Removal Procedure
- Turn the ignition OFF.
- Raise and support the vehicle. Refer to Lifting and Jacking the Vehicle in General Information.
- Remove the catalytic converter. Refer to Catalytic Converter Replacement in Engine Exhaust.
- Disconnect the intermediate steering shaft from the steering gear. Refer to Intermediate Steering Shaft Replacement in Steering Wheel and Column.
- Position a utility stand beneath the rear center section of the frame in order to support the powertrain.
- Remove the frame rear bolts.
- Carefully lower the powertrain in order to provide access.
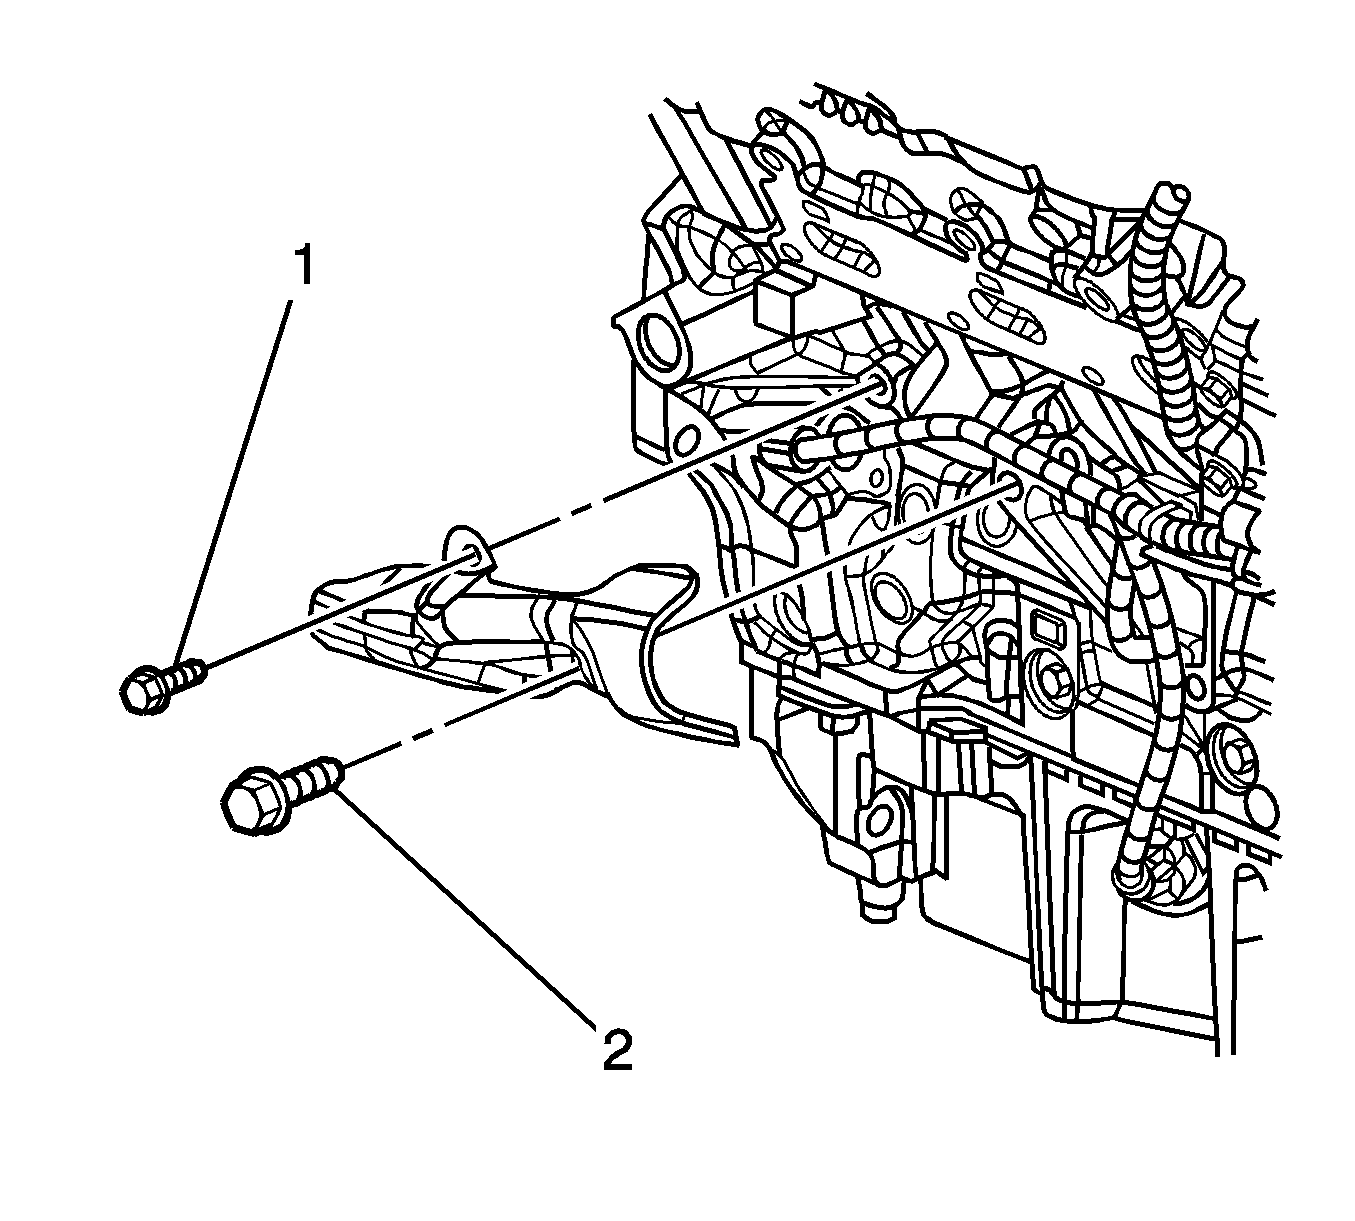
- Remove the crank sensor heat shield bolts (1, 2) and the heat shield.
- Remove the crankshaft position (CKP) sensor bolt.
- Use a long flat-bladed tool in order to carefully remove the CKP sensor and harness.
- Disconnect the wiring harness from the CKP sensor.
Important: The catalytic converter does not have to be removed from the vehicle, relocate to the side.
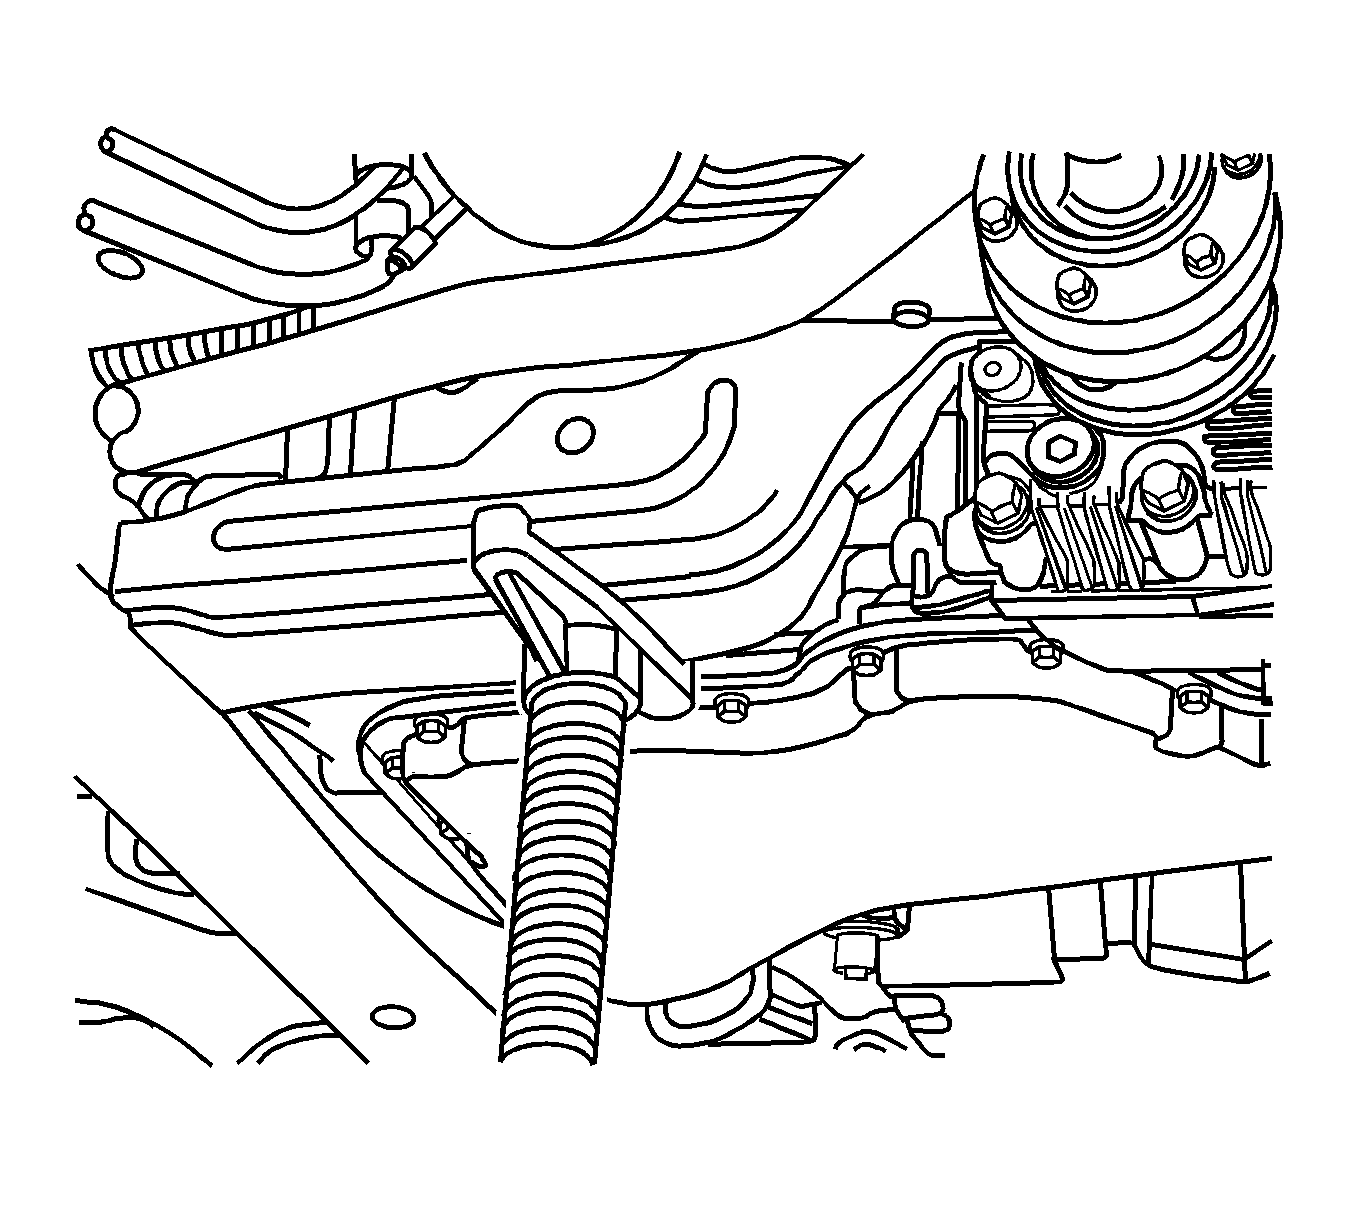
Important: Do not lower the powertrain more than 100 mm (4 in).
Important: Use a universal or swivel socket with a long extension in order to remove the bolts.
Important: Use a universal or swivel socket with a long extension in order to remove the bolt.
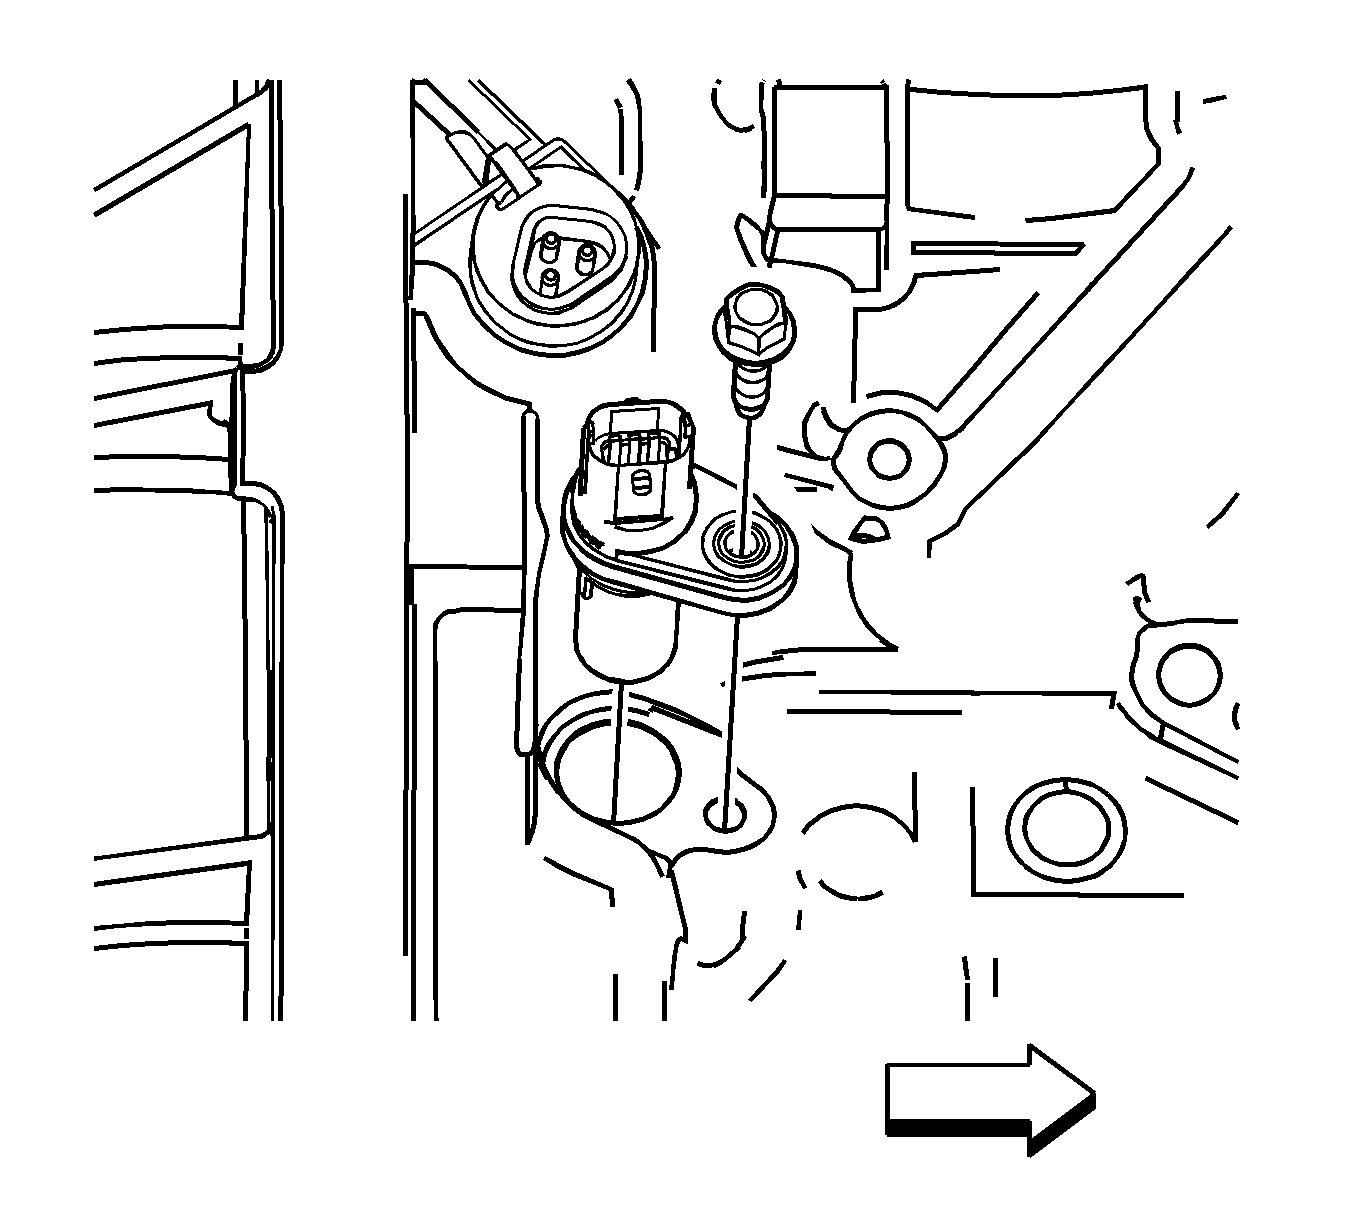
Important: It may be necessary to use a long flat-bladed tool in order to carefully remove the CKP sensor.
Installation Procedure
- Connect the CKP sensor wiring harness.
- Use a long flexible pick-up tool in order to position the CKP sensor to the engine block.
- Install the CKP sensor bolt.
- Install the crank sensor heat shield and the heat shield bolts.
- Raise the powertrain until the frame contacts the chassis.
- Install the frame rear bolts. Refer to Front Frame Replacement in Frame and Underbody.
- Connect the intermediate steering shaft to the steering gear. Refer to Intermediate Steering Shaft Replacement in Steering Wheel and Column.
- Install the catalytic converter. Refer to Catalytic Converter Replacement in Engine Exhaust.
- Lower the vehicle.
Notice: Refer to Fastener Notice in the Preface section.
Important: Use a universal or swivel socket with a long extension in order to install the bolt.
Tighten
Tighten the CKP sensor bolt to 10 N·m
(89 lb in).
Important: Use a universal or swivel socket with a long extension in order to install the bolts.
Tighten
| • | Tighten the upper crank sensor heat shield bolt (1) to 10 N·m (89 lb in). |
| • | Tighten the lower crank sensor heat shield bolt (2) to 50 N·m (37 lb in). |
