For 1990-2009 cars only
Removal Procedure
Important:: Sunshades can be equipped with an illuminated vanity mirror. The illuminated vanity mirror is not serviced as a separate unit.
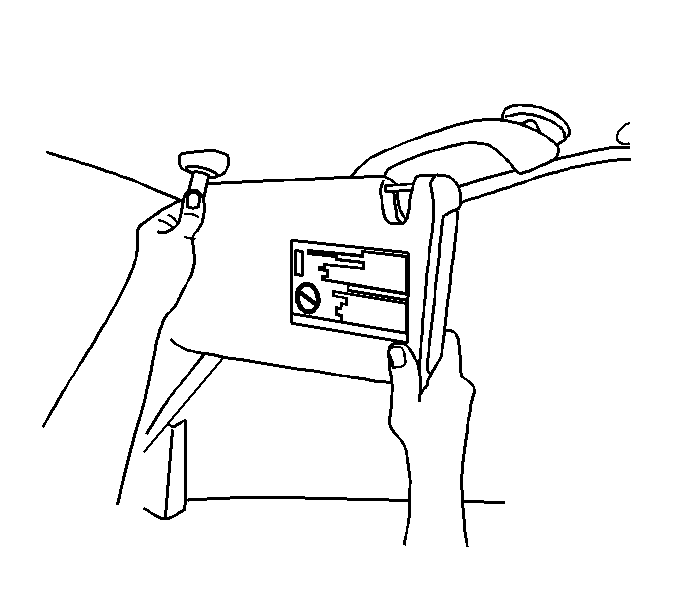
- Rotate the sunshade so that the bottom edge is pointing straight down.
- Remove the sunshade from the anchor.
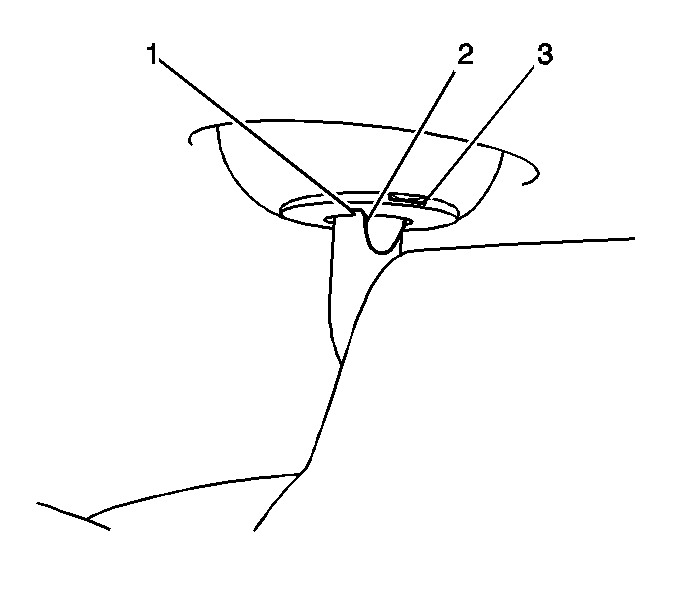
- Move the sunshade rearward, about 50 mm (2 inches) until the ridge on the sunshade stem (2) is flush to the slot in the flange (1).
- Pull down on the free end of the sunshade until a rectangular slot (3) appears between the flange and the retainer bezel. Maintain this pressure for the next two steps.
- Insert a flat-bladed tool in the flange slot. Hold this tool in a vertical position and maintain an upward pressure on the tool equal to the downward pressure on the sunshade.
- Quickly rotate the sunshade rearward approximately 100 mm (4 in). At this position you will feel a first disengagement.
- Maintain the upward pressure on the flat-bladed tool and now press upward on the free end of the sunshade. Then continue to rotate the sunshade towards the side door glass.
- Remove the flat-bladed tool and pull down on the front of the sunshade arm to separate it from the bezel.
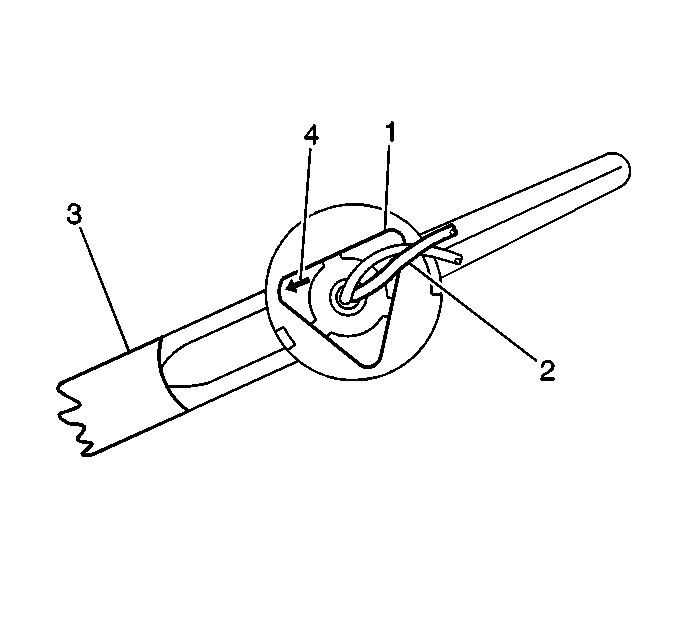
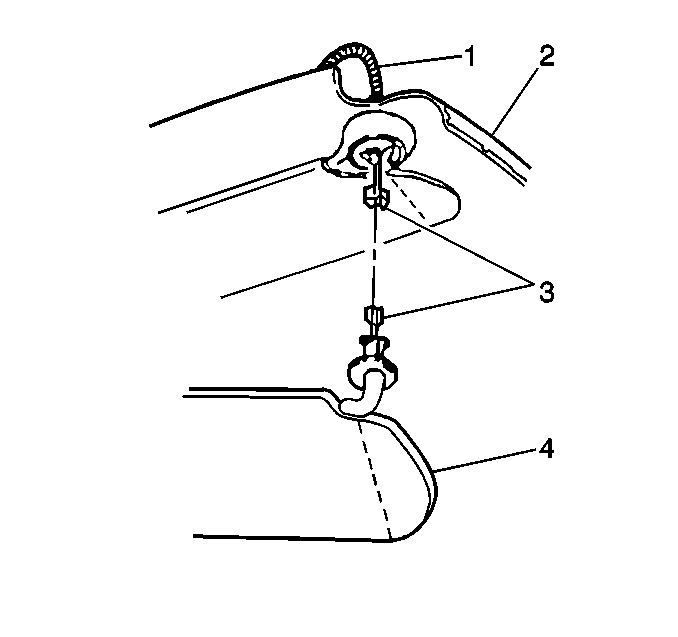
- Disconnect the electrical connector (3), if equipped.
- Remove the sunshade from the vehicle.
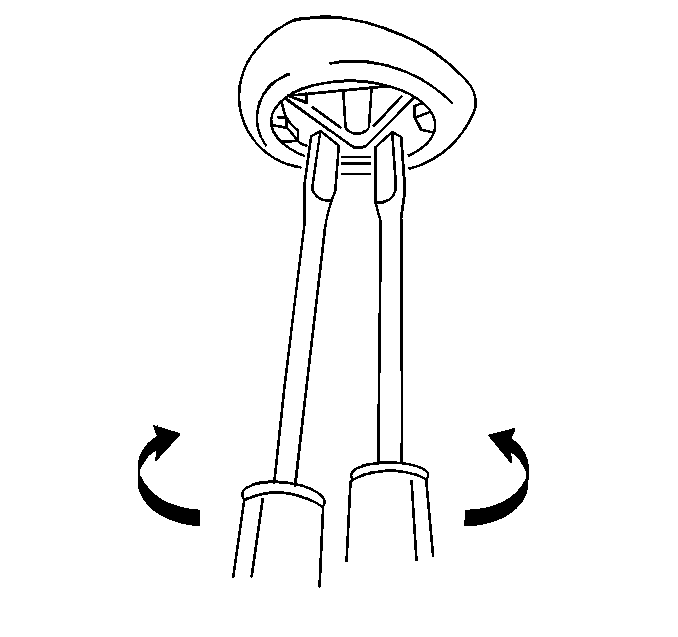
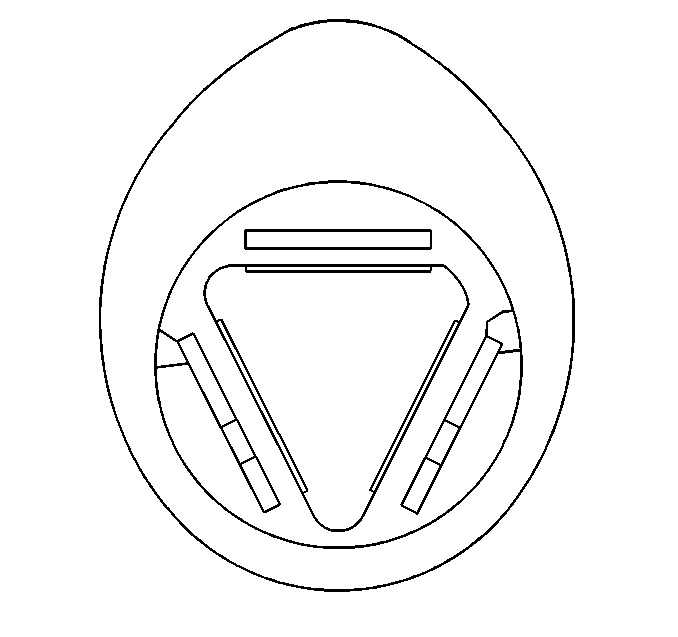
- Insert 2 thin, flat-bladed tools into two sunshade retainer bezel slots and press inward to release the locking tabs. Pull down to remove the bezel.
- Remove the sunshade retainer bezel from the headliner.
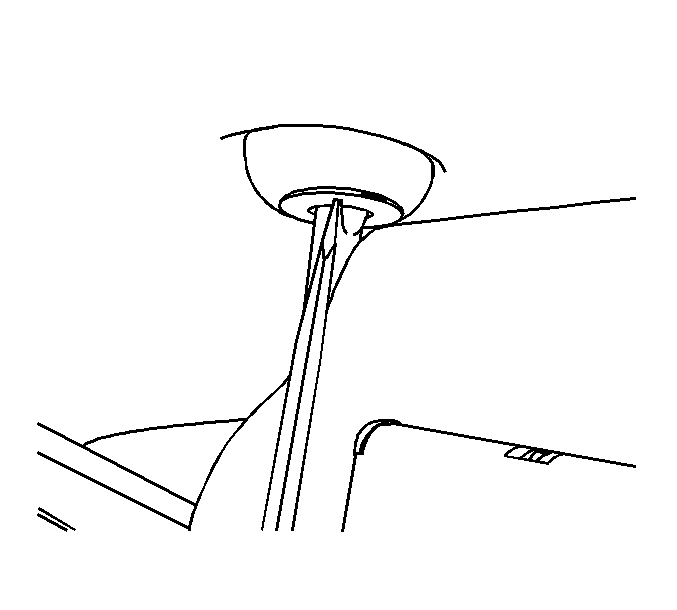
Important: The flat-bladed tool used to remove the sunshade must completely fill the slot on the sunshade flange. If there is any free play, the plastic flange will be distorted and the sunshade will not be released.
Installation Procedure
- Align the sunshade retainer bezel to the headliner and apply pressure until fully seated.
- Position the sunshade in the vehicle.
- Connect the electrical connector (3), if equipped.
- Align the sunshade arm so that the triangular base with the arrow (4) is parallel to the sunshade (3).
- Position the sunshade so it is parallel to the door.
- Press up until the flange is seated in the retainer bezel. Maintain this pressure.
- Quickly rotate the sunshade toward the windshield until it is past the sunshade anchor. A slight click will be heard once the retainer shaft seats into the bezel.
- Return the sunshade to its stored position.


