Diagnostic Information on LL8 Engine Oil Leak from Rear of Crankshaft Due to Porosity (Follow Special Crankshaft Porosity Service Repair Procedure)

| Subject: | Diagnostic Information on LL8 Engine Oil Leak from Rear of Crankshaft Due to Porosity (Follow Special Crankshaft Porosity Service Repair Procedure) |
| Models: | 2005-2007 Buick Rainier |
| 2005-2007 Chevrolet TrailBlazer Models |
| 2005-2007 GMC Envoy Models |
| 2005-2007 Saab 9-7X |
| with 4.2L Inline 6 Cylinder Engine (VIN S -- RPO LL8) |
This bulletin is being revised to add the 2006 and 2007 model years. Please discard Corporate Bulletin Number 05-06-01-022A (Section 06 -- Engine/Propulsion System).
Special Crankshaft Porosity Service Repair Procedure
This bulletin is being published to aid technicians in the diagnosis and repair of oil leak from the rear of the engine. Some engines may have slight crankshaft casting porosity that results in a leak in the crankshaft flange bore. This leak may be misdiagnosed as a rear main oil seal leak.
Important: Do not assume that an oil leak at the rear of the engine is from a leak at the rear of the crankshaft.
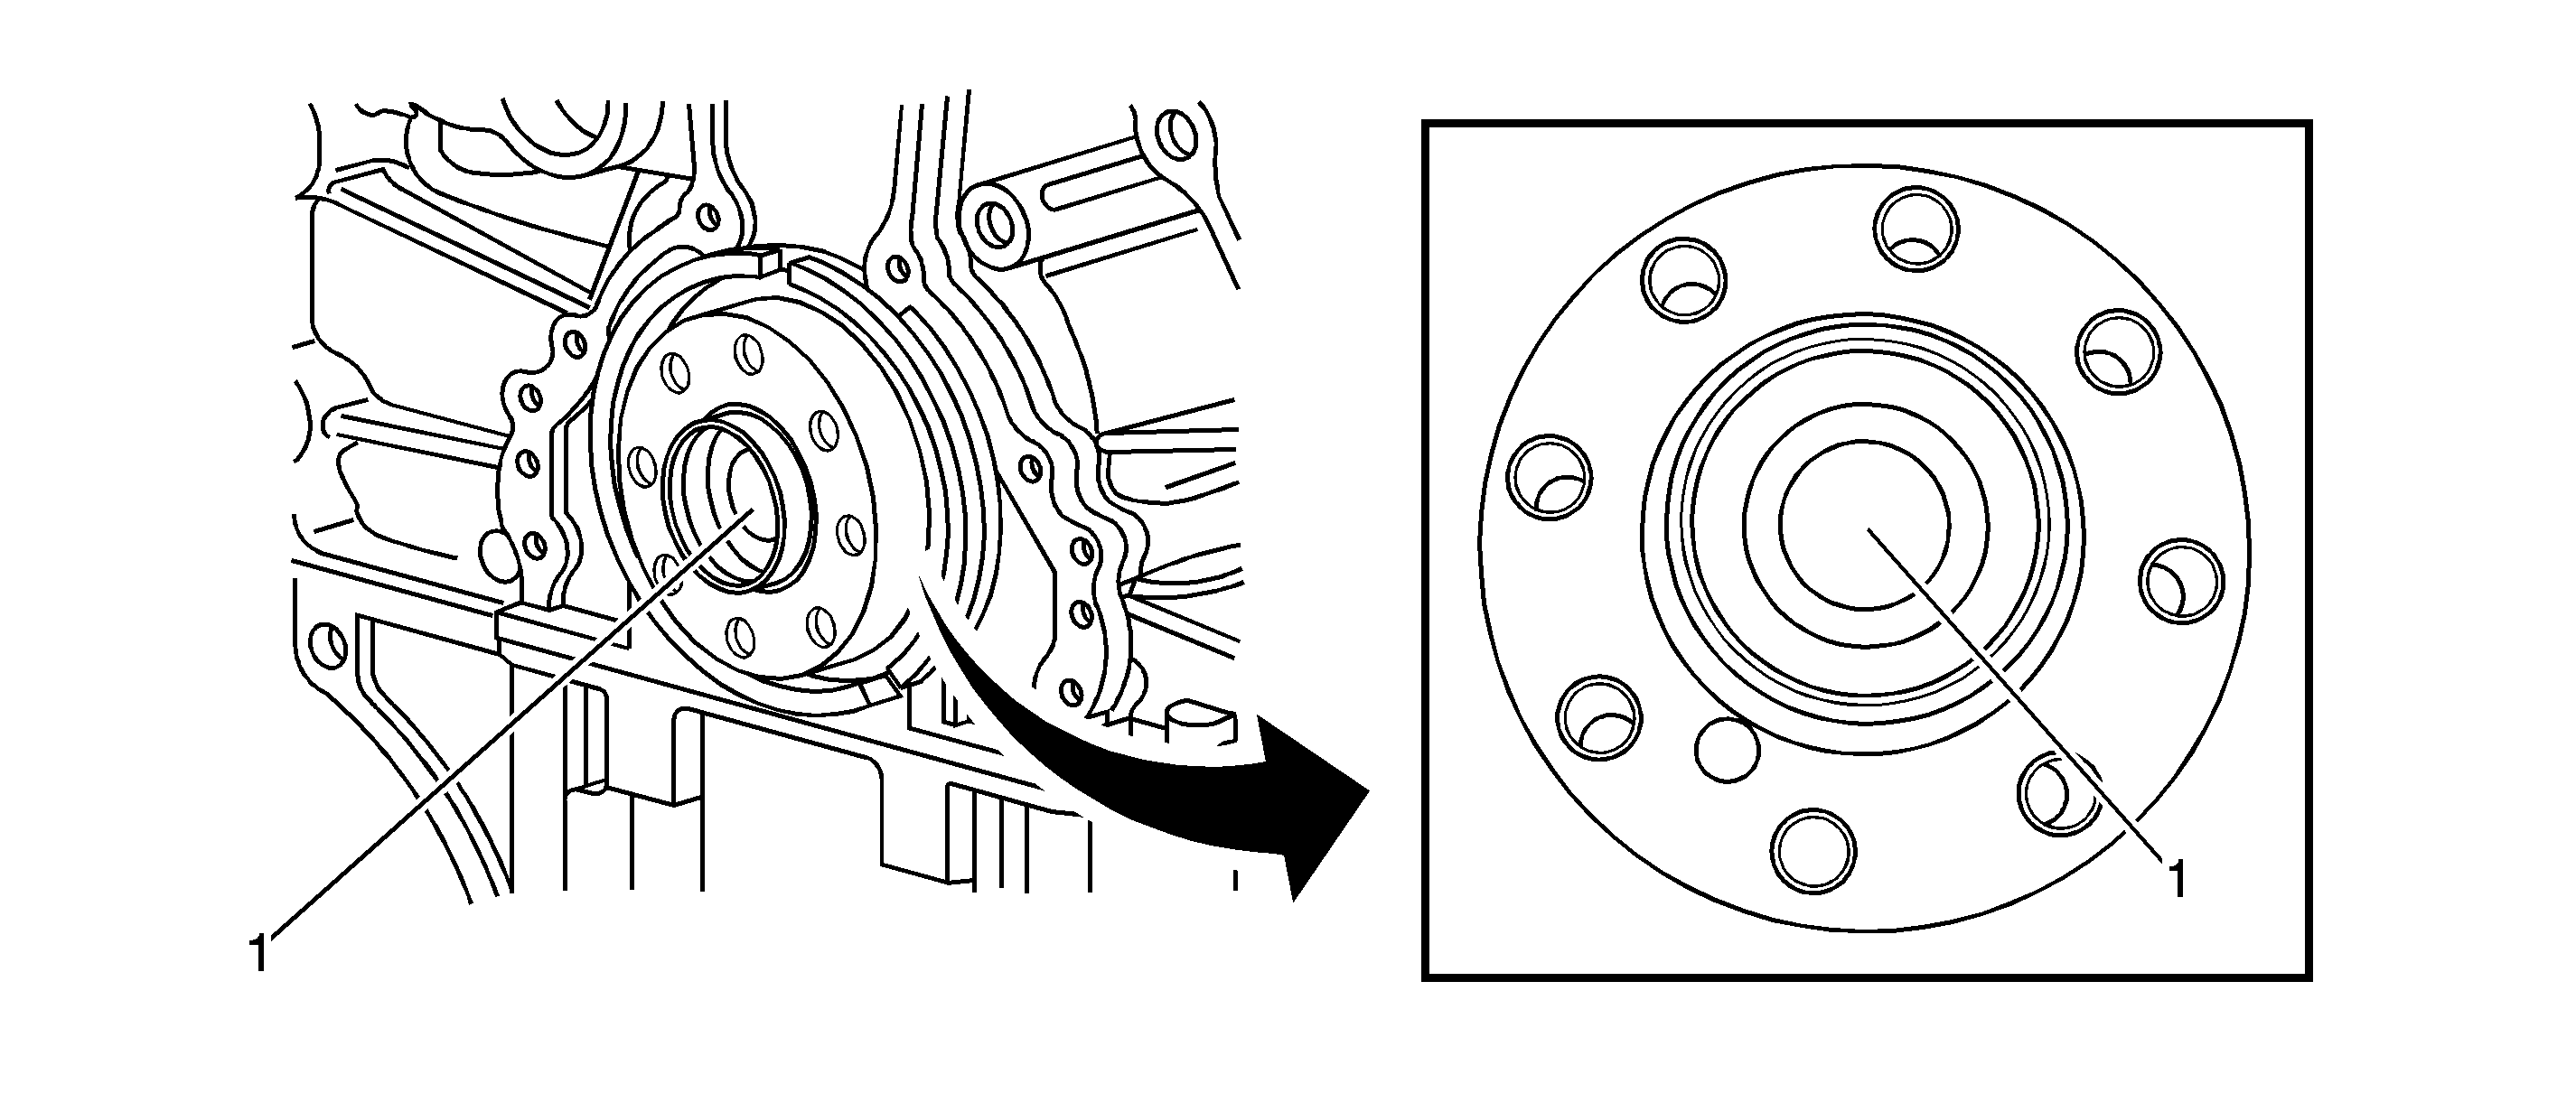
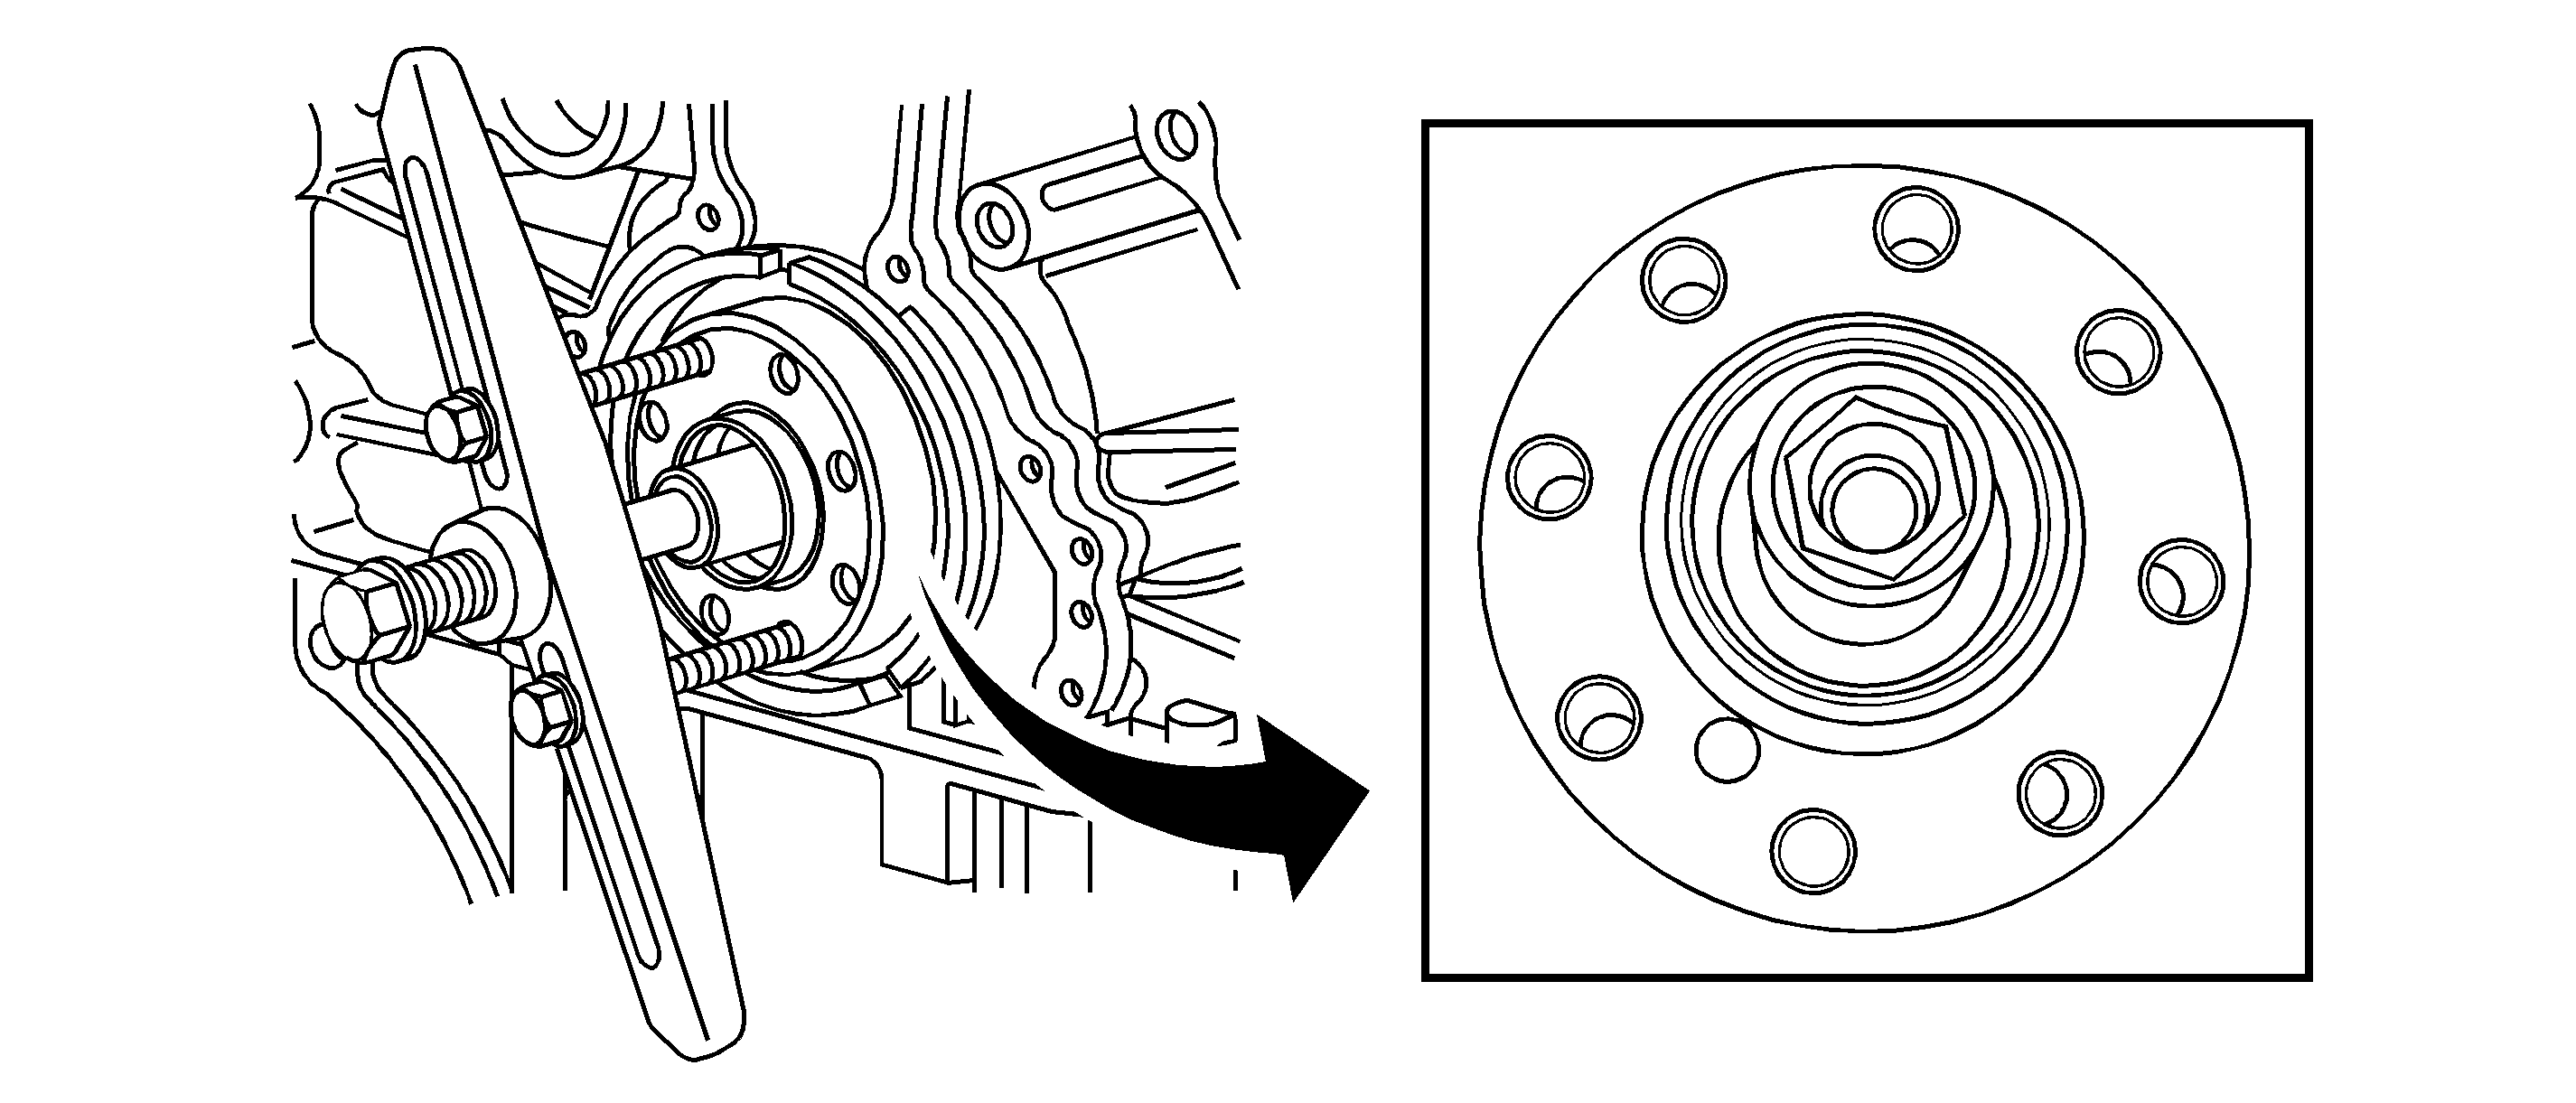
Refer to above illustration for the area of the oil leak (1). Verify the leak by looking in the end of the crankshaft. If oil is present in the bore (where the torque converter nose engages the crankshaft), the special service procedure needs to be performed. If the bore is dry, or oil appears to be from the seal area, perform normal oil leak analysis. Refer to Oil Leak Diagnosis in SI.
A service cup plug was recently developed to repair this leak and is available through the Warranty Parts Center (WPC). Refer to the information in this bulletin to order a service cup plug.
Important: If the following tools are not available at your dealership, use an aftermarket equivalent.
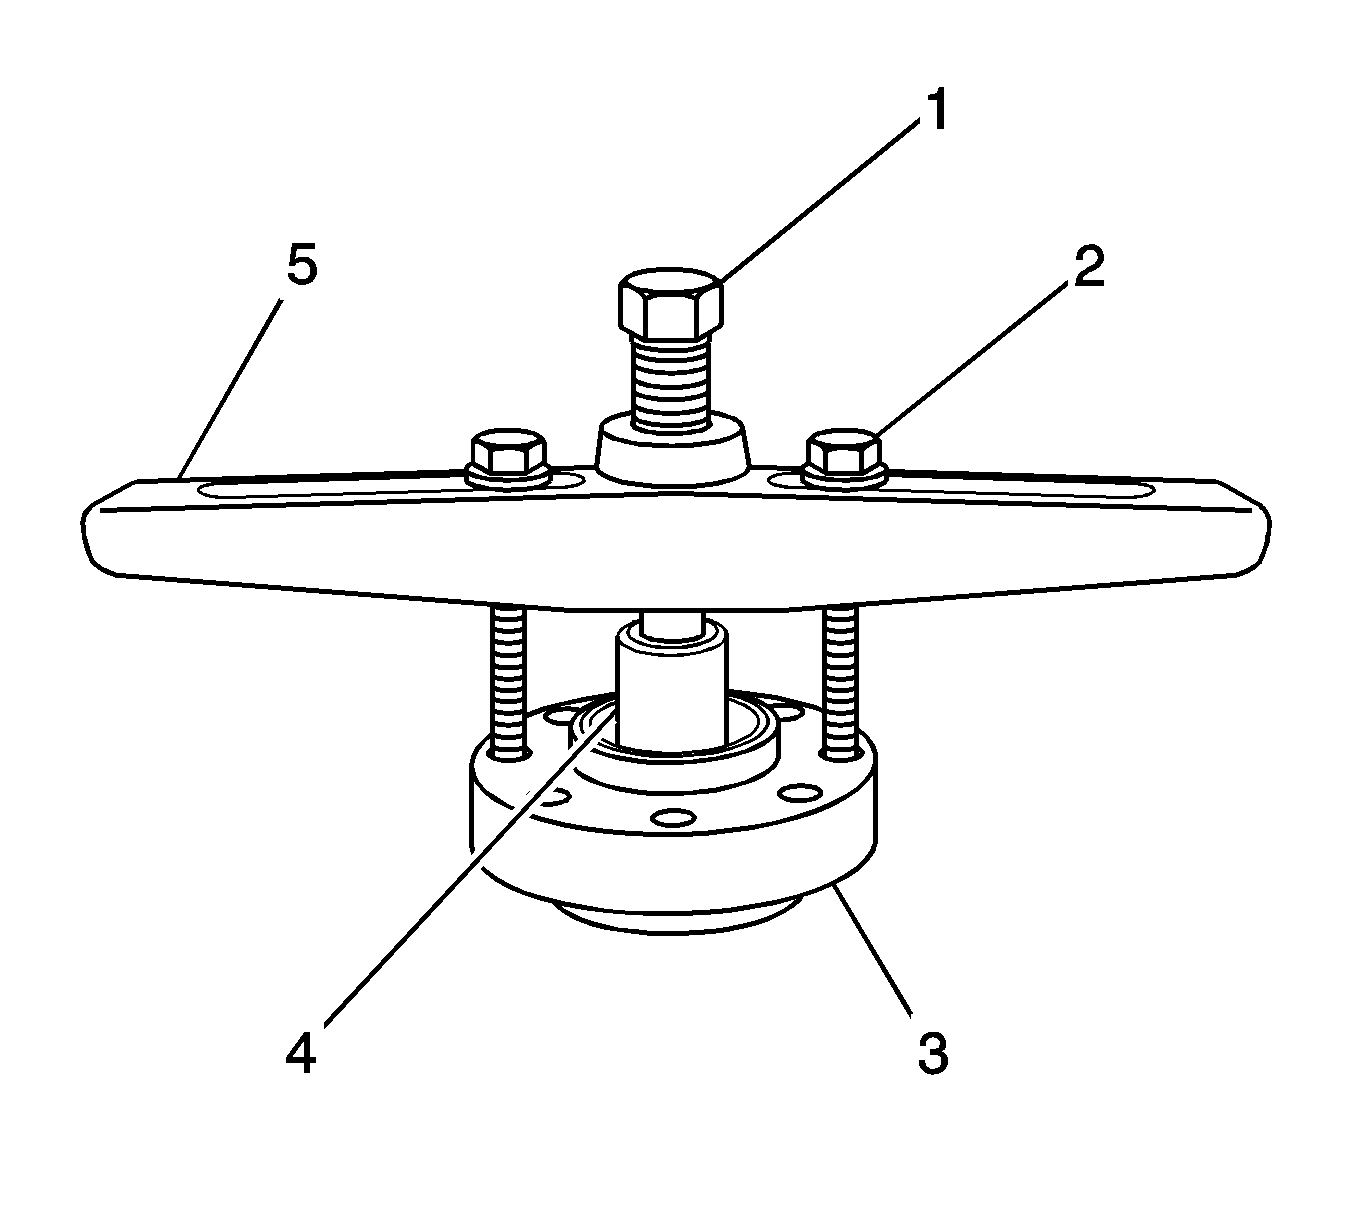
Special Installation Tool Assembly Needed:
- J 8433-3 Forcing Screw or Equivalent
- J 45949 Bolts (Only the two bolts of this kit will be needed) or Equivalent
- For Display Purposes Only (End Section of the Crankshaft)
- 18 MM. or 19 MM. Impact Style Socket (Thick Wall) with a 1/2" drive base that is approximately 15MM. deep with an overall height of 38 MM. (1 1/2").
- J 8433-1 Puller Bar or Equivalent
- Verify the oil leak. Refer to the above illustration (1), showing the leak path through the end of the crankshaft flange bore area.
- Order a crankshaft service cup plug part number WPC-340 by completing the WPC PART REQUEST FORM at the end of this bulletin and send it to the WPC via fax or E-mail. Typically, the cup plug should arrive within 2 business days.
- Clean the crankshaft flange bore area with BrakeKleen (12378392, 12346139 (in Canada, 88901247) or equivalent. Thoroughly dry the area and examine the bore surface for irregularities. If the bore surface needs additional cleaning, use sand paper, or equivalent, and clean as necessary.
- Once the crankshaft bore surface is clean and smooth, apply a thin bead of LOCTITE™ 620, P/N 89021297 or Permatex 27010 High Strength Red Thread Locker Gel, P/N 88861429 (in Canada, 88861430), completely around the inside of the crankshaft flange bore.
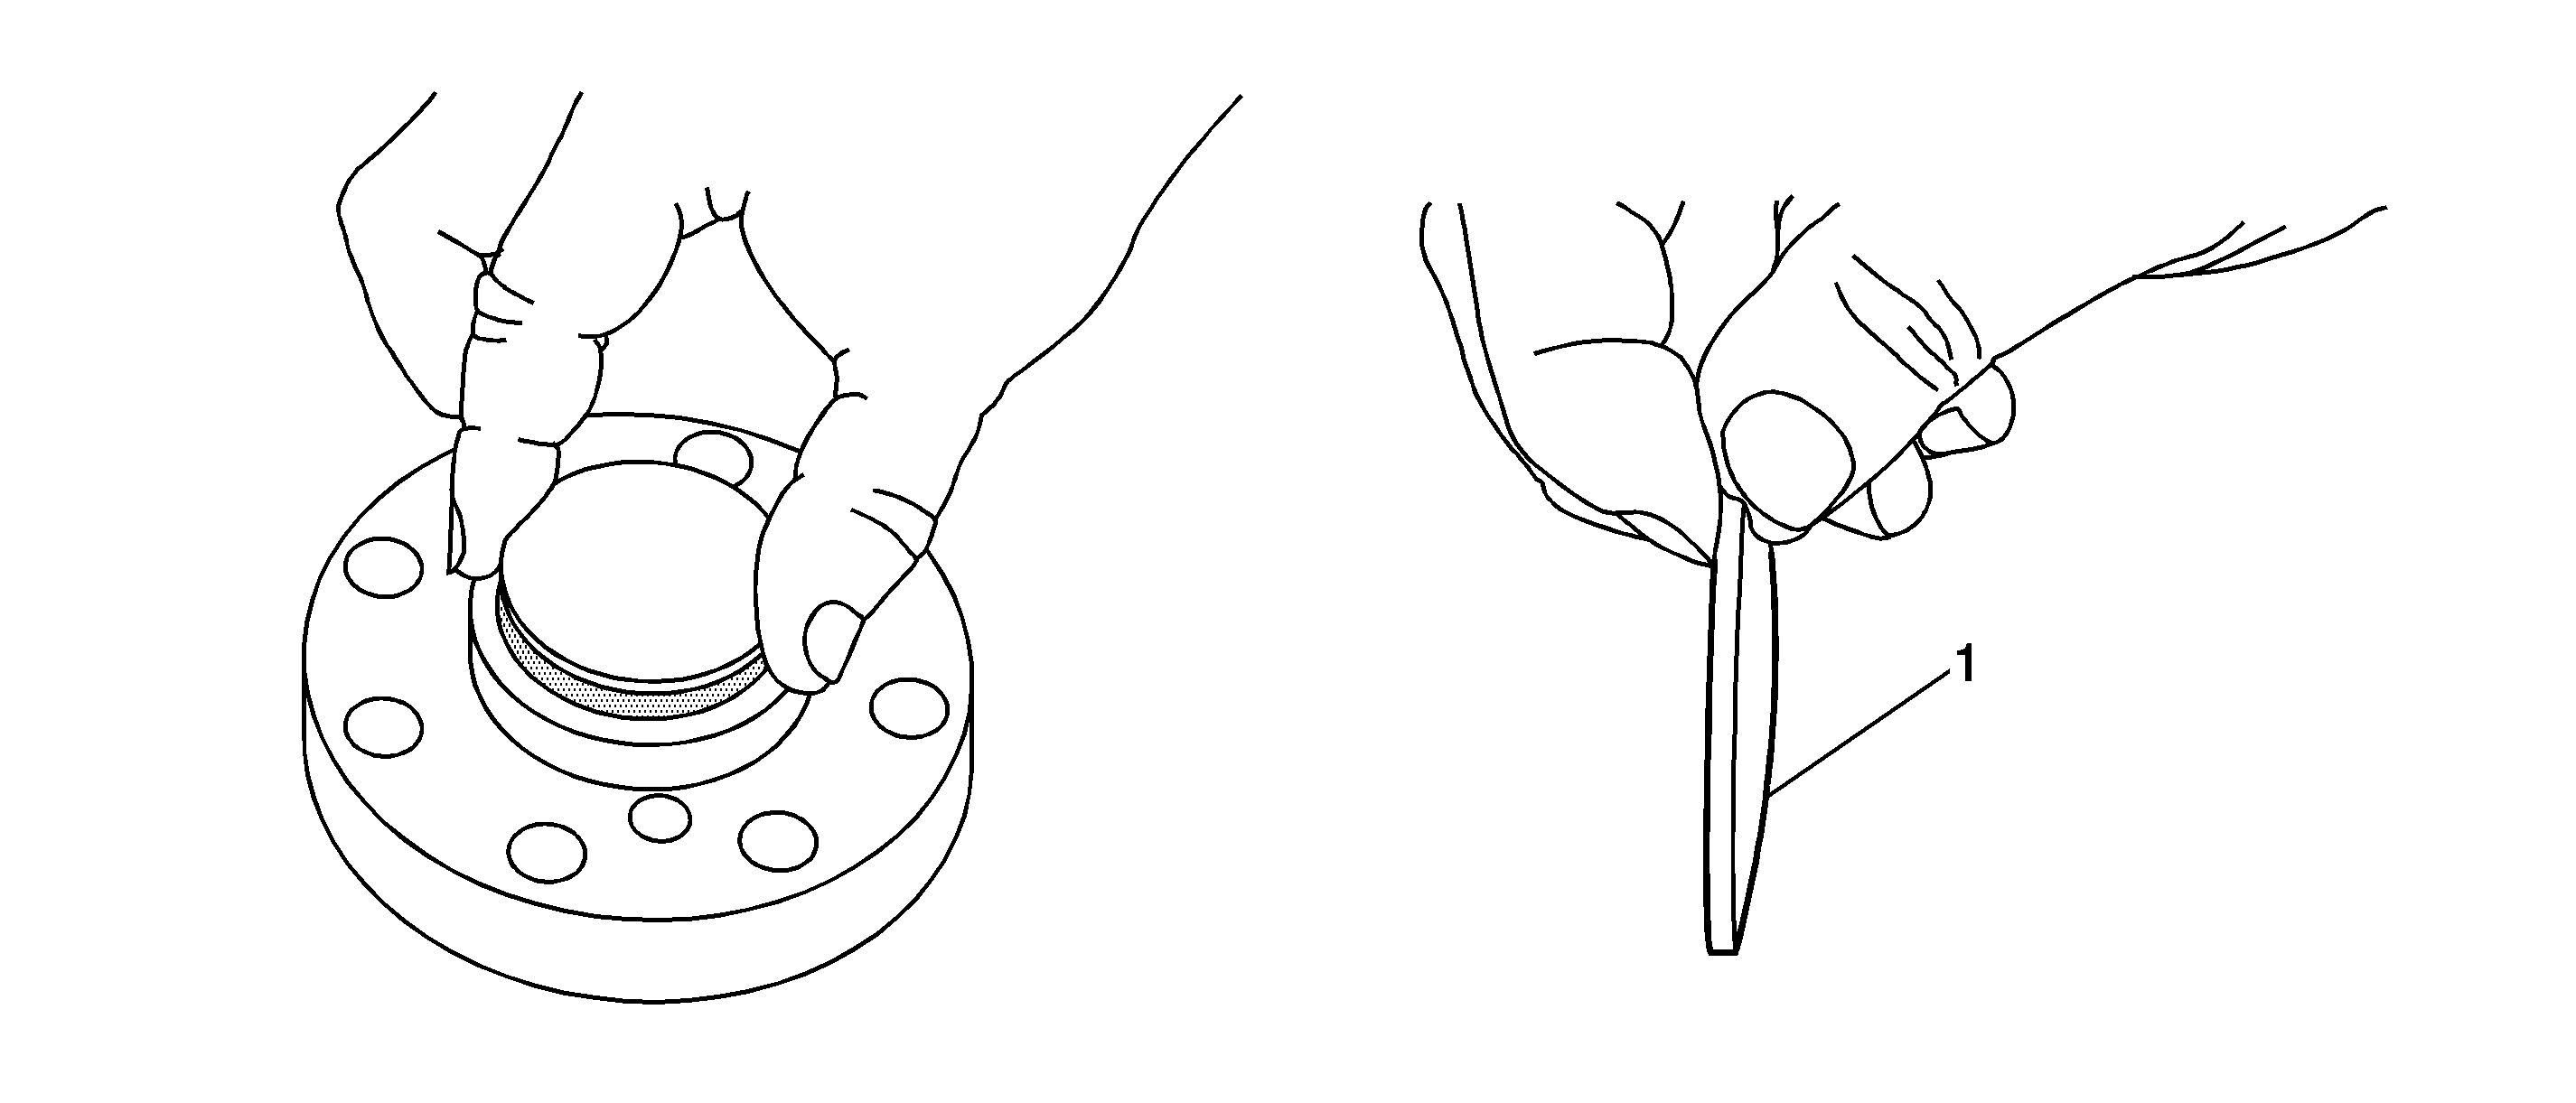
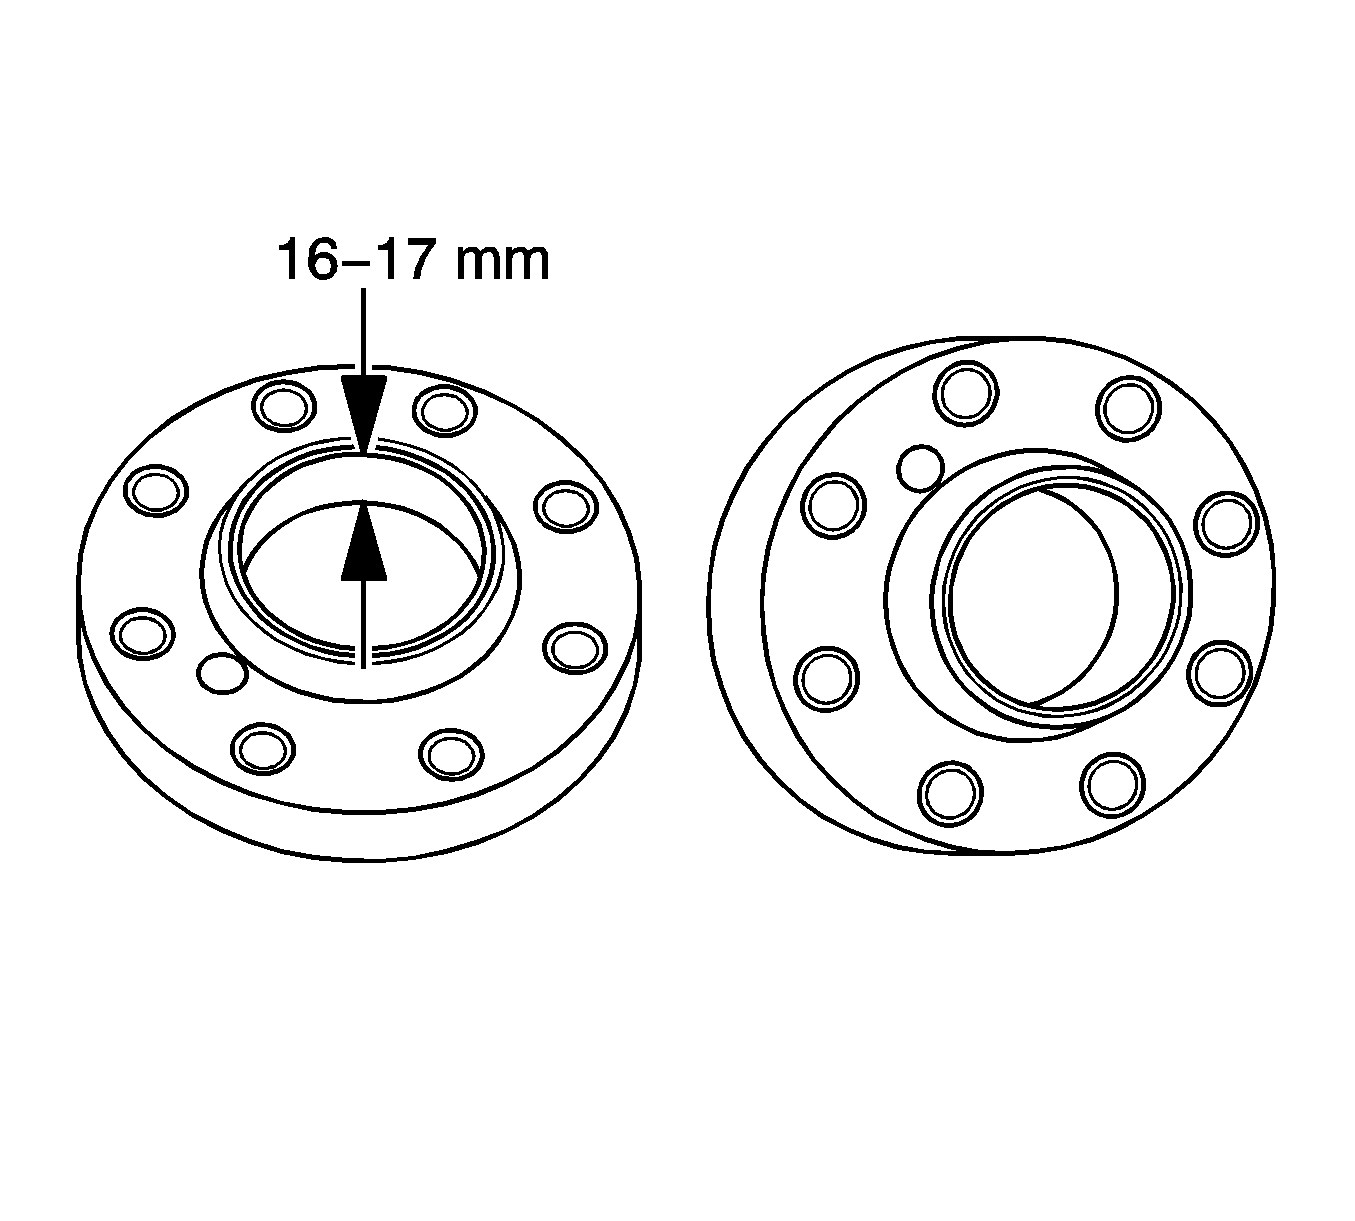
- Position the crankshaft service cup plug into the crankshaft flange bore with service cup plug, dish side out . Refer to the above graphic illustration (1) (dish side out) for the installation of the service cup plug.
- Refer to above illustration (1), showing the 15 MM. step inside the 18 MM. 1/2" drive impact style socket.
- Refer to the above illustration (1), showing the 38 MM (1½" ) overall height of an 18 MM or 19 MM 1/2" drive impact style socket.
- Assemble the arbor, forcing screw, attaching bolts and socket. Refer to the illustration titled, Special Installation Tool Assembly Needed. Install the tool press assembly to the end of the crankshaft flange and position the socket and service cup plug into the bore of the crankshaft flange. Refer to the above illustration for proper tool set up before pressing the cup plug into the end of the crankshaft.
- Hand tighten the forcing screw into the socket, making sure that it is centered on the service cup plug.
- Mark the forcing screw and arbor for reference, then tighten the forcing screw two complete turns and an additional 90 degrees or 1/4 turn more.
- When completed, remove the installation tool assembly and confirm the installation depth of the service cup plug. Place a straight edge across the center of the crankshaft flange as the measurement point. Measure from the straight edge to the center of the installed cup plug. The depth of the installed cup plug should be 16-17 mm (0.63-0.67 in). Refer to the above illustration to confirm the installed depth.
| • | Fax Number - 248-371-0192 |
| • | E-mail Address -- warrantypartscenterusa@gm.com. |
Notice: Do Not use the impact socket with hammer to drive the service cup plug into place. Damage to the crankshaft thrust bearing may occur.
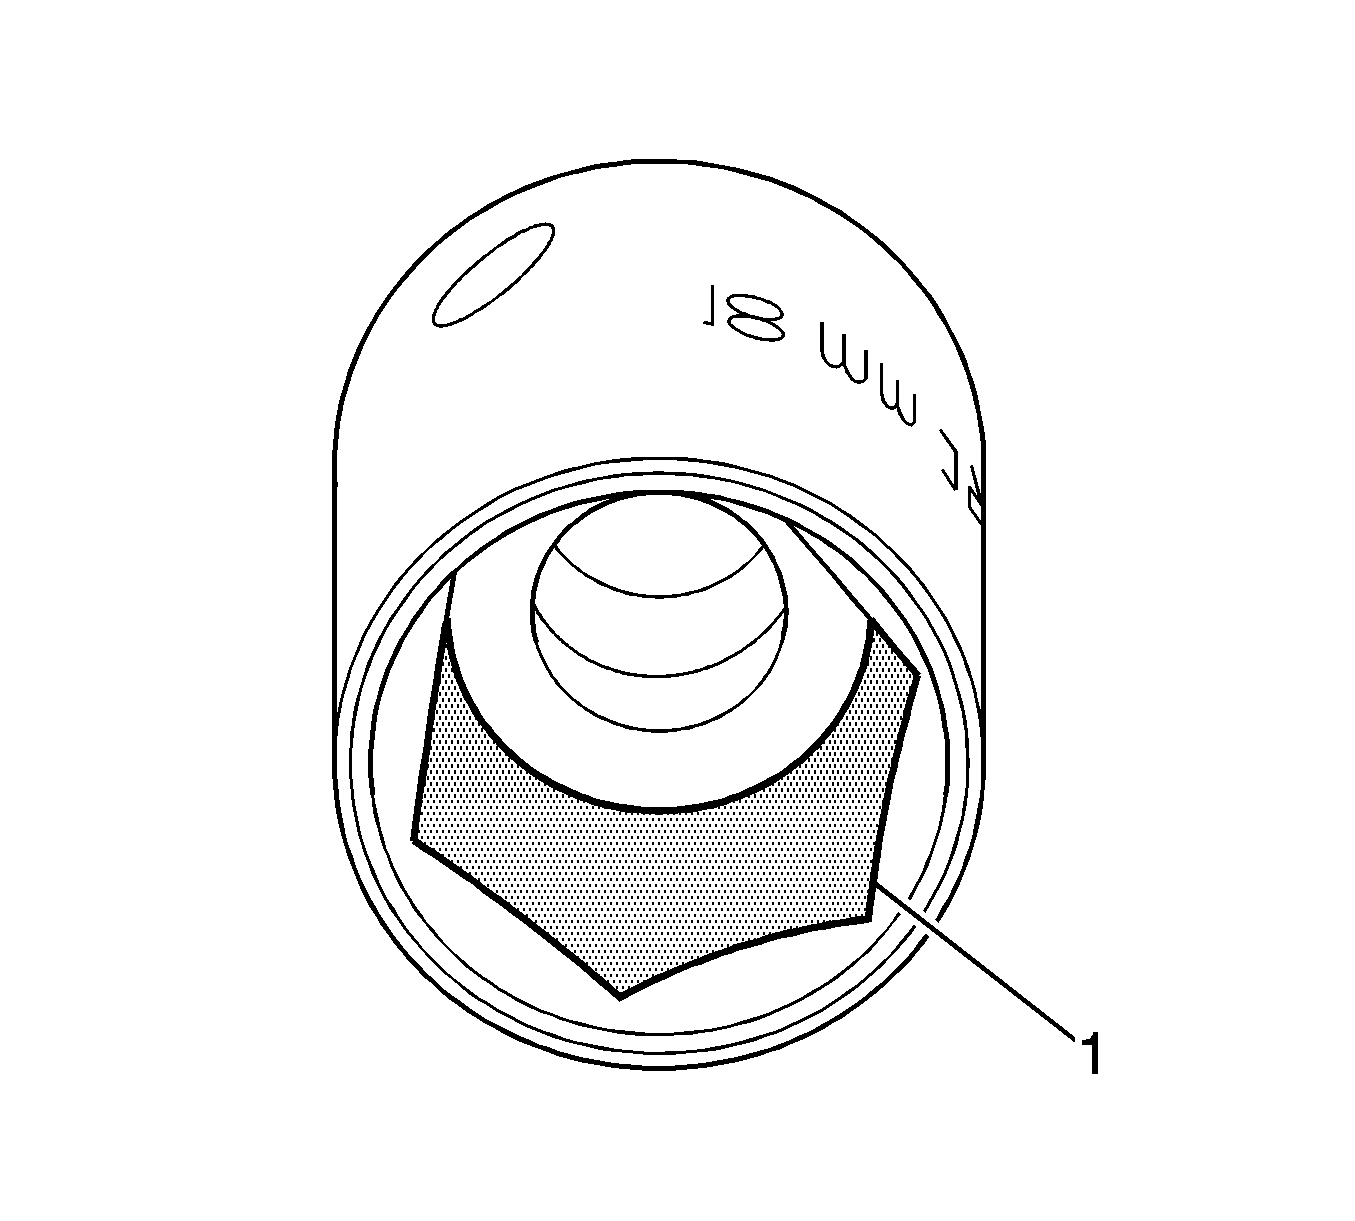
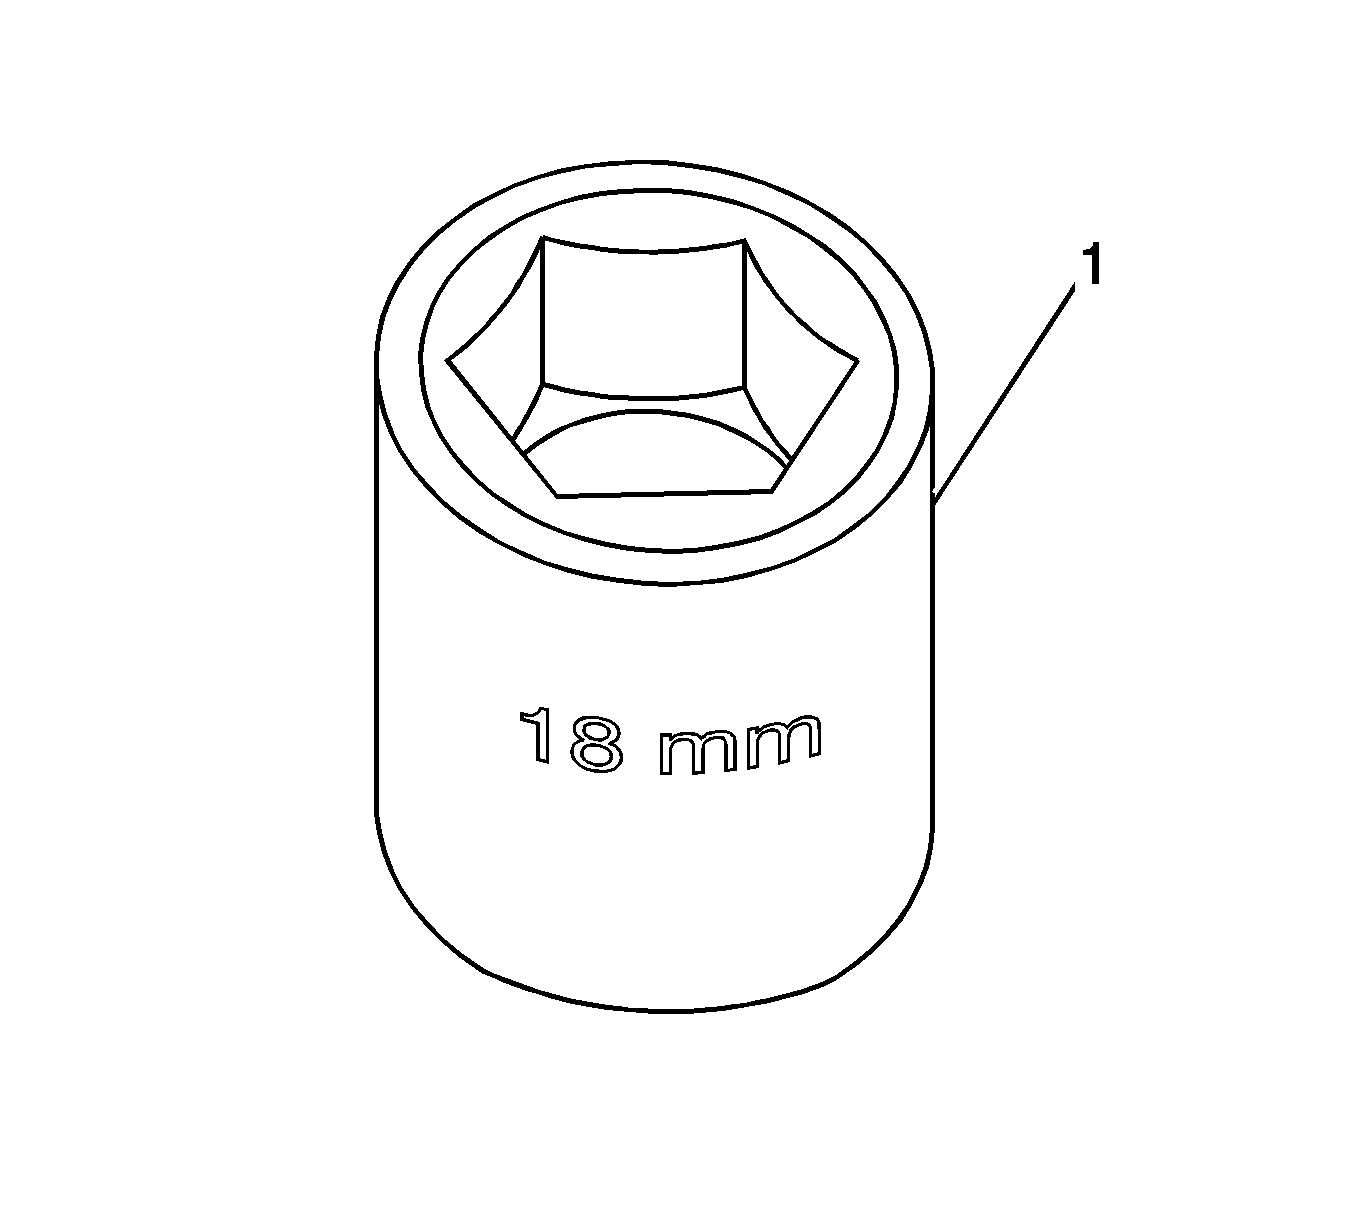
Important: It is best to use a thicker wall socket to equalize installation force with the following approximate dimensions.
The forcing screw will fit inside an 18 MM or 19 MM end of the impact style socket with the 1/2" drive side of the socket facing the service cup plug. The forcing screw should bottom on the 15 MM step inside the socket. Refer to the above illustrations on 1/2" drive impact style socket dimensions.
Parts Information
Part Number | Description |
|---|---|
WPC-340 | Service Cup Plug, Crankshaft Flange Bore* |
* This part must be ordered through the WPC. Refer to the request form at the end of this bulletin. | |
Warranty Information (excluding Saab U.S. Models)
For vehicles repaired under warranty, use:
Labor Operation | Description | Labor Time |
|---|---|---|
J7512* | Service Cup Plug, Crankshaft Flange Bore Installation | S Truck 5.1 hrs T Truck 6.2 hrs |
*This labor operation number is for bulletin use only. This number will not be published in the Labor Time Guide. | ||
Warranty Information (Saab U.S. Models)
For vehicles repaired under warranty, use:
Labor Operation | Description | Failed Object | Fault/Reason Code | Location Code | Warranty Type | Repair/Action Code | Labor Time |
|---|---|---|---|---|---|---|---|
2161118 | Service Cup Plug, Crankshaft Flange Bore Installation | 21611 | 55 | 0 | 01 | 05 | 6.2 hrs T Truck |
Warranty Parts Center (WPC) Request Form
IMPORTANT NOTE WHEN PRINTING THIS FORM: If the form prints out on two pages, make certain you fax BOTH pages so that the WPC receives all the needed information. Missing information will delay or prevent the part from being shipped.
Parts Request Form - Warranty Parts Center |
|---|
To: Warranty Parts Center
e-mail: warrantypartscenterUSA@gm.com
or WPC Fax: 248-371-0192
Attn: Jeannette Dunn
Part Being Requested: WPC -340
Dealer BAC (U.S.) / Dealer Code (Canada):
Dealer Name:
Dealer Address:
Dealer Contact Person:
Dealer Phone Number:
Repair Order Number:
Vehicle VIN:
Important: If you do not receive the part within 2 business days after e-mailing or faxing your part request to the Warranty Parts Center, please call Customer Assistance at 248-371-9901/9902. IMPORTANT NOTE WHEN PRINTING THIS FORM: If the form prints out on two pages, make certain you fax BOTH pages so that the WPC receives all the needed information. Missing information will delay or prevent the part from being shipped. |
