For 1990-2009 cars only
Removal Procedure
- Remove the transmission. Refer to Transmission Replacement .
- Remove the engine flywheel bolts.
- Remove the engine flywheel.
- Clean and inspect the engine flywheel. Refer to Engine Flywheel Cleaning and Inspection .
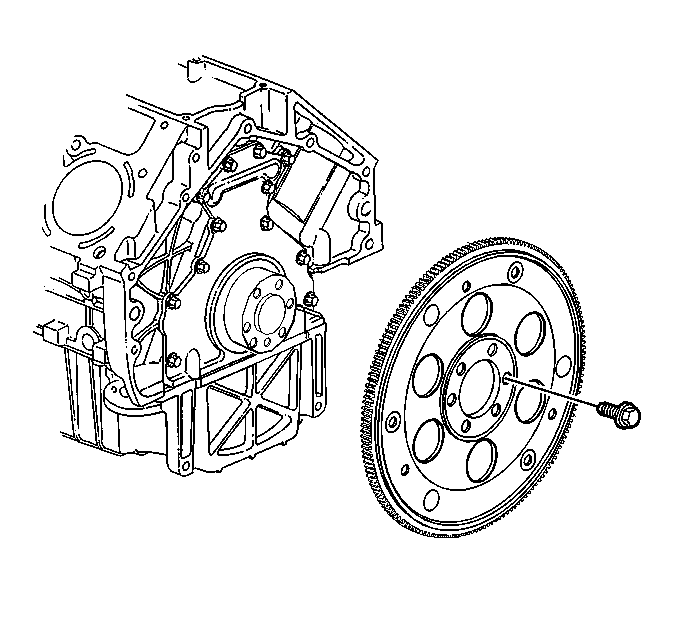
Important: Note the position and direction of the engine flywheel before removal.
Installation Procedure
- Install the engine flywheel to the crankshaft.
- Apply threadlock to the threads of the flywheel bolts. Refer to Adhesives, Fluids, Lubricants, and Sealers for the correct part number.
- Install the engine flywheel bolts.
- Tighten the bolts a first pass in sequence to 20 N·m (15 lb ft).
- Tighten the bolts a second pass in sequence to 50 N·m (37 lb ft).
- Tighten the bolts a final pass in sequence to 100 N·m (74 lb ft).
- Install the transmission. Refer to Transmission Replacement .
Important: The flywheel does not use a locating pin for alignment and will not initially seat against the crankshaft flange, but will be pulled onto the crankshaft by the engine flywheel bolts. This procedure requires a three stage tightening process.
Notice: Refer to Fastener Notice in the Preface section.
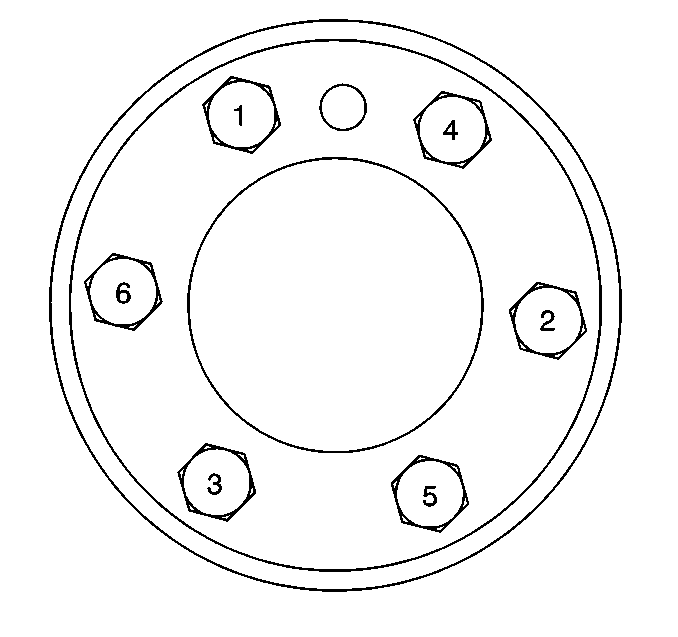
Tighten
