Removal Procedure
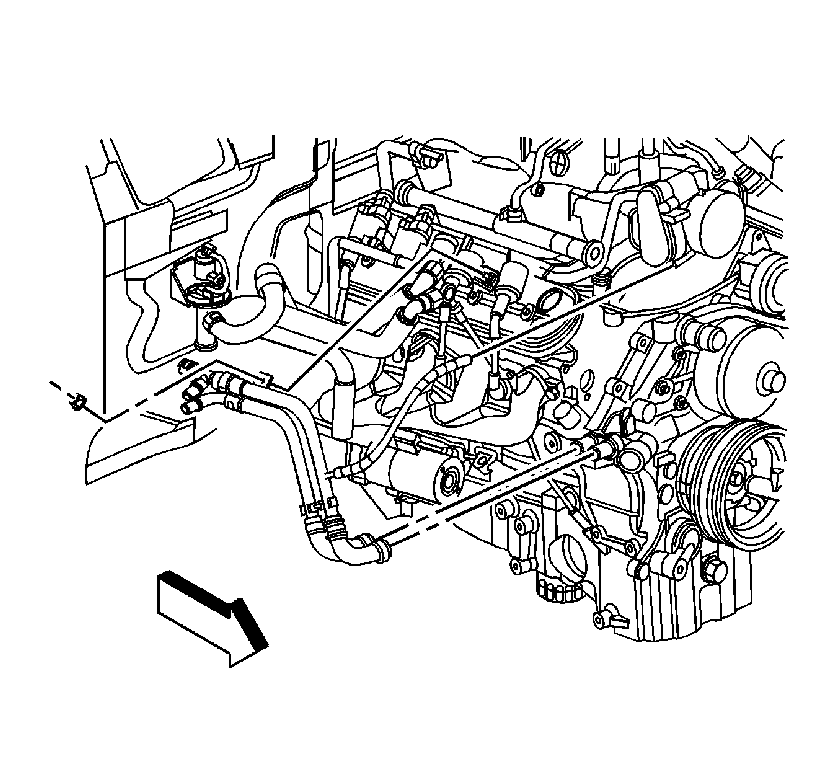
- Partially drain the cooling system in order to allow the hose at the throttle body to be removed. Refer to Cooling System Draining and Filling .
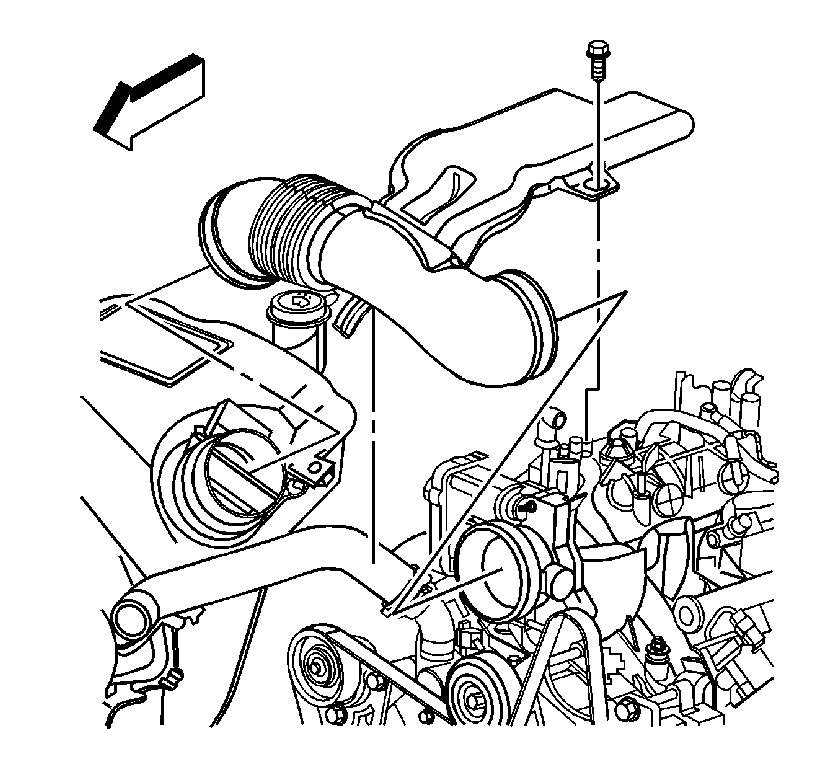
- Remove the air cleaner outlet duct. Refer to Air Cleaner Resonator Outlet Duct Replacement .
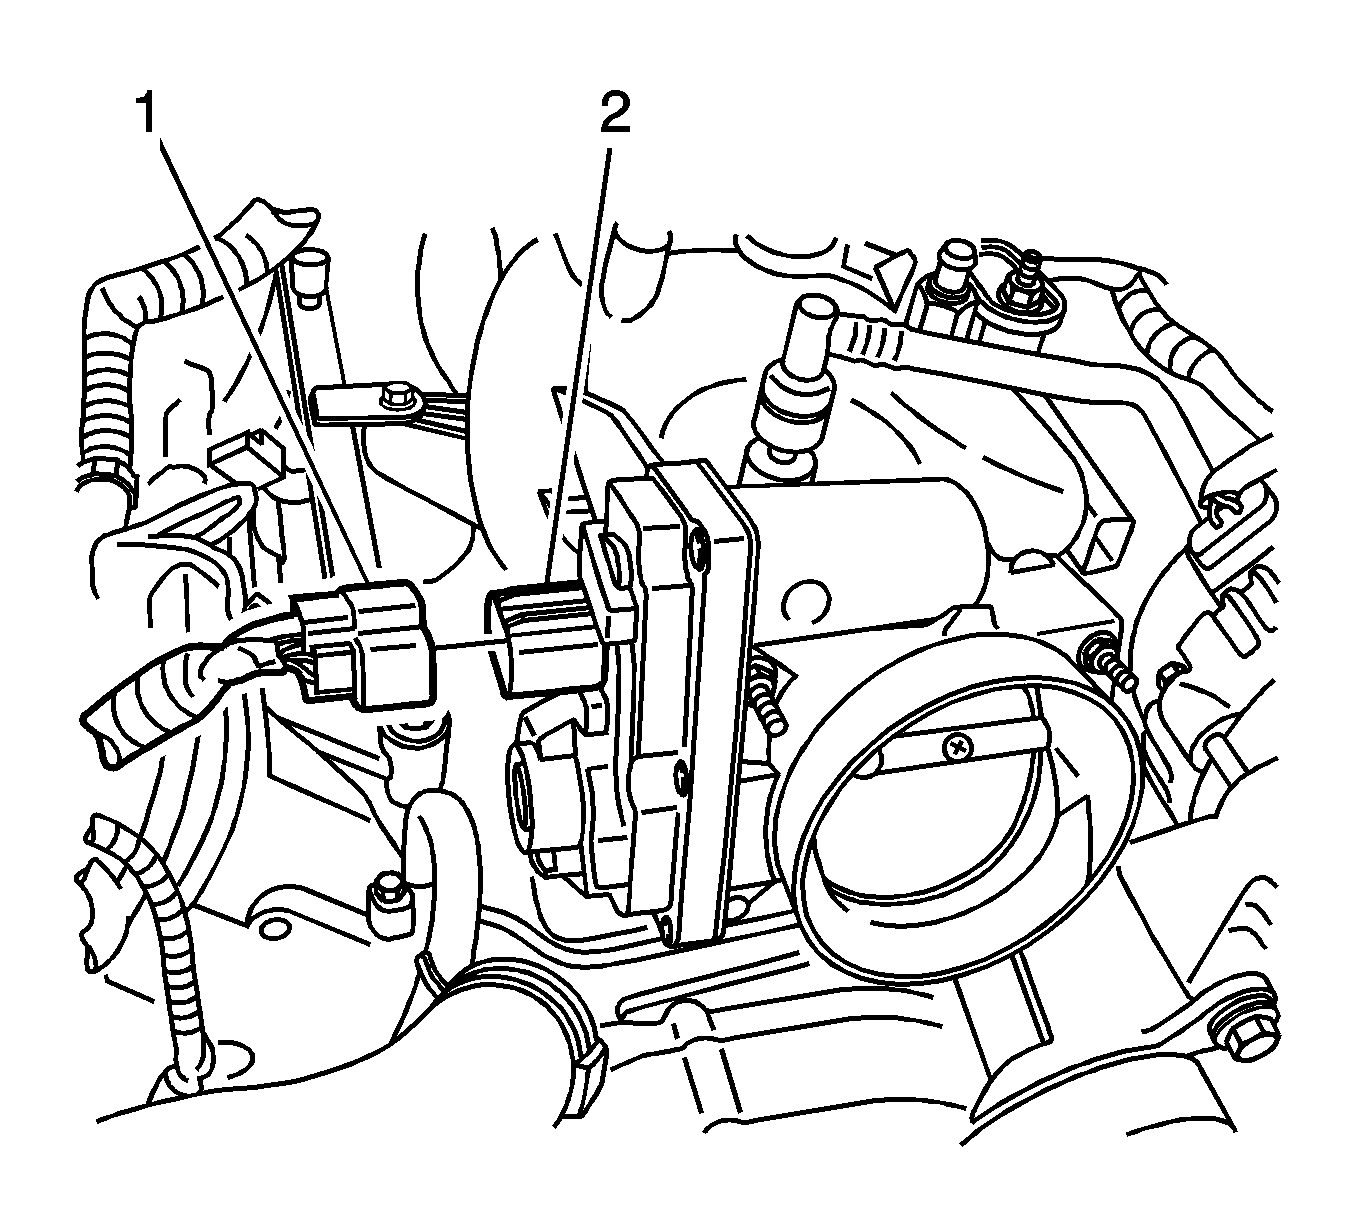
- Disconnect the throttle actuator motor electrical connector (1) from the throttle actuator motor (2).
- Reposition the throttle body hose clamp.
- Remove both of the throttle body engine coolant hoses from the throttle body.
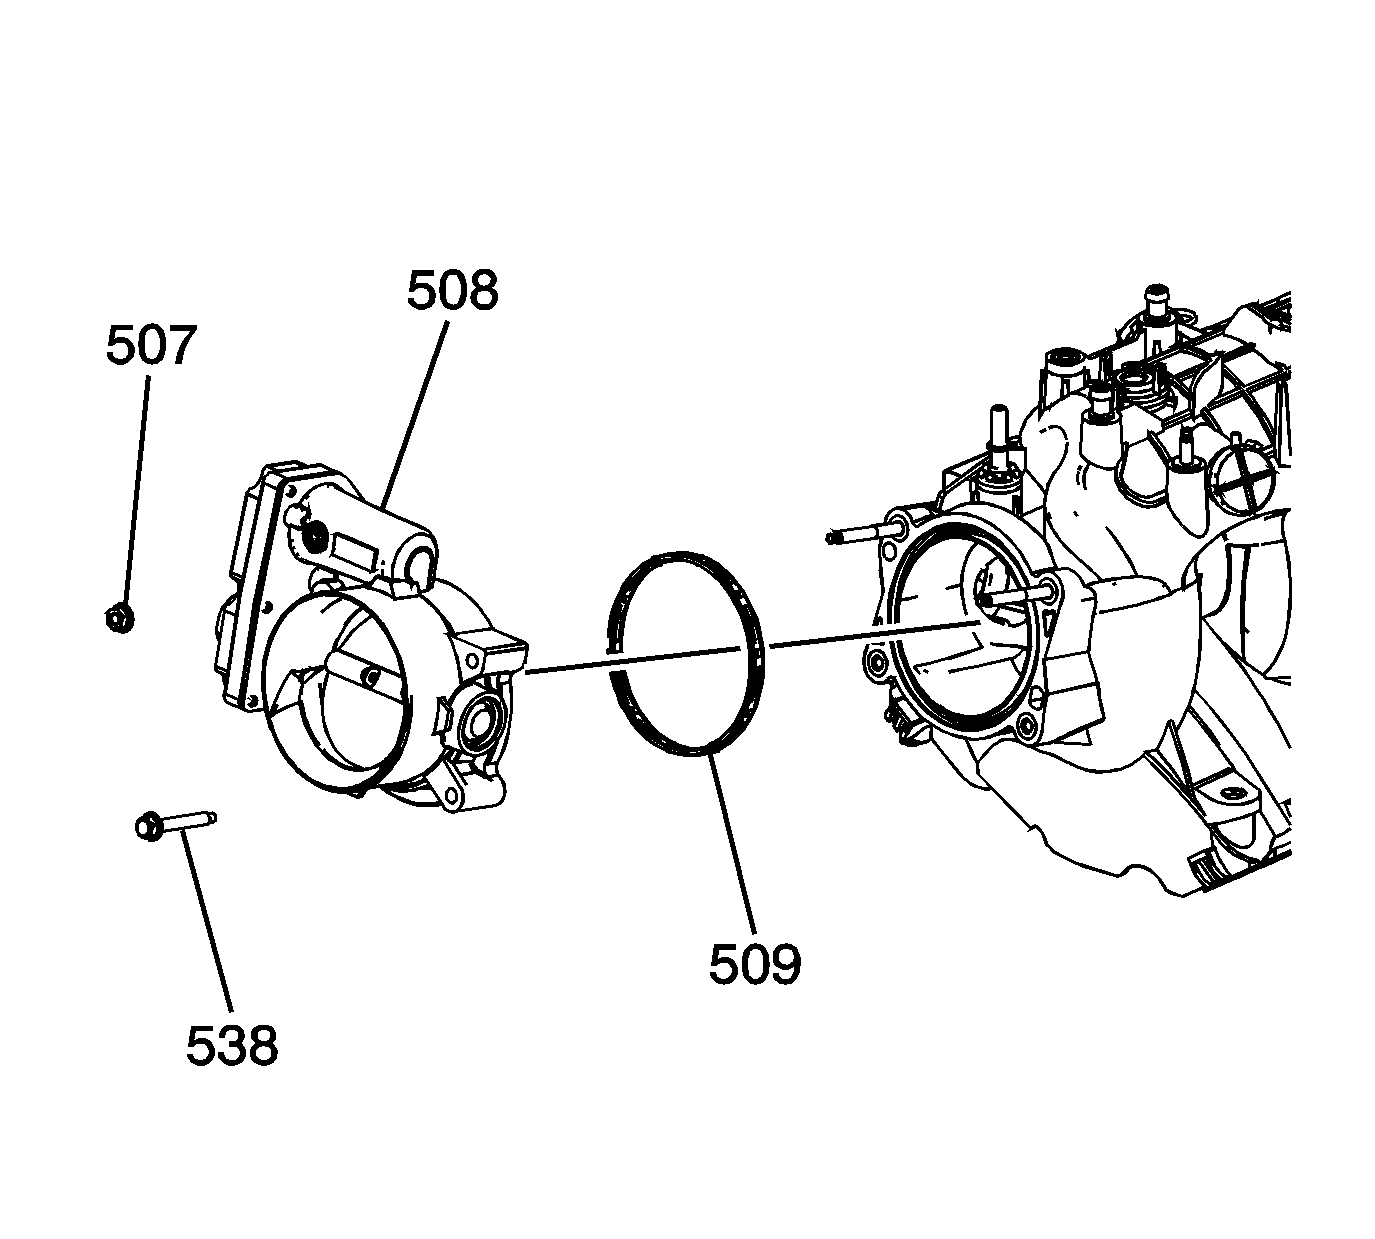
- Remove the throttle body bolts (538) and nuts (507).
- Remove the throttle body (508) and gasket (509). Discard the gasket.
Notice: Handle the electronic throttle control components carefully. Use cleanliness in order to prevent damage. Do not drop the electronic throttle control components. Do not roughly handle the electronic throttle control components. Do not immerse the electronic throttle control components in cleaning solvents of any type.
Important:
• DO NOT for any reason, insert a screwdriver or other small hand tool into the throttle body to hold open the throttle plate, as the throttle body could be damaged. • An 8-digit part identification number is stamped on the throttle body casting. Refer to this number if servicing, or part replacement is required.
Important: Do not reuse the throttle body gasket. Install a new gasket during assembly.
Installation Procedure
- Install a NEW throttle body gasket (509).
- Install the throttle body (508).
- Install the throttle body bolts (538) and nuts (507).
- Connect the 2 throttle body engine coolant hoses to the throttle body.
- Position the throttle body hose clamps.
- Connect the throttle actuator motor electrical connector (1) to the throttle actuator motor (2).
- Install the air cleaner outlet duct. Refer to Air Cleaner Resonator Outlet Duct Replacement .
- Refill the cooling system. Refer to Cooling System Draining and Filling .
- Verify that the vehicle meets the following conditions:
- Connect a scan tool in order to test for a proper throttle-opening and throttle-closing range.
- Operate the accelerator pedal and monitor the throttle angles. The accelerator pedal should operate freely, without binding, between a closed throttle, and a wide open throttle (WOT).
- Start the engine.
- Inspect for coolant leaks.
Notice: Refer to Fastener Notice in the Preface section.
Tighten
Tighten the bolts/nuts to 6 N·m (53 lb in).
| • | The vehicle is not in a reduced engine power mode. |
| • | The ignition is ON. |
| • | The engine is OFF. |
