Tools Required
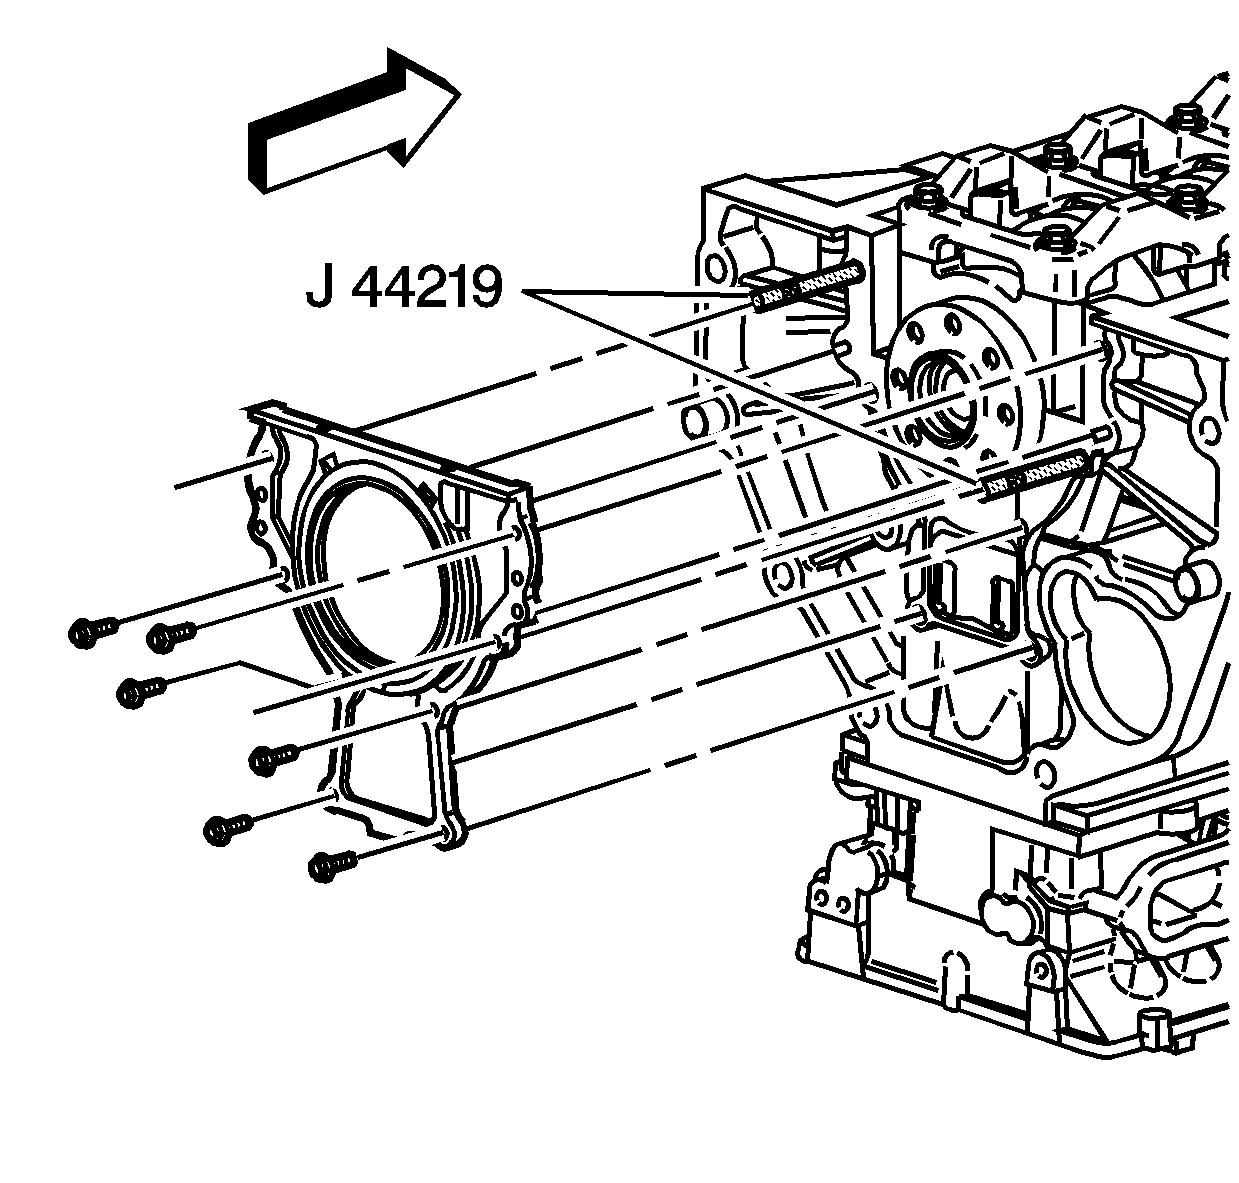
J 44219 Cover Alignment Pins
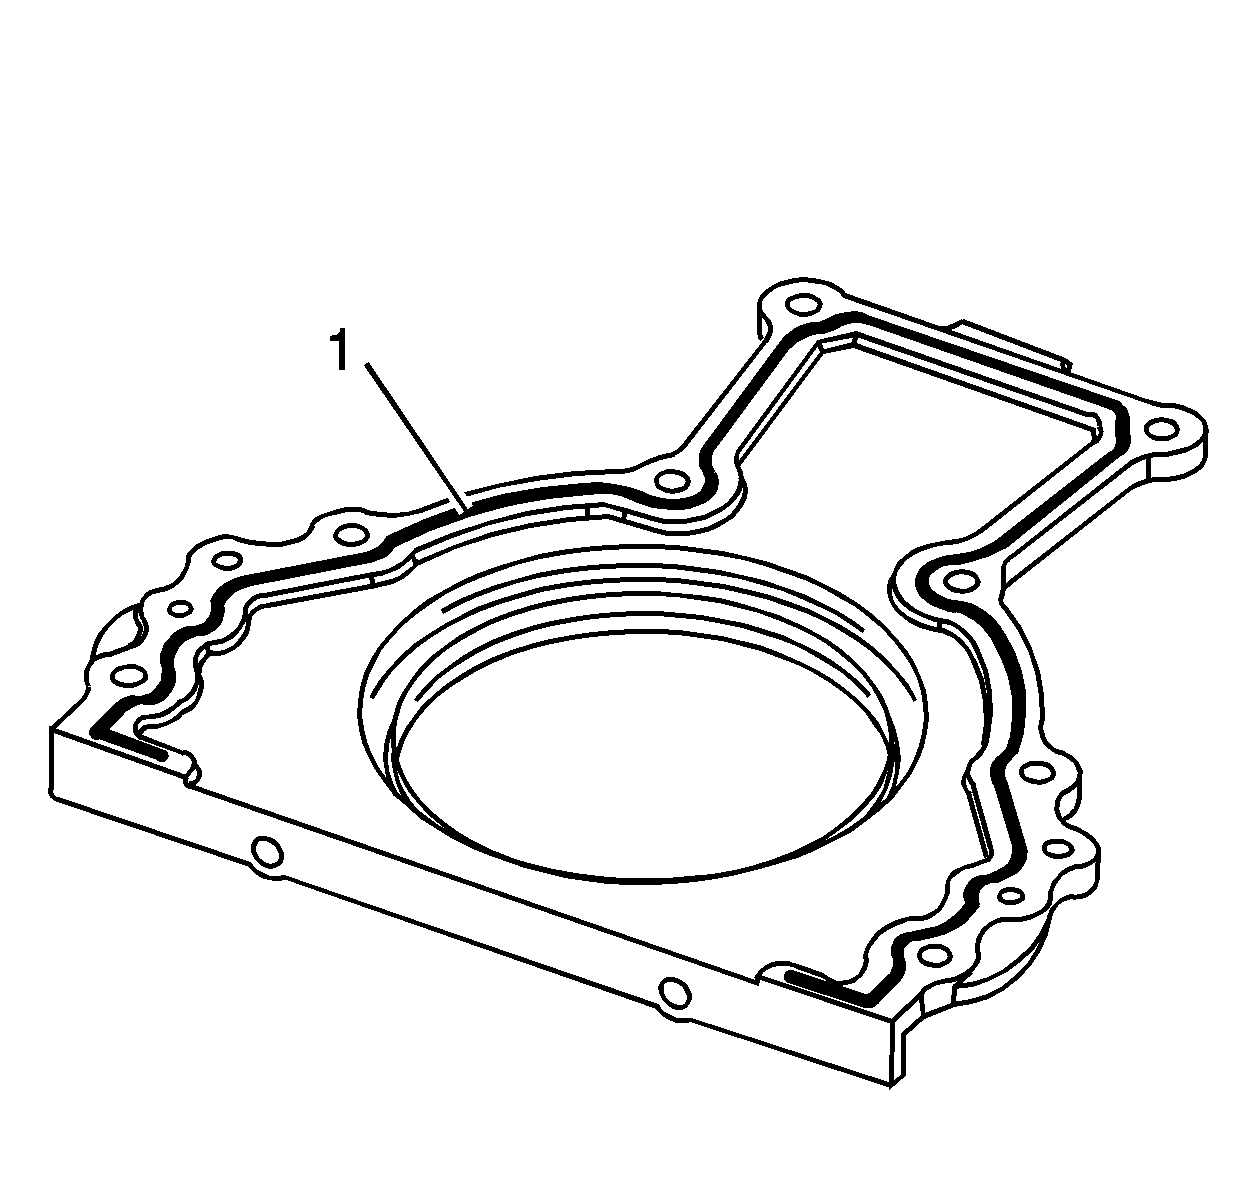
- Apply a 3 mm (0.12 in) bead of GM P/N 12378521, Canadian P/N 88901148 to the rear oil seal housing (1).
- Install J 44219 into the block.
- Slide the crankshaft rear oil seal housing over the J 44219 and crankshaft.
- Install the crankshaft rear oil seal housing bolts (except the two in place of the guide pins).
- Remove J 44219 .
- Install the remaining two crankshaft rear oil seal housing bolts.
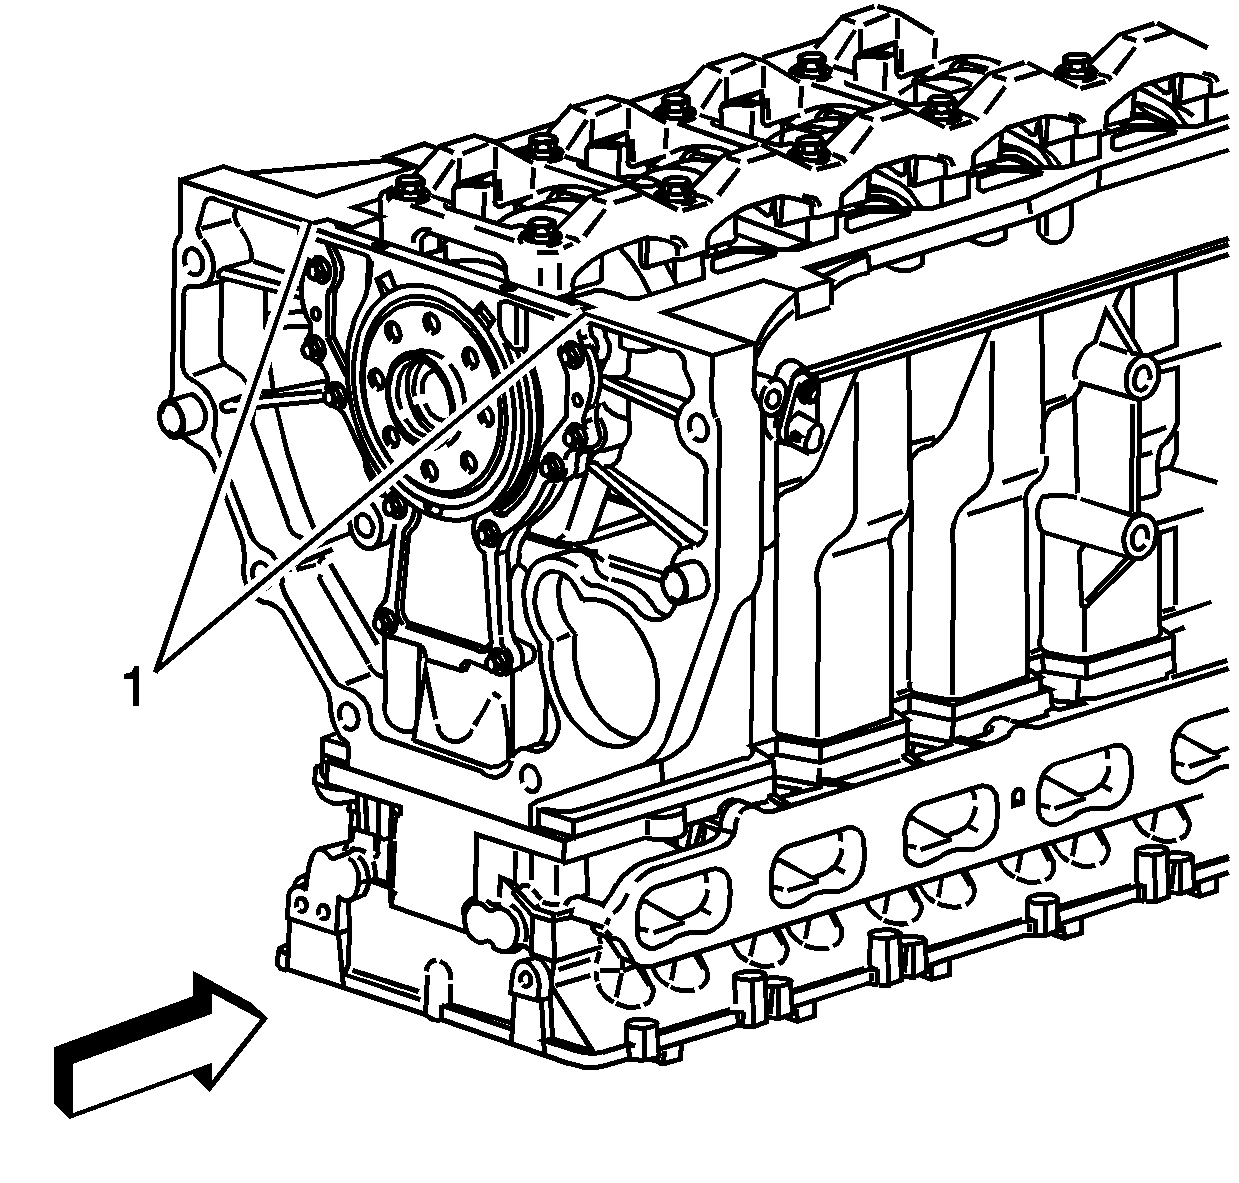
- Wipe off any excess material from the bottom of the oil pan sealing area (1).


Important: With the help of the plastic installation aid (supplied with the new seal), be sure the lip of the seal faces inward.
Notice: Use the correct fastener in the correct location. Replacement fasteners must be the correct part number for that application. Fasteners requiring replacement or fasteners requiring the use of thread locking compound or sealant are identified in the service procedure. Do not use paints, lubricants, or corrosion inhibitors on fasteners or fastener joint surfaces unless specified. These coatings affect fastener torque and joint clamping force and may damage the fastener. Use the correct tightening sequence and specifications when installing fasteners in order to avoid damage to parts and systems.
Tighten
Tighten the crankshaft rear oil seal housing bolts to 10 N·m (89 lb in).

