For 1990-2009 cars only
Removal Procedure
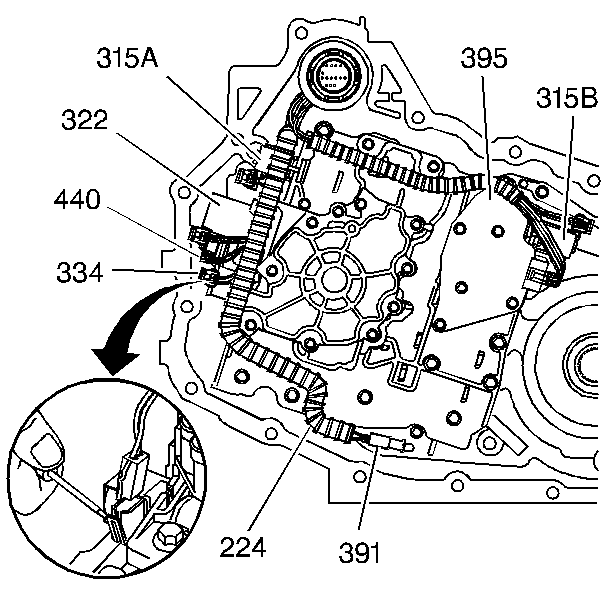
- Remove the case side cover. Refer to Control Valve Body Cover Replacement .
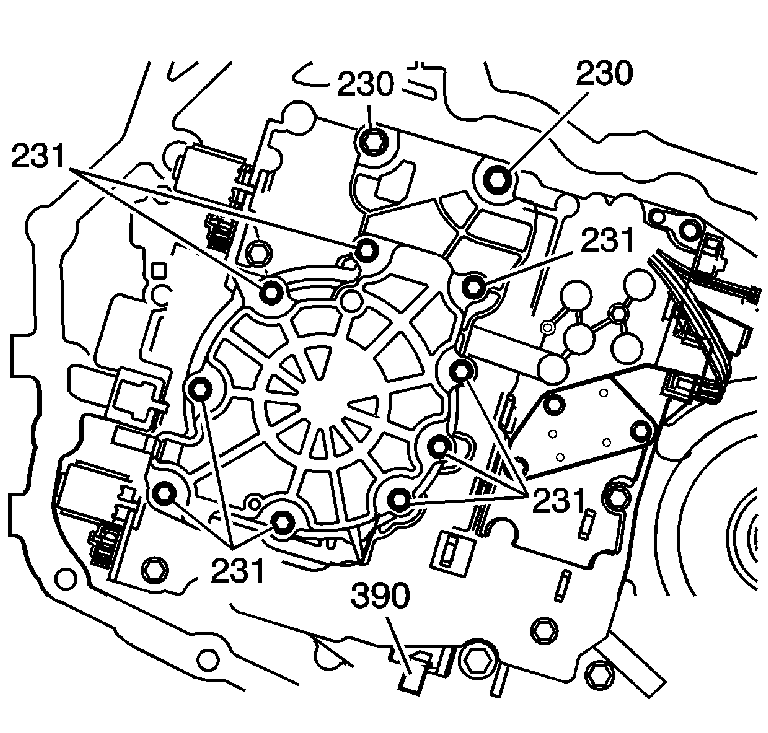
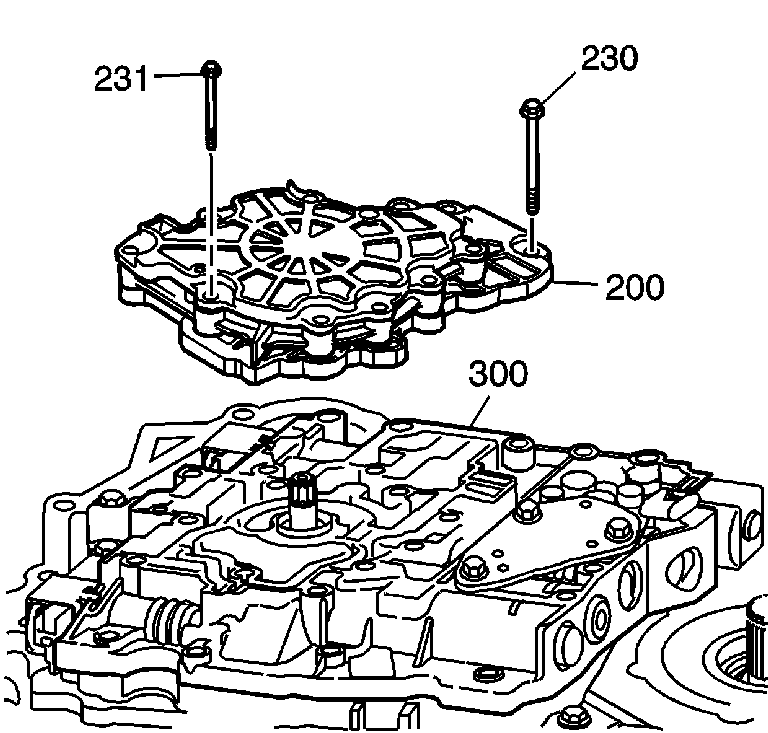
- Remove the oil pump bolts (230, 231).
- Remove the oil pump (200) from the valve body (300).
- Clean and inspect the oil pump. Refer to Transmission Fluid Pump Disassemble and Transmission Fluid Pump Assemble .
Notice: Do NOT remove the three bolts which hold the pump together.
Installation Procedure
- Install the oil pump (200) to the valve body (300).
- Install the oil pump bolts (230, 231).
- Install the case side cover. Refer to Control Valve Body Cover Replacement .
Notice: Refer to Fastener Notice in the Preface section.
Tighten
| • | Tighten the nine (231) M6 X 1.0 X 85 bolts to 12 N·m (106 lb in). |
| • | Tighten the two (230) M6 X 1.0 X 95 bolts to 16 N·m (12 lb ft). |
Important: It is recommended that transmission adaptive pressure (TAP) information be reset.
Resetting the TAP values using a scan tool will erase all learned values in all cells. As a result, the engine control module (ECM), powertrain control module (PCM) or transmission control module (TCM) will need to relearn TAP values. Transmission performance may be affected as new TAP values are learned. Reset the TAP values. Refer to Transmission Adaptive Functions .