For 1990-2009 cars only
Tools Required
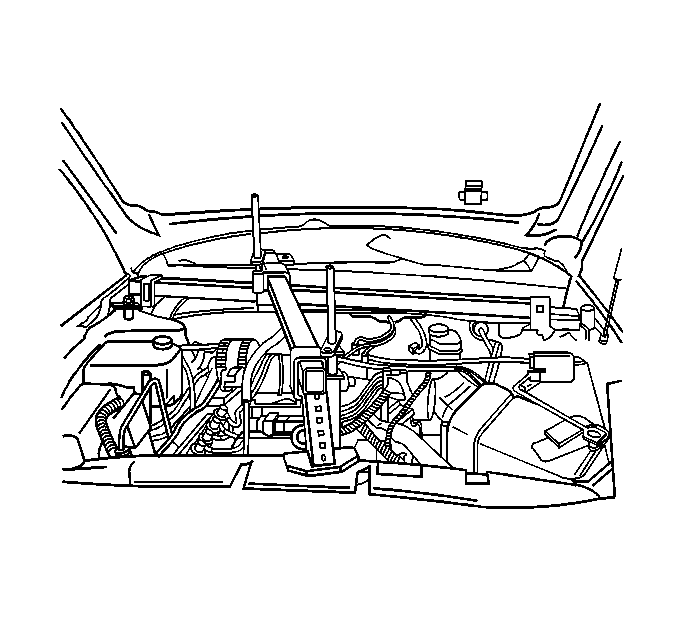
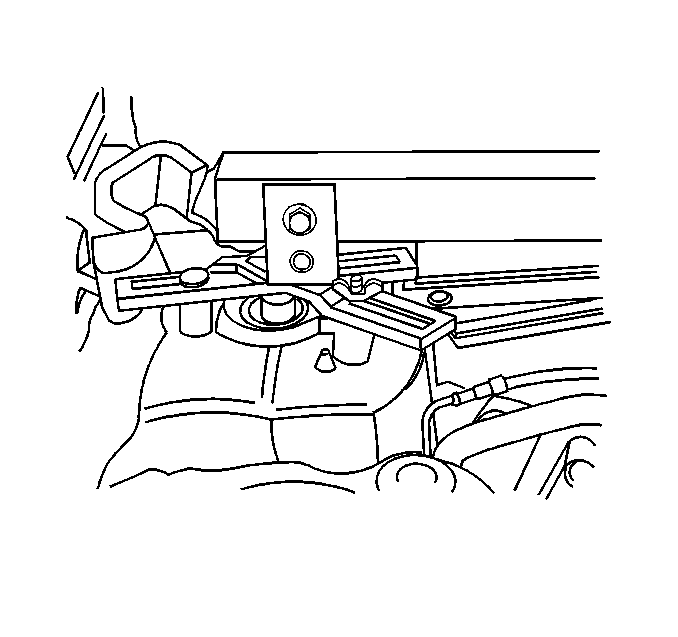
J 28467-A Universal Engine Support Fixture
Removal Procedure
- Install the J 28467-A to support the engine.
- Ensure the engine support fixture is stable on the strut towers.
- Raise and support the vehicle. Refer to Lifting and Jacking the Vehicle in General Information.
- Remove the fasteners retaining the rack and pinion at the left side of the vehicle.
- Remove the front tires and wheels. Refer to Tire and Wheel Removal and Installation in Tires and Wheels.
- Remove the engine splash shield.
- Separate the ball joints from the steering knuckle. Refer to Lower Control Arm Replacement in Front Suspension.
- Remove the front air deflector. Refer to Front Air Deflector Replacement in Body Front End.
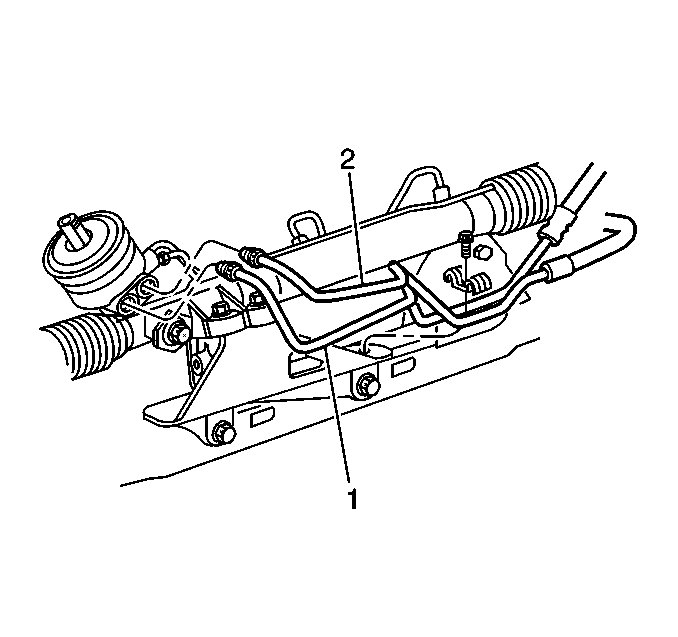
- Remove the brackets retaining the power steering lines (1, 2) at the engine frame.
- Remove the fastener retaining the rack and pinion at the right side of the vehicle.
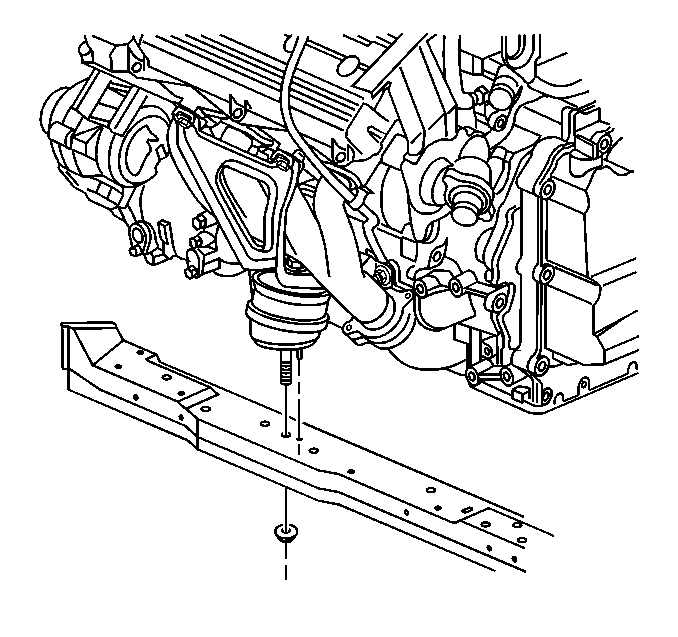
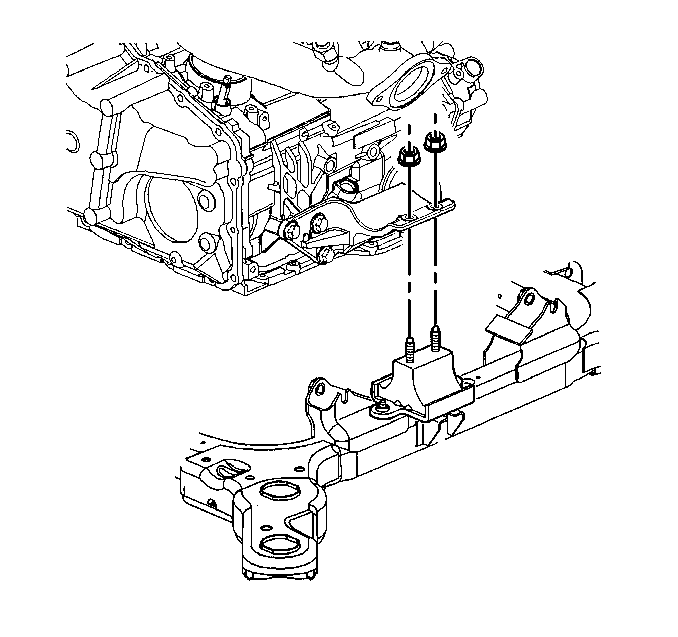
- Remove the fastener retaining the left transaxle mount to the engine frame.
- Remove the fasteners retaining the right transaxle mount to the engine frame.
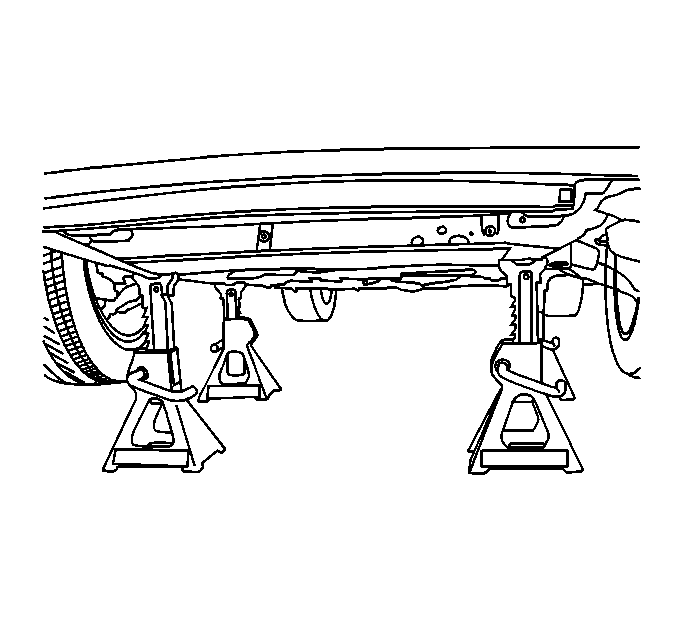
- Support the engine frame with suitable jack stands.
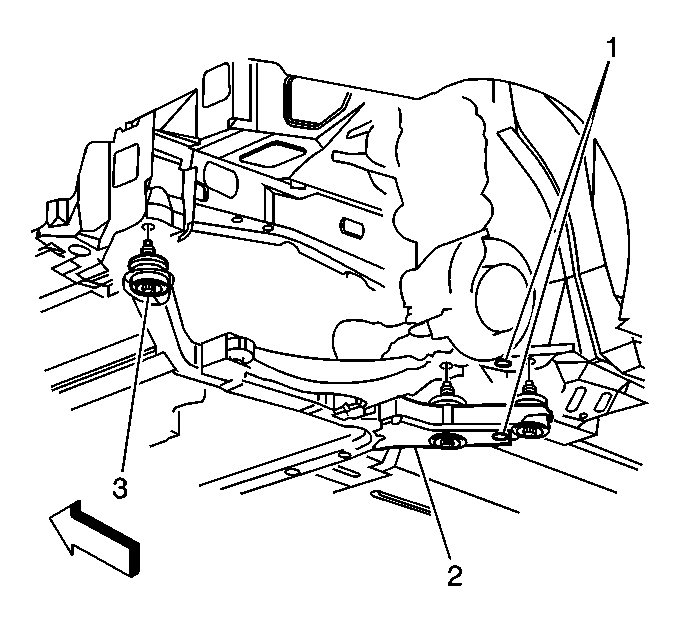
- Remove the engine frame insulator fasteners (3) retaining the engine frame (2) to the vehicle.
- Lower the engine frame (2) from the vehicle.
- Separate the engine frame insulators from the engine frame:
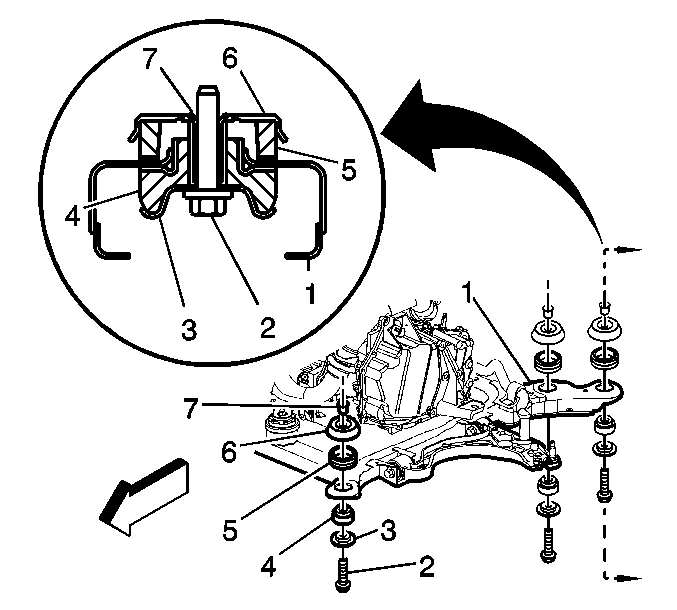
| 16.1. | Remove the bolts (2) from the engine frame (1). |
| 16.2. | Remove the lower insulator retainer (3) from the lower insulator (4). |
| 16.3. | Remove the lower insulator (4) from the engine frame (1). |
| 16.4. | Remove the retainer (7) and the upper spacer (6) from the upper insulator (5). |
| 16.5. | Remove the upper insulator (5) from the engine frame (1). |
Installation Procedure
- Assemble the engine frame insulators to the engine frame:
- Using dowel pins in the alignment holes (1), align the engine frame (2) with the vehicle.
- Install the engine frame insulator fasteners (3) to retain the engine frame (2) to the vehicle.
- Remove the jack stands supporting the engine frame.
- Install the nut and the bolt to retain the rear transaxle mount to the bracket.
- Install the fastener to retain the front transaxle mount to the engine frame.
- Install the fastener to retain the rack and pinion at the right side of the vehicle.
- Install the brackets to retain the power steering lines (1 and 2) at the engine frame.
- Install the front air deflector. Refer to Front Air Deflector Replacement in Body Front End.
- Install the ball joints to the steering knuckle. Refer to Lower Control Arm Replacement in Front Suspension.
- Install the engine splash shield.
- Install the front tires and wheels. Refer to Tire and Wheel Removal and Installation in Tires and Wheels.
- Install the bolts to retain the rack and pinion at the left side of the vehicle.
- Remove the J 28467-A supporting the engine.
- Lower the vehicle.
- Check the front wheel alignment. Refer to Wheel Alignment Specifications in Suspension.
| 1.1. | Install the upper insulator (5) from the engine frame (1). |
| 1.2. | Install the retainer (7) and the upper spacer (6) from the upper insulator (5). |
| 1.3. | Install the lower insulator (4) from the engine frame (1). |
| 1.4. | Install the lower insulator retainer (3) from the lower insulator (4). |
| 1.5. | Install the fasteners (2) from the engine frame (1). |
Notice: Refer to Fastener Notice in the Preface section.
Tighten
Tighten the fasteners to 191 N·m (141 lb ft).
Tighten
Tighten the fasteners to 40 N·m (30 lb ft).
Tighten
Tighten the fastener to 40 N·m (30 lb ft).
Tighten
Tighten the bolts to 33 N·m (24 lb ft).
Tighten
Tighten the bolts to 33 N·m (24 lb ft).
