Removal Procedure
- Disconnect the negative battery cable.
- Install the engine support fixture. Refer to Frame Replacement in Frame and Underbody.
- Remove the air cleaner assembly. Refer to Air Cleaner Assembly Replacement in Engine Controls - 3.8L.
- Disconnect the transaxle electrical connector.
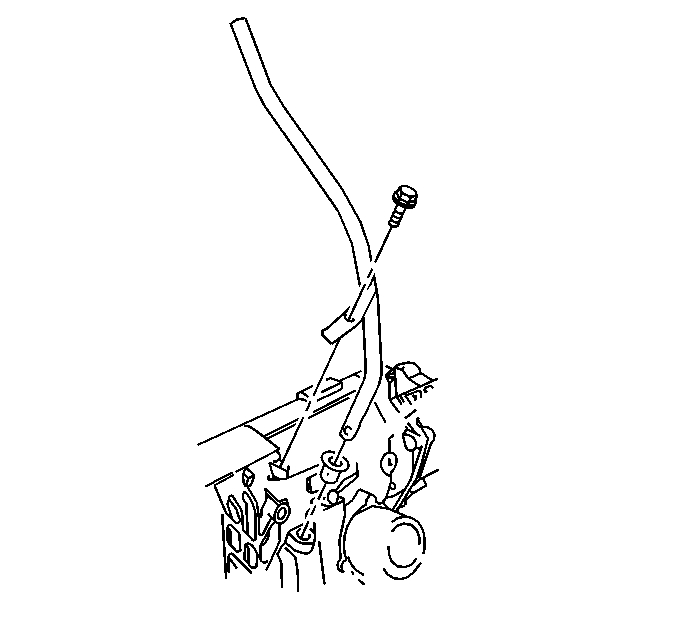
- Disconnect shift control cable bracket with cable attached.
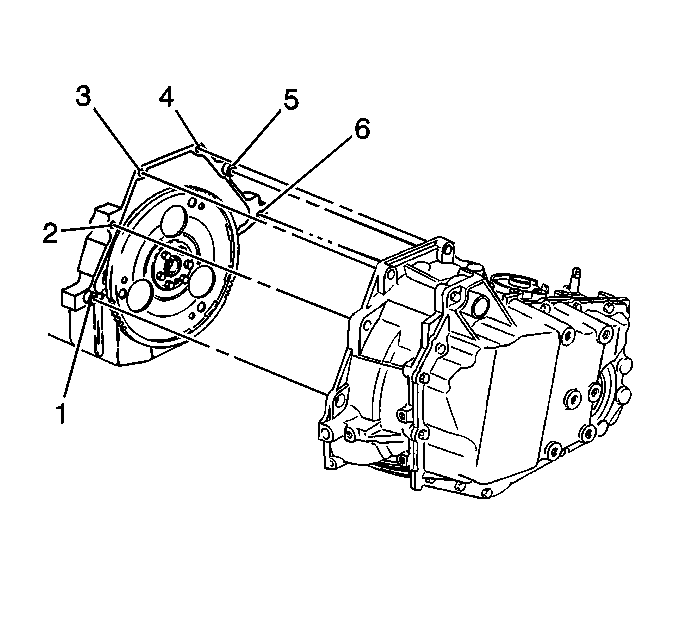
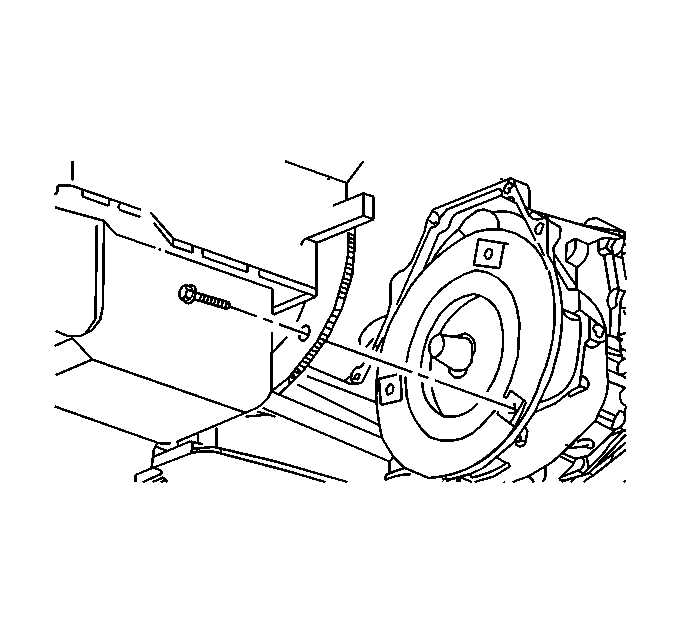
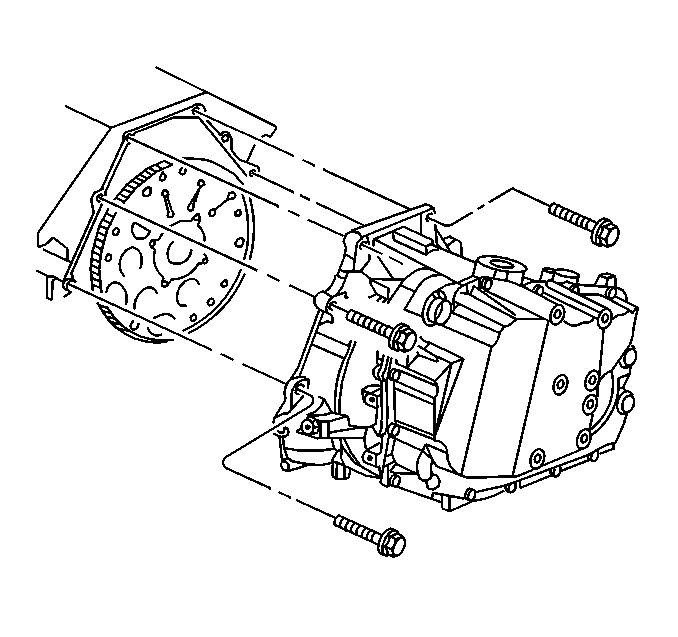
- Remove the top transaxle case bolts (3, 4).
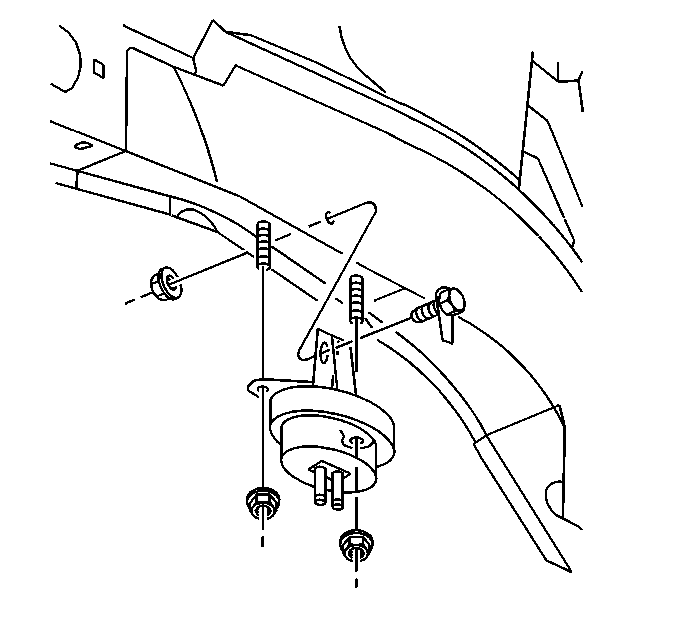
- Remove the top bolt from rear transaxle mount.
- Disconnect the oxygen sensor connector.
- Remove the engine frame. Refer to Frame Replacement in Frame and Underbody.
- Remove the left and right drive axles from the transaxle. Refer to Wheel Drive Shaft Replacement in Wheel Drive Shafts.
- Remove the torque converter cover. Refer to Torque Converter Cover Replacement .
- Remove the flywheel to torque converter bolts. Mark the flywheel to converter relationship to ensure proper reassembly. Refer to Flywheel to Torque Converter Bolt Replacement
- Disconnect Input speed sensor electrical connectors.
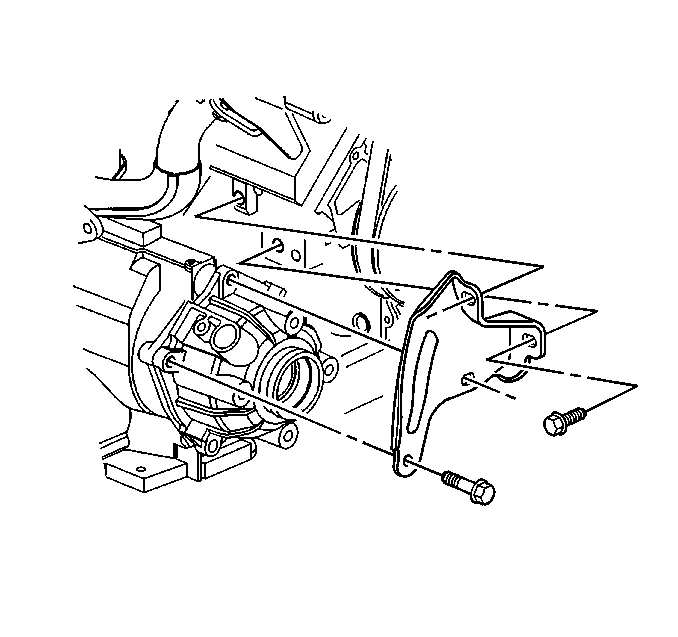
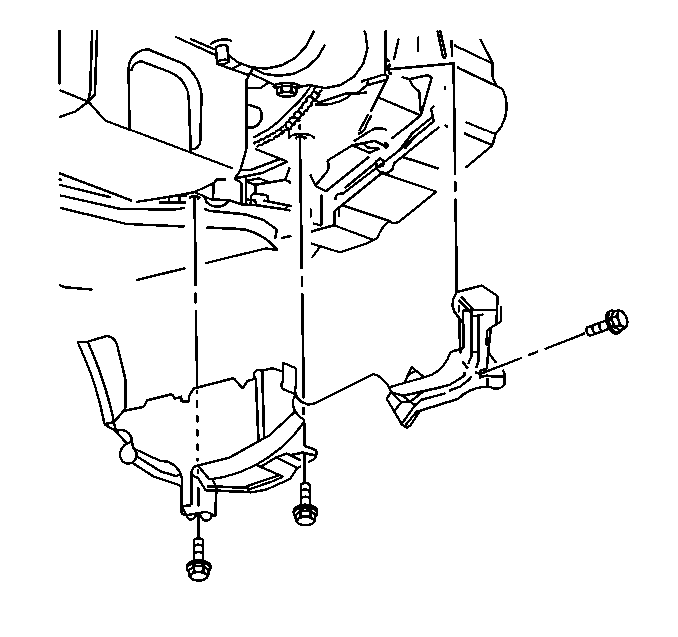
- Remove the engine to transaxle bracket.
- Remove the transaxle fluid filler tube. Refer to Transmission Fluid Filler Tube Replacement .
- Remove the rear engine mount.
- Remove the remaining transaxle to engine bolts.
- Remove the transaxle from vehicle using an appropriate transmission jack.
- Flush the transmission cooler and lines. Refer to Transmission Fluid Cooler Flushing and Flow Test .
Caution: Unless directed otherwise, the ignition and start switch must be in the OFF or LOCK position, and all electrical loads must be OFF before servicing any electrical component. Disconnect the negative battery cable to prevent an electrical spark should a tool or equipment come in contact with an exposed electrical terminal. Failure to follow these precautions may result in personal injury and/or damage to the vehicle or its components.
Installation Procedure
- Install the transaxle into the vehicle.
- Install the transaxle to engine bolts.
- Install the rear engine mount.
- Install the transaxle fluid filler tube. Refer to Transmission Fluid Filler Tube Replacement .
- Install the transaxle brace to engine.
- Connect the input speed sensor electrical connectors.
- Install the flywheel to torque converter bolts.
- Install the torque converter cover. Refer to Torque Converter Cover Replacement .
- Install the left drive axle and the right drive axle to the transaxle. Refer to Wheel Drive Shaft Replacement in Wheel Drive Shafts.
- Install the engine frame. Refer to Frame Replacement in Frame and Underbody.
- Connect to oxygen sensor connector.
- Lower the vehicle.
- Install the top bolt of the rear transaxle mount.
- Remove the engine support fixture.
- Connect the shift control cable and the shift control cable bracket.
- Check adjustment of the shift cables. Re-adjust as needed. Refer to Range Selector Lever Cable Adjustment .
- Connect the transaxle electrical connector.
- Install the air cleaner assembly. Refer to Air Cleaner Assembly Replacement in Engine Controls - 3.8L.
- Connect the negative battery cable.
- Check and adjust the transaxle fluid level. Refer to Transmission Fluid Check .
- Reset the TAP values. Refer to Adapt Function .
- Road test the vehicle and check for transaxle leaks.
Notice: Use the correct fastener in the correct location. Replacement fasteners must be the correct part number for that application. Fasteners requiring replacement or fasteners requiring the use of thread locking compound or sealant are identified in the service procedure. Do not use paints, lubricants, or corrosion inhibitors on fasteners or fastener joint surfaces unless specified. These coatings affect fastener torque and joint clamping force and may damage the fastener. Use the correct tightening sequence and specifications when installing fasteners in order to avoid damage to parts and systems.
Tighten
Tighten the transaxle bolts to 75 N·m (55 lb ft).
Tighten
Tighten the filler tube bolt to 20 N·m (15 lb ft).
Tighten
Tighten the transaxle brace to engine bolts to 60 N·m (44 lb ft).
Important:
• Align the mark made on the torque converter with the mark made on the flywheel made in the disassembly unless installing a new converter. • Tighten all the torque converter to flywheel bolts twice.
Tighten
Tighten the flywheel to torque converter bolts to 62 N·m (46 lb ft).
Important: Use care when installing the right side drive axle into the transaxle case. The splined shaft of the drive axle can easily damage the seal.
Tighten
Tighten the rear transaxle bolt to 58 N·m (42 lb ft).
Important: It is recommended that transmission adaptive pressure (TAP) information be reset.
Resetting the TAP values using a scan tool will erase all learned values in all cells. As a result, The ECM, PCM or TCM will need to relearn TAP values. Transmission performance may be affected as new TAP values are learned.