Removal Procedure
Caution: For safety reasons, the brake pressure modulator valve assembly must not be repaired, the complete unit must be replaced. With the exception of the EBCM, no screws on the brake pressure modulator valve assembly may be loosened. If screws are loosened, it will not be possible to get the brake circuits leak-tight and personal injury may result.
- Turn OFF the ignition.
- Raise the vehicle. Refer to Lifting and Jacking the Vehicle in General Information.
- Remove the left front wheel. Refer to Tire and Wheel Removal and Installation in Tires and Wheels.
- Remove the left front fascia extension. Refer to Wheelhouse Filler Replacement in Body Front End.
- Remove the front air deflector. Refer to Front Air Deflector Replacement in Body Front End.
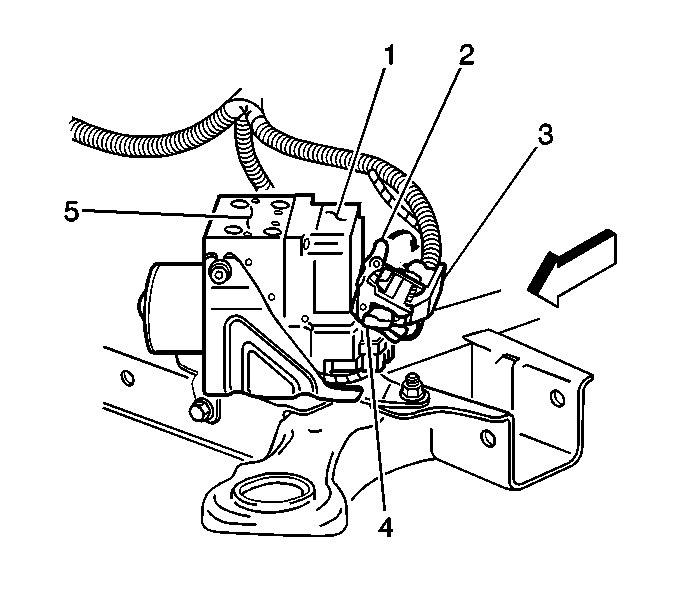
- Thoroughly clean all contaminants from around the EBCM.
- Remove the EBCM connector position assurance (2) from the EBCM electrical connector (1).
- Rotate the EBCM connector tab up to the unlocked position.
- Disconnect the EBCM electrical connector (1) from the EBCM (4).
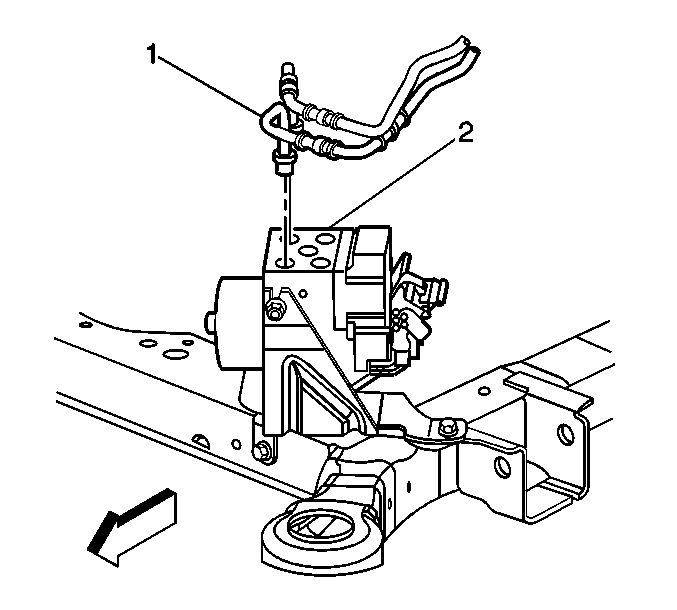
- Remove the master cylinder brake pipes (1) from the BPMV (2).
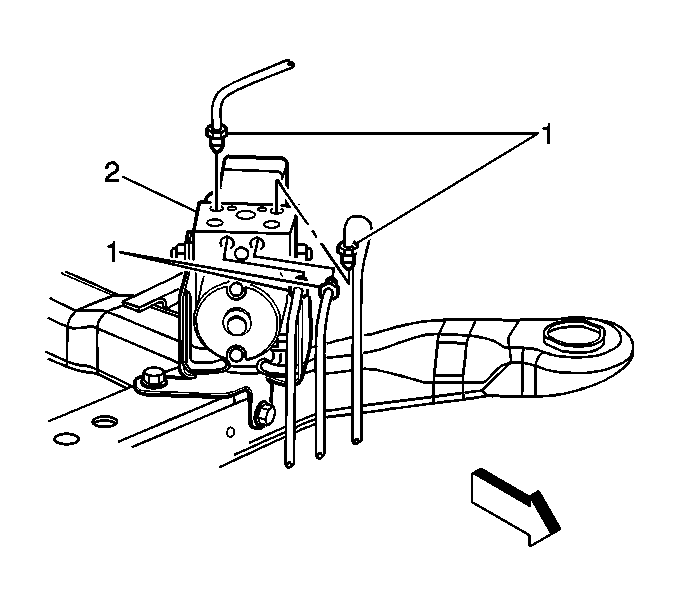
- Remove the 4 wheel brake pipes (1) from the BPMV (2).
- Clean any brake fluid spillage from the BPMV (1).
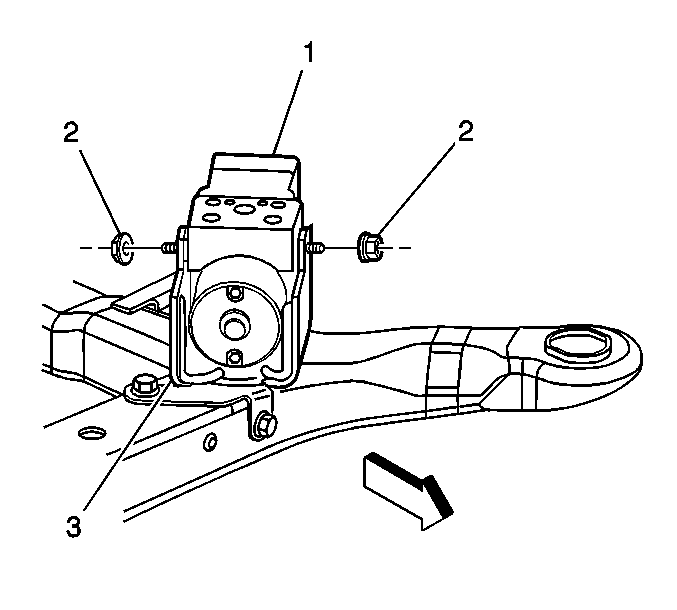
- Remove the 2 BPMV bracket nuts (2).
- Remove the EBCM/BPMV assembly (1) from the BPMV bracket (3).
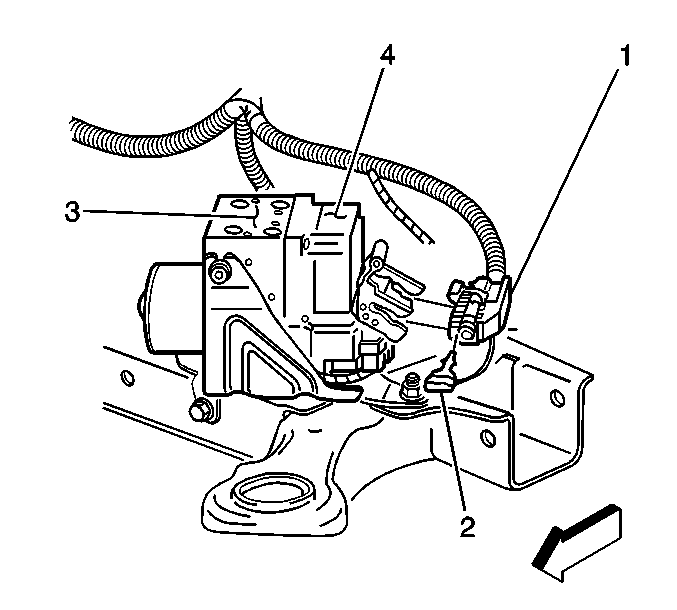
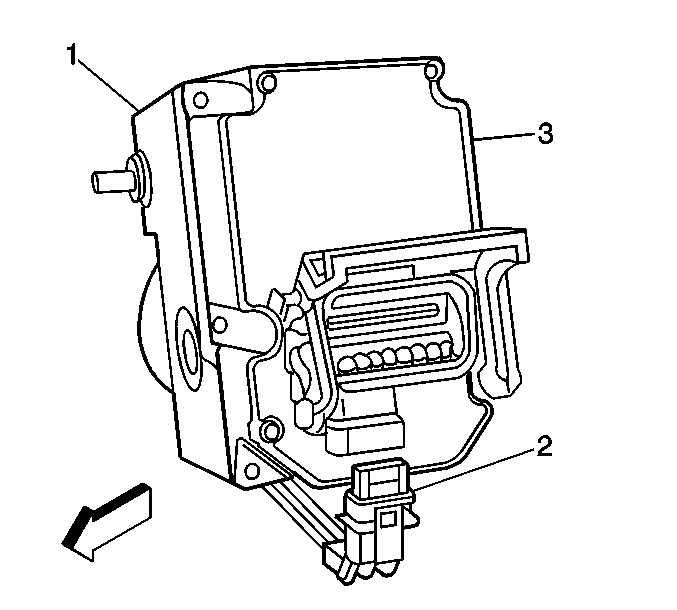
- Remove the BPMV electrical connector (2) from the EBCM (3).
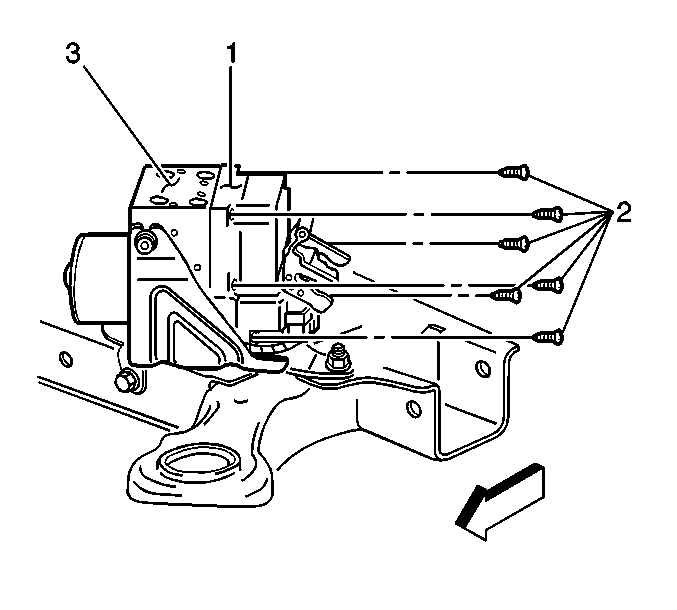
- Remove the 6 EBCM to BPMV screws (2).
- Clean the surface of the EBCM/BPMV assembly.
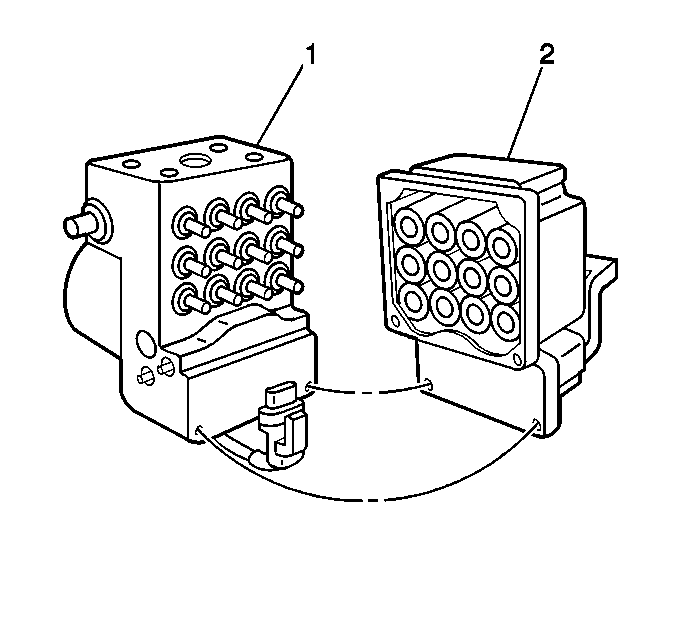
- Remove the EBCM (2) from the BPMV (1).
Important: The area around the electronic brake control module (EBCM) must be free from loose dirt to prevent contamination of disassembled ABS components.
Notice: To prevent equipment damage, never connect or disconnect the wiring harness connection from the EBCM with the ignition switch in the ON position.
Caution: Brake fluid may irritate eyes and skin. In case of contact, take the
following actions:
• Eye contact--rinse thoroughly with water. • Skin contact--wash with soap and water. • If ingested--consult a physician immediately.
Notice: Avoid spilling brake fluid onto painted surfaces, electrical connections, wiring, or cables. Brake fluid will damage painted surfaces and cause corrosion to electrical components. If any brake fluid comes in contact with painted surfaces, immediately flush the area with water. If any brake fluid comes in contact with electrical connections, wiring, or cables, use a clean shop cloth to wipe away the fluid.
Important: Record the location of all brake pipes to the brake pressure modulator valve (BPMV) for use as an aid during installation.
Installation Procedure
- Clean the seal surface of the BPMV.
- Install the EBCM (2) to the BPMV (1).
- Install the 6 EBCM to BPMV screws (2).
- Install the BPMV electrical connector (2) to the EBCM (3).
- Install the EBCM/BPMV assembly (1) to the BPMV bracket (3).
- Install the 2 BPMV bracket nuts (2).
- Install the 4 wheel brake pipes (1) to the BPMV (2) using the locations recorded during the removal procedure.
- Install the 2 master cylinder brake pipes (1) to the BPMV (2) using the locations recorded during the removal procedure.
- Clean the seal surface of the EBCM/BPMV assembly.
- Connect the EBCM electrical connector (1) to the EBCM (4).
- Rotate the EBCM connector tab (2) down to the locked position.
- Install the EBCM connector position assurance (4) to the EBCM electrical connector (1).
- Install the left front fascia extension. Refer to Wheelhouse Filler Replacement in Body Front End.
- Install the front air deflector. Refer to Front Air Deflector Replacement in Body Front End.
- Install the left front wheel. Refer to Tire and Wheel Removal and Installation in Tires and Wheels.
- Lower the vehicle. Refer to Lifting and Jacking the Vehicle in General Information.
- Fill and bleed the hydraulic brake system. Refer to Hydraulic Brake System Bleeding in Hydraulic Brakes.
- Perform the Auto Bleed Procedure. Refer to Antilock Brake System Automated Bleed Procedure .
- Perform the ABS Diagnostic System Check. Refer to Diagnostic System Check - ABS .
Notice: Use the correct fastener in the correct location. Replacement fasteners must be the correct part number for that application. Fasteners requiring replacement or fasteners requiring the use of thread locking compound or sealant are identified in the service procedure. Do not use paints, lubricants, or corrosion inhibitors on fasteners or fastener joint surfaces unless specified. These coatings affect fastener torque and joint clamping force and may damage the fastener. Use the correct tightening sequence and specifications when installing fasteners in order to avoid damage to parts and systems.
Tighten
Tighten the EBCM to BPMV screws to 3.2 N·m (28 lb in).
Important: Make sure that all 3 rubber isolators are installed on the BPMV. The isolators protect the EBCM/BPMV assembly from vehicle vibrations.
Notice: Use the correct fastener in the correct location. Replacement fasteners must be the correct part number for that application. Fasteners requiring replacement or fasteners requiring the use of thread locking compound or sealant are identified in the service procedure. Do not use paints, lubricants, or corrosion inhibitors on fasteners or fastener joint surfaces unless specified. These coatings affect fastener torque and joint clamping force and may damage the fastener. Use the correct tightening sequence and specifications when installing fasteners in order to avoid damage to parts and systems.
Tighten
Tighten the BPMV nuts to 10 N·m (89 lb in).
Caution: Make sure brake pipes are correctly connected to BPMV. If brake pipes are switched by mistake Inlet vs. Outlet, wheel lockup will occur and personal injury may result.
Important: If a new BPMV is being installed, remove the shipping plugs from the valve openings.
Tighten
Tighten the wheel brake pipes to 15 N·m (11 lb ft).
Tighten
Tighten the master cylinder brake pipes to 15 N·m (11 lb ft).
Notice: To prevent equipment damage, never connect or disconnect the wiring harness connection from the EBCM with the ignition switch in the ON position.