Removal Procedure
- Remove two-thirds of the brake fluid from the master cylinder.
- Raise the vehicle and suitably support. Refer to Lifting and Jacking the Vehicle in General Information.
- Remove the Wheel. Refer to Tire and Wheel Removal and Installation in Tires and Wheels.
- Using a large C clamp in order to compress the caliper piston into the caliper bore completely.
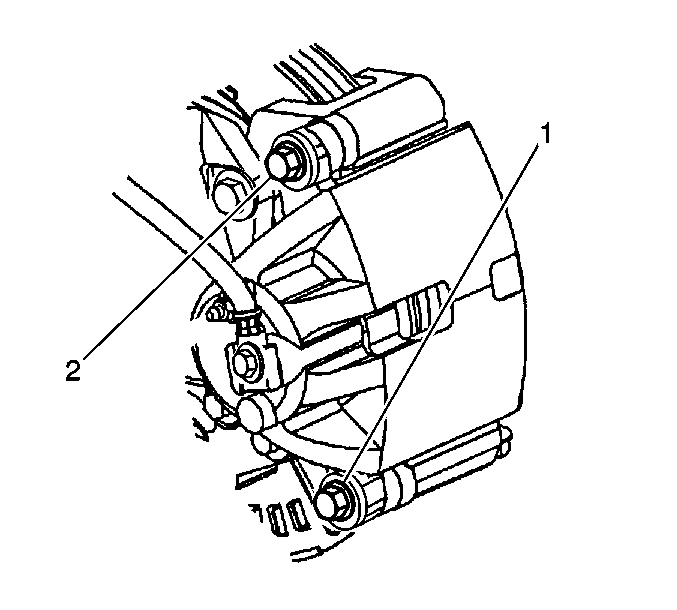
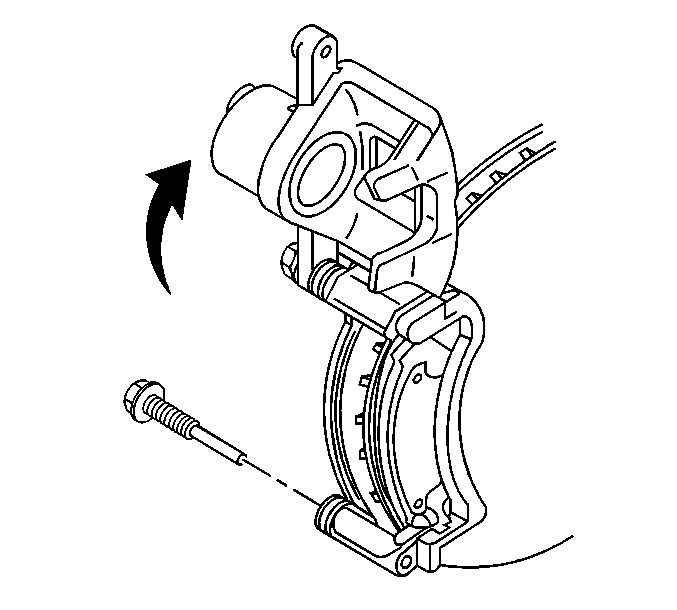
- Remove the bottom caliper pin bolt (1).
- Pivot the caliper body upward.
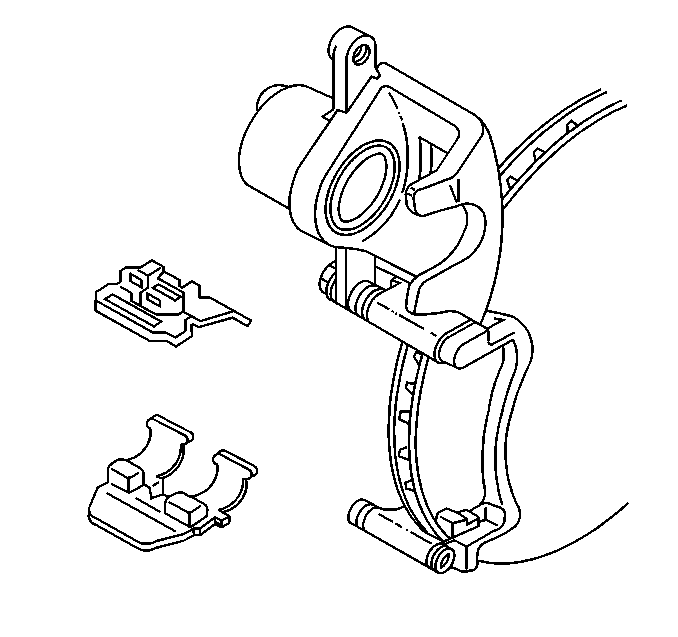
- Remove the inboard and outboard pads from the anchor bracket.
- Remove and inspect the pad retainers.
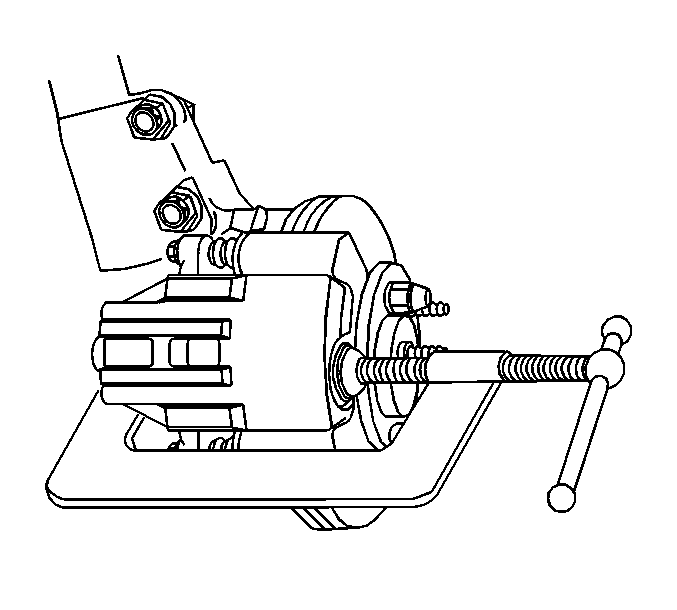
Important: Do not use a screwdriver or pry bar to compress the caliper piston into the caliper. Any damage to the piston boot could cause corrosive elements to enter the piston sealing area and lead to the piston seizing in the caliper bore.

Installation Procedure
- Inspect the caliper bolt suspension boots for cuts, tears, or deterioration. If damaged, replace the pin boots.
- Inspect the caliper pin bolts for damage or corrosion. Replace if damaged or corroded. Do not attempt to clean away corrosion. Corrosion is typically caused by damaged pin boots. Refer to Brake Caliper Bracket Overhaul .
- Inspect the caliper piston boot for deterioration, replace if damaged. Refer to Front Brake Caliper Overhaul .
- Install the brake pad retainers into the caliper anchor bracket.
- Install both brake pads into the caliper anchor bracket.
- Use a small plastic or wooden tool (1) to lift the inner edge of the boot next to the piston (2), and press out any trapped air.
- Pivot the caliper down over the brake pads and into the anchor bracket.
- Insert the lower caliper pin bolt (1).
- Install the tire and wheel assembly. Refer to Tire and Wheel Removal and Installation in Tires and Wheels.
- Lower the vehicle.
- Start the vehicle and apply approximately 778 N (175 lb) of force three times to the brake pedal to seat the brake caliper piston and brake pads.
- Refill the brake fluid. Refer to Master Cylinder Reservoir Filling in Hydraulic Brakes.
- Burnish the pads and rotors. Refer to Brake Pad and Rotor Burnishing .


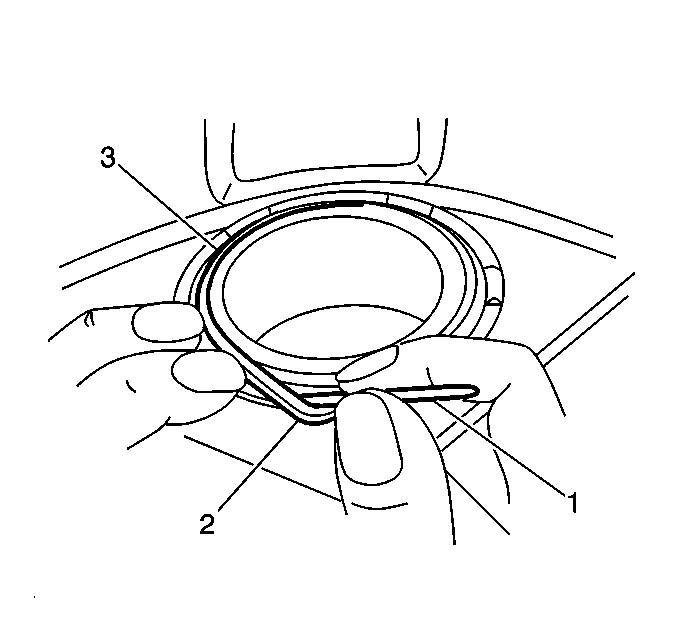
Important: The caliper piston boot must lay flat. Make sure convolutions are tucked into place.
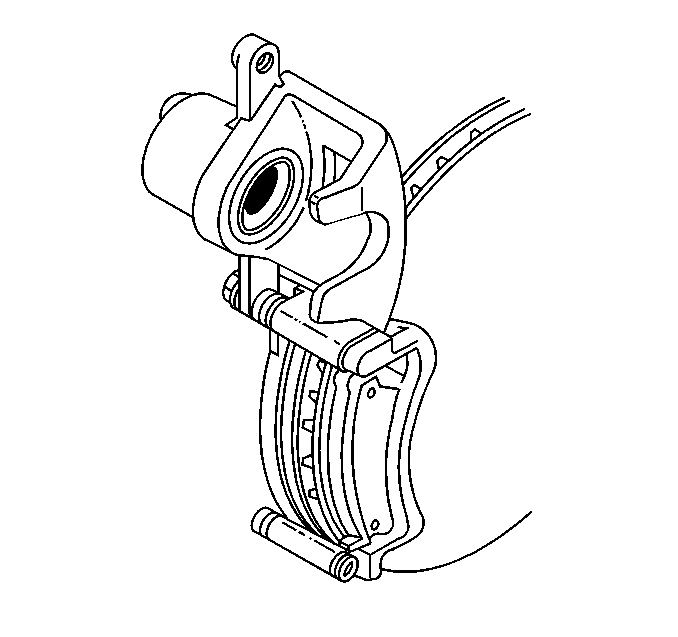
Notice: Use the correct fastener in the correct location. Replacement fasteners must be the correct part number for that application. Fasteners requiring replacement or fasteners requiring the use of thread locking compound or sealant are identified in the service procedure. Do not use paints, lubricants, or corrosion inhibitors on fasteners or fastener joint surfaces unless specified. These coatings affect fastener torque and joint clamping force and may damage the fastener. Use the correct tightening sequence and specifications when installing fasteners in order to avoid damage to parts and systems.

Tighten
Tighten the caliper pin bolt to 85 N·m (63 lb ft).
