Removal Procedure
- Raise and support the vehicle. Refer to Lifting and Jacking the Vehicle in General Information.
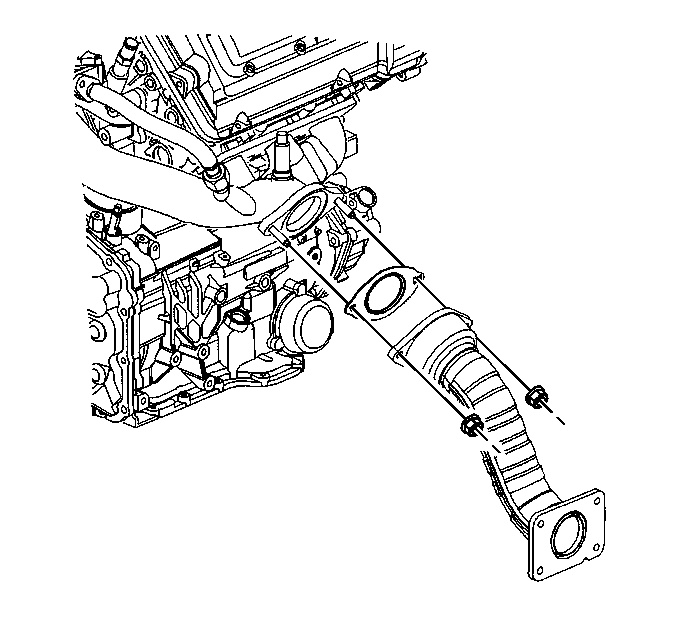
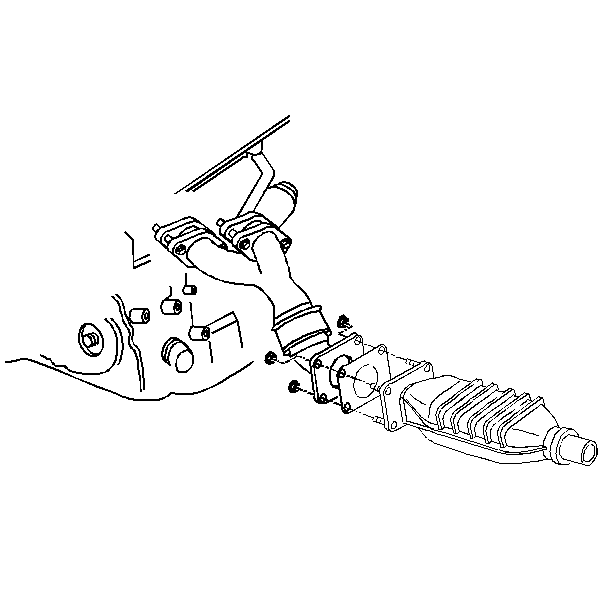
- Remove two nuts at the exhaust manifold.
- Remove the four nuts at the catalytic converter
- Remove the exhaust downpipe.

Notice: When a flex coupling is moved from the normal mounting position it is possible to over-flex and damage the flex coupling. Always support the flex coupling and pipe assembly in order to avoid over-flexing. The flex coupling is designed to flex a maximum of six degrees which is equivalent to the pipes connected to the joint moving no more than 1 inch for every 1 foot length of pipe. If the pipe connected to the joint is 3 feet long, the end of the pipe could be moved a maximum of 3 inches.

Installation Procedure
- Install the exhaust down pipe to manifold gasket.
- Install the front pipe to the manifold studs.
- Install four nuts at the catalytic converter.
- Install two nuts at the exhaust manifold studs.
- Lower the vehicle.

Notice: Use the correct fastener in the correct location. Replacement fasteners must be the correct part number for that application. Fasteners requiring replacement or fasteners requiring the use of thread locking compound or sealant are identified in the service procedure. Do not use paints, lubricants, or corrosion inhibitors on fasteners or fastener joint surfaces unless specified. These coatings affect fastener torque and joint clamping force and may damage the fastener. Use the correct tightening sequence and specifications when installing fasteners in order to avoid damage to parts and systems.
Tighten
Tighten the nuts to 25 N·m (18 lb ft).

Tighten
Tighten the two nuts to 50 N·m (36 lb ft).
