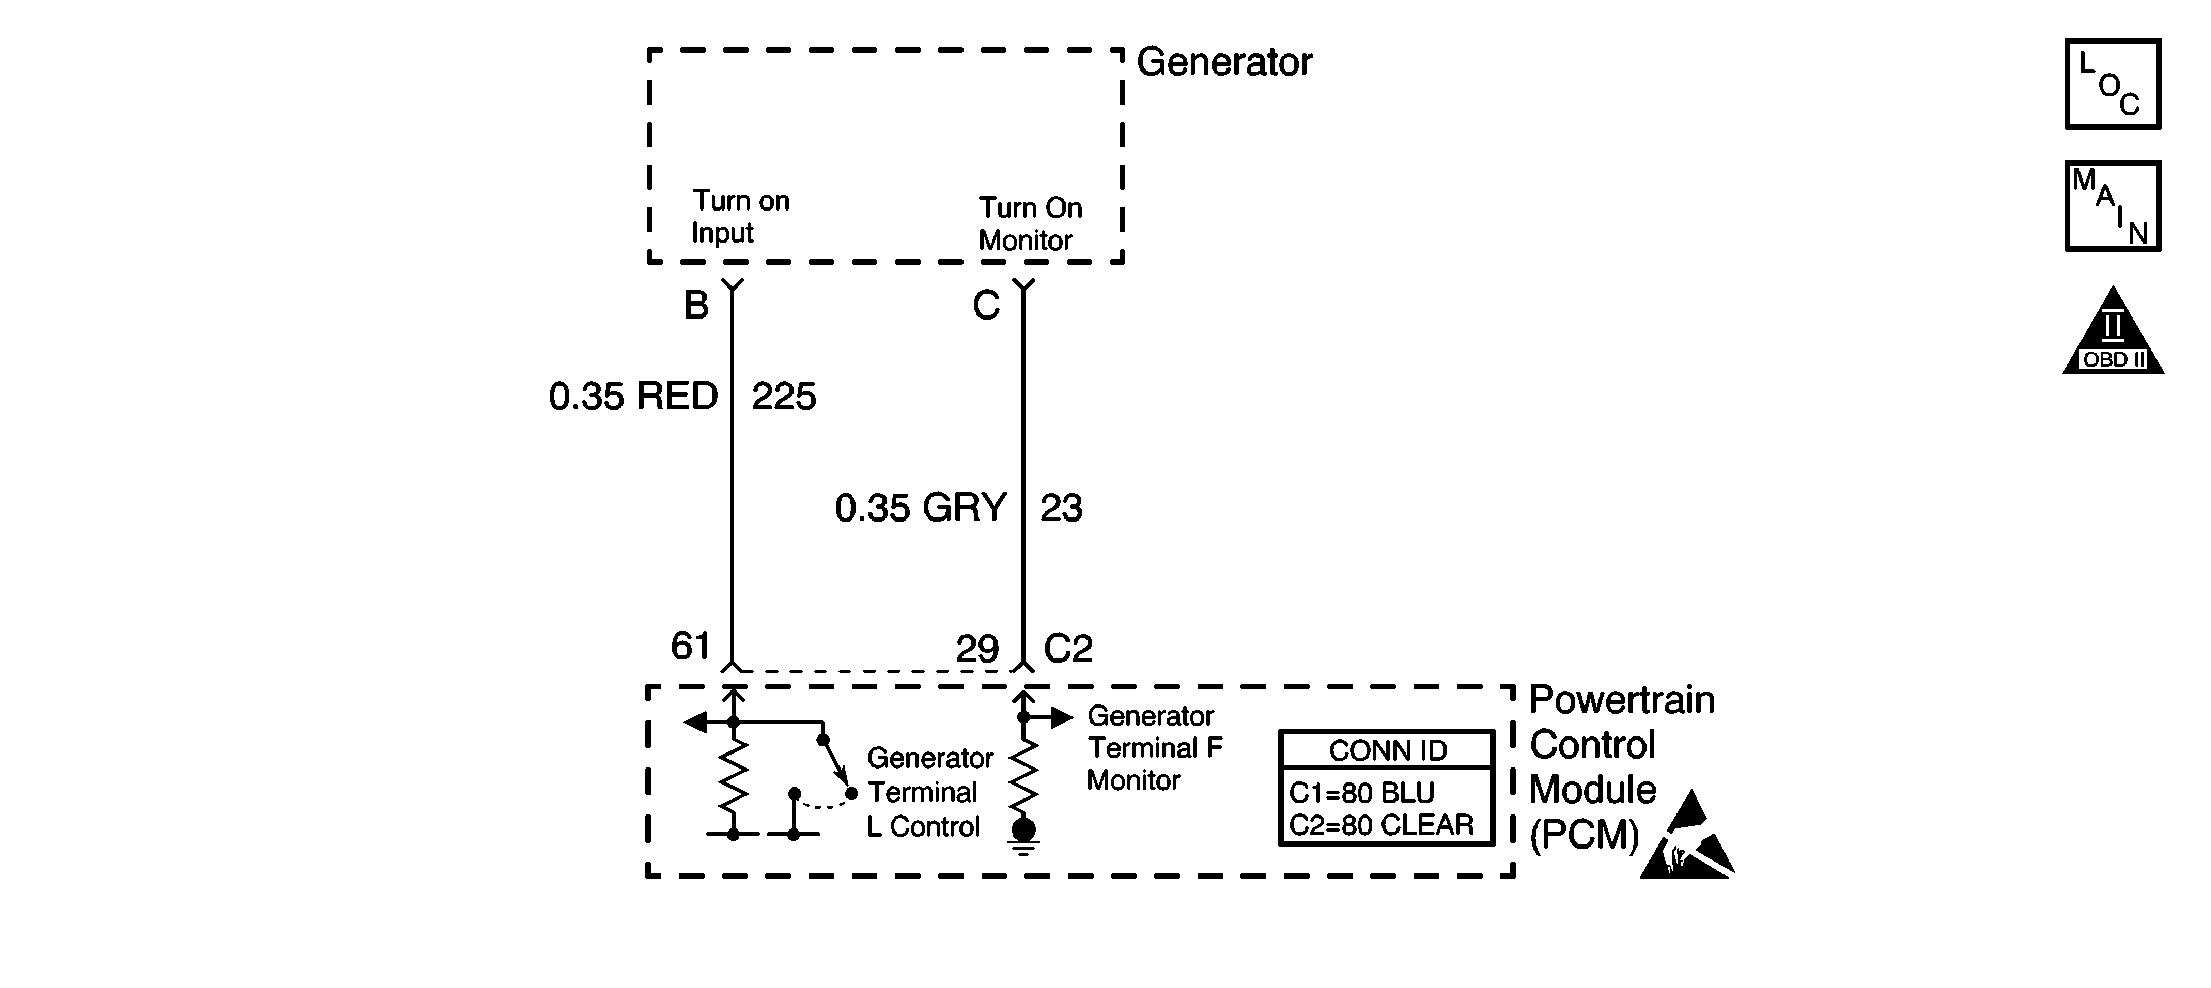
Circuit Description
The PCM Output (L) terminal to the alternator determines when the alternator will be turned off. It is on under all normal vehicle operating conditions except during low RPM conditions. The alternator is turned off during low RPM conditions to remove excess load from the engine.
The PCM Input Field (F) terminal from the alternator provides a 400 Hz PWM signal to the PCM. The duty cycle of the F terminal mimics the duty cycle of the field coils in the alternator, Thus, the F terminal duty cycle indicates the relative electrical load on the alternator.
The alternator Telltale lamp will illuminate any time the ignition is on and engine is not running. The Telltale will go out after the engine is running and the alternator is putting out the desired amperage.
Conditions for Running the DTC
| • | The engine is running. |
| • | The voltage telltale is on. |
Conditions for Setting the DTC
| • | (L) terminal voltage is low while the PCM is commanding the generator on. |
| • | The above condition is present for more than 30 seconds. |
OR
| • | (F) terminal PWM is less than 5 percent. |
| • | Engine RPM is less than 2500. |
| • | The above conditions are present for more then 30 seconds. |
Action Taken When the DTC Sets
The PCM stores conditions which were present when the DTC set as Failure Records only. This information will not be stored as Freeze Frame Records.
Conditions for Clearing the MIL/DTC
| • | The DTC becomes history when the conditions for setting the DTC are no longer present. |
| • | The history DTC clears after 40 malfunction free warm-up cycles. |
| • | The PCM receives a clear code command from the scan tool. |
Diagnostic Aids
Check for the following conditions:
| • | Poor connection at the PCM or Generator: Inspect the harness connectors for backed out terminals, improper mating, broken locks, improperly formed or damaged terminals, and poor terminal to wire connection. Refer to Testing for Intermittent Conditions and Poor Connections Connector Repairs and Wiring Repairs in Wiring Systems. |
| • | Damaged harness: Inspect the wiring harness for damage. If the harness appears to be OK, disconnect the PCM, turn the ignition on and observe voltmeter connected to the Generator circuits at the PCM harness connector while moving connectors and wiring harnesses related to the generator control circuit. A change in voltage will indicate the location of the fault. Refer to Testing for Intermittent Conditions and Poor Connections Connector Repairs and Wiring Repairs in Wiring Systems. |
Test Description
The numbers below refer to the step numbers on the diagnostic table.
Step | Action | Values | Yes | No |
|---|---|---|---|---|
1 | Was the Powertrain On-Board Diagnostic (OBD) System Check performed? | -- | ||
2 | With the engine running at approximately 1200 rpm, does the scan tool indicate that the Generator PWM is within the indicated range? | 5% - 95% | Go to Charging System Test in Engine Electrical | |
3 |
Command the generator on with the scan tool while monitoring the DMM. Does the voltage change from the first indicated value to the second indicated value? | 0.0V 5.0V | ||
4 |
Is the generator PWM display affected? | -- | Go to Charging System Test in Engine Electrical | |
5 | Test the (L) circuit for an open or short to ground and repair if necessary. Refer to Wiring Repairs in Wiring Systems. Was a problem found? | -- | ||
6 | Test the (L) circuit for a short to voltage and repair if necessary. Refer to Wiring Repairs in Wiring Systems. Was a problem found? | -- | ||
7 | Test the (F) circuit for an open or short to ground and repair if necessary. Refer to Wiring Repairs in Wiring Systems. Was a problem found? | -- | ||
8 | Test the (F) circuit for a short to voltage and repair if necessary. Refer to Wiring Repairs in Wiring Systems. Was a problem found? | -- | ||
9 | Check for a poor connection at the PCM and repair if necessary. Refer to Testing for Intermittent Conditions and Poor Connections in Wiring Systems. Was a problem found. | -- | ||
|
Important: : Replacement PCM must be programmed. Replace the PCM. Refer to Powertrain Control Module Replacement/Programming . Is action complete? | -- | -- | ||
11 |
Does the scan tool indicate DTC P0620 failed this ignition? | -- | System OK |
