GM Service Manual Online
For 1990-2009 cars only

Rattling, Ticking or Scraping Noise from Engine Compartment (Inspect Transmission Rear Dust Cover)

Subject:Rattling, Ticking or Scraping Noise from Engine Compartment (Inspect Transmission Rear Dust Cover)

Models:2005 Buick Park Avenue
2005-2006 Buick Allure (Canada Only), LaCrosse, LeSabre
2006 Buick Lucerne
2005 Chevrolet Impala, Monte Carlo
2005 Pontiac Bonneville
2005-2006 Pontiac Grand Prix, Grand Prix GTP
with 3800 Series II or Series III 3.8L V6 Engine (VINs K, 1, 2, 4 -- RPOs L36, L67, L26, L32)


Condition

Some customers may comment on a rattling, ticking or scraping noise coming from the engine compartment.

Cause

This condition may be caused by the transmission rear (flywheel/flexplate) dust cover being installed incorrectly, resulting in the cover contacting the flexplate.

Correction

Figure 1 - Transmission Dust Covers
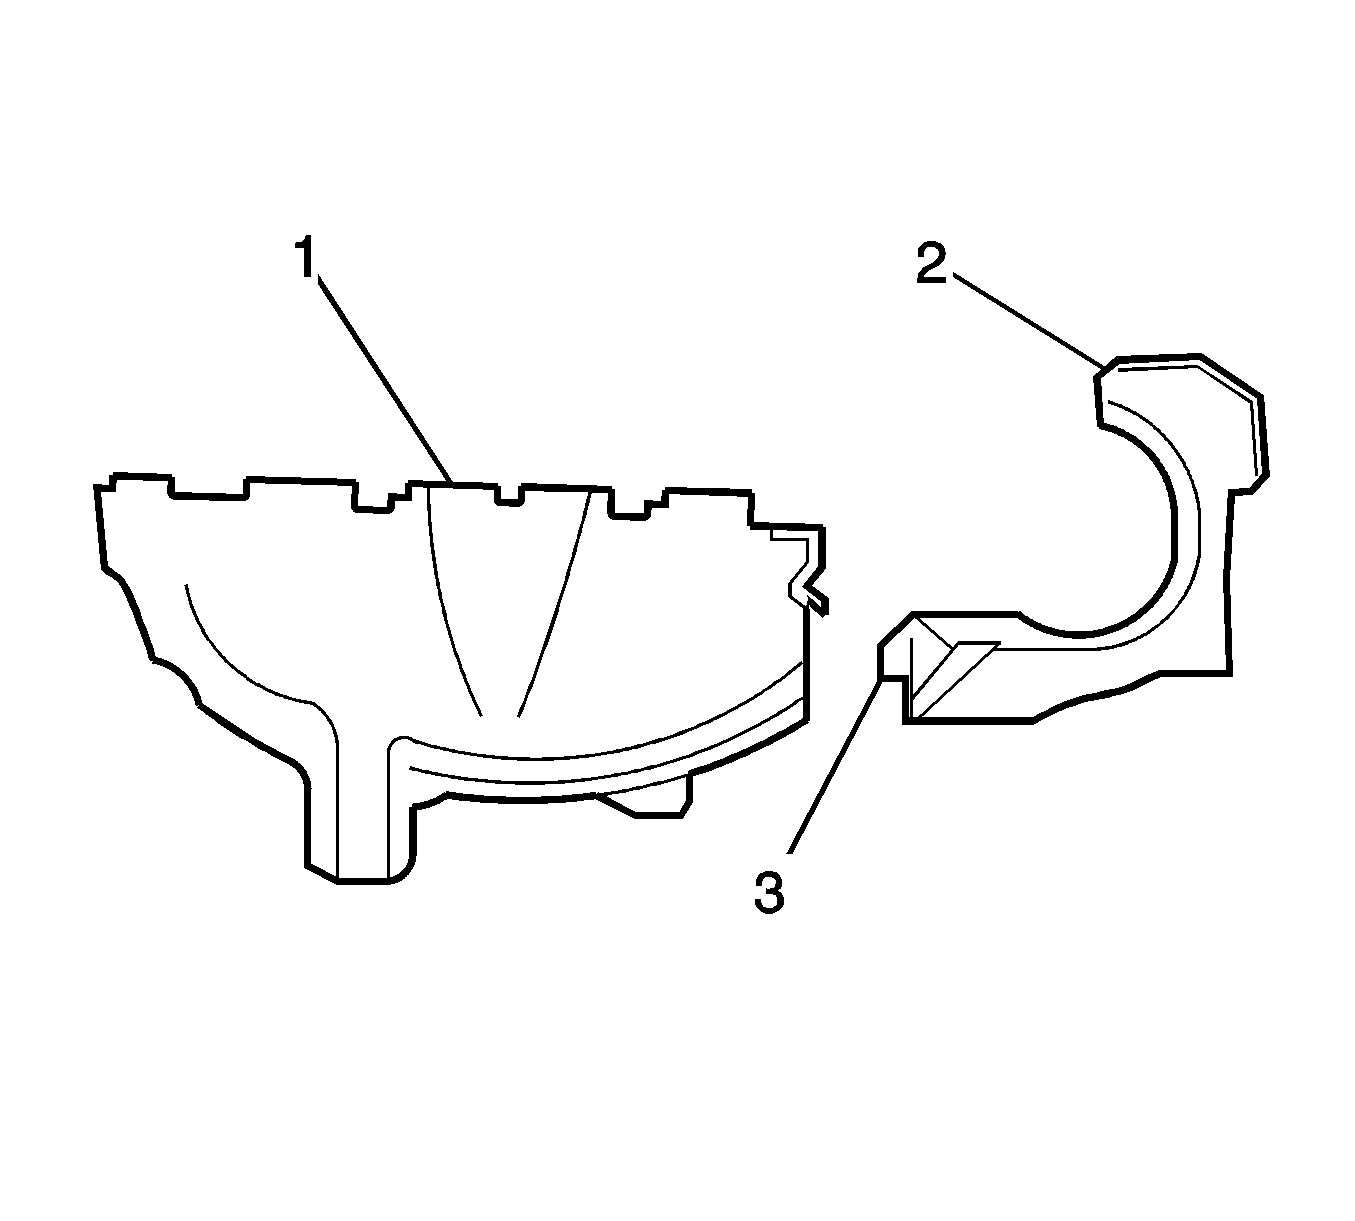

Object Number: 1701526  Size: SH
(1)Rear Transmission Dust Cover
(2)Front Transmission Dust Cover
(3)Guide Tab

Figure 2 - Correct Installation of Transmission Dust Covers


Object Number: 1701528  Size: SH
(1)Rear Transmission Dust Cover Alignment Feature (Refer to Step 6)
(2)Front Transmission Dust Cover Notch locates above the Rear Transmission Dust Cover Alignment Feature (Refer to Step 6)
(3)Front Transmission Dust Cover Guide Tab tucks behind the Rear Transmission Dust Cover

Inspection of Rear Transmission (Flexplate) Dust Cover


Figure 3


Object Number: 1702962  Size: SH

Important: The rear dust cover has a designed-in bow. Refer to the shaded area (3) of the illustration above. Do not confuse this designed-in bow as a warp in the cover.

  1. Remove the front and rear transmission dust covers. Refer to Figure 1.
  2. Start the engine.
  3. • If the noise is present, it is not being caused by the transmission dust covers. Continue diagnosis until the source of the noise is found. Then proceed to Step 5 for correct installation of the covers.
    • If the noise is not present, continue to the next step.
  4. Inspect the rear cover in the area shown (1) for signs of it having contacted the flexplate. Refer to Figure 3.
  5. If there are signs of contact (refer to Figure 3), use a sharp knife to cut away some of the plastic as shown by the dotted line (2).
  6. Install the front dust cover (2). Refer to Figure 1.
  7. After the front dust cover is installed (refer to Figure 2), position the rear cover so that the tab (3) on the front cover is behind the rear cover, as shown. When properly positioned, the alignment features (1 and 2) will be positioned as shown with the tab (3) hidden from view.

Warranty Information

For vehicles repaired under warranty, use:

Labor Operation

Description

Labor Time

J1440

Cover, Flywheel - Replace

Use Published Labor Operation Time