For 1990-2009 cars only
Tools Required
J 41712 Oil Pressure Switch Socket
Removal Procedure
- Raise and support the vehicle. Refer to Lifting and Jacking the Vehicle in General Information.
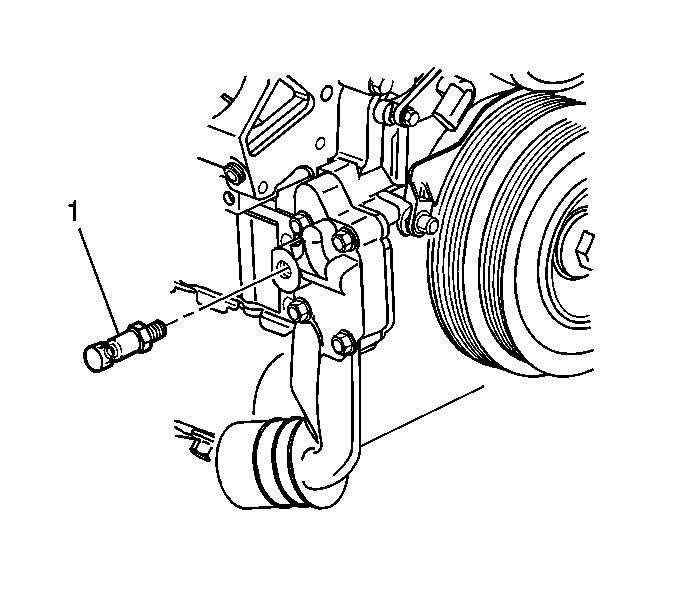
- Disconnect the electrical connector from the engine oil pressure switch (1).
- Remove the engine oil pressure switch (1) from the oil filter adapter using the J 41712 .
Installation Procedure
- Install the engine oil pressure switch (1) to the oil filter adapter using the J 41712 .
- Connect the electrical connector to the engine oil pressure switch (1).
- Lower the vehicle.
- Inspect for oil leaks after engine start up.
- Adjust the engine oil level to the full mark.
Notice: Replacement components must be the correct part number for the application. Components requiring the use of the thread locking compound, lubricants, corrosion inhibitors, or sealants are identified in the service procedure. Some replacement components may come with these coatings already applied. Do not use these coatings on components unless specified. These coatings can affect the final torque, which may affect the operation of the component. Use the correct torque specification when installing components in order to avoid damage.
Tighten
Tighten the engine oil pressure switch to 16 N·m (12 lb ft).
