Circuit Description
The powertrain control module (PCM) continuously monitors the heated oxygen sensor (HO2S) activity for 100 seconds. During the monitor period the PCM counts the number of times that the HO2S responds from rich to lean and from lean to rich and adds the amount of time it took to complete all transitions. With this information, an average time for all transitions can be determined. The PCM then divides the rich to lean average by the lean to rich average to obtain a ratio. If the HO2S transition time ratio is not within range, DTC P1134 will be set, indicating that the oxygen sensor is not responding as expected to changes in exhaust oxygen content.
Conditions for Setting the DTC
| • | No injector circuit, MAF sensor, TP sensor, EVAP system, IAT sensor, MAP sensor, Fuel trim, EGR, ECT sensor, or H02S heater circuit sensor 1 DTCs set. |
| • | The engine is running in closed loop. |
| • | Above conditions present for a 100 second monitoring period. |
| • | (VIN 1) Ratio of average response times is not between 0.3 and 6. |
| • | (VIN K) Ratio of average response times is not between 0.3 and 3.5. |
Action Taken When the DTC Sets
| • | The PCM will illuminate the malfunction indicator lamp (MIL) during the second consecutive trip in which the diagnostic test has been run and failed. |
| • | The PCM will store conditions which were present when the DTC set as Freeze Frame and Failure Records data. |
Conditions for Clearing the MIL/DTC
| • | The PCM will turn OFF the MIL during the third consecutive trip in which the diagnostic has been run and passed. |
| • | The History DTC will clear after 40 consecutive warm-up cycles have occurred without a malfunction. |
| • | The DTC can be cleared by using the scan tool. |
Diagnostic Aids
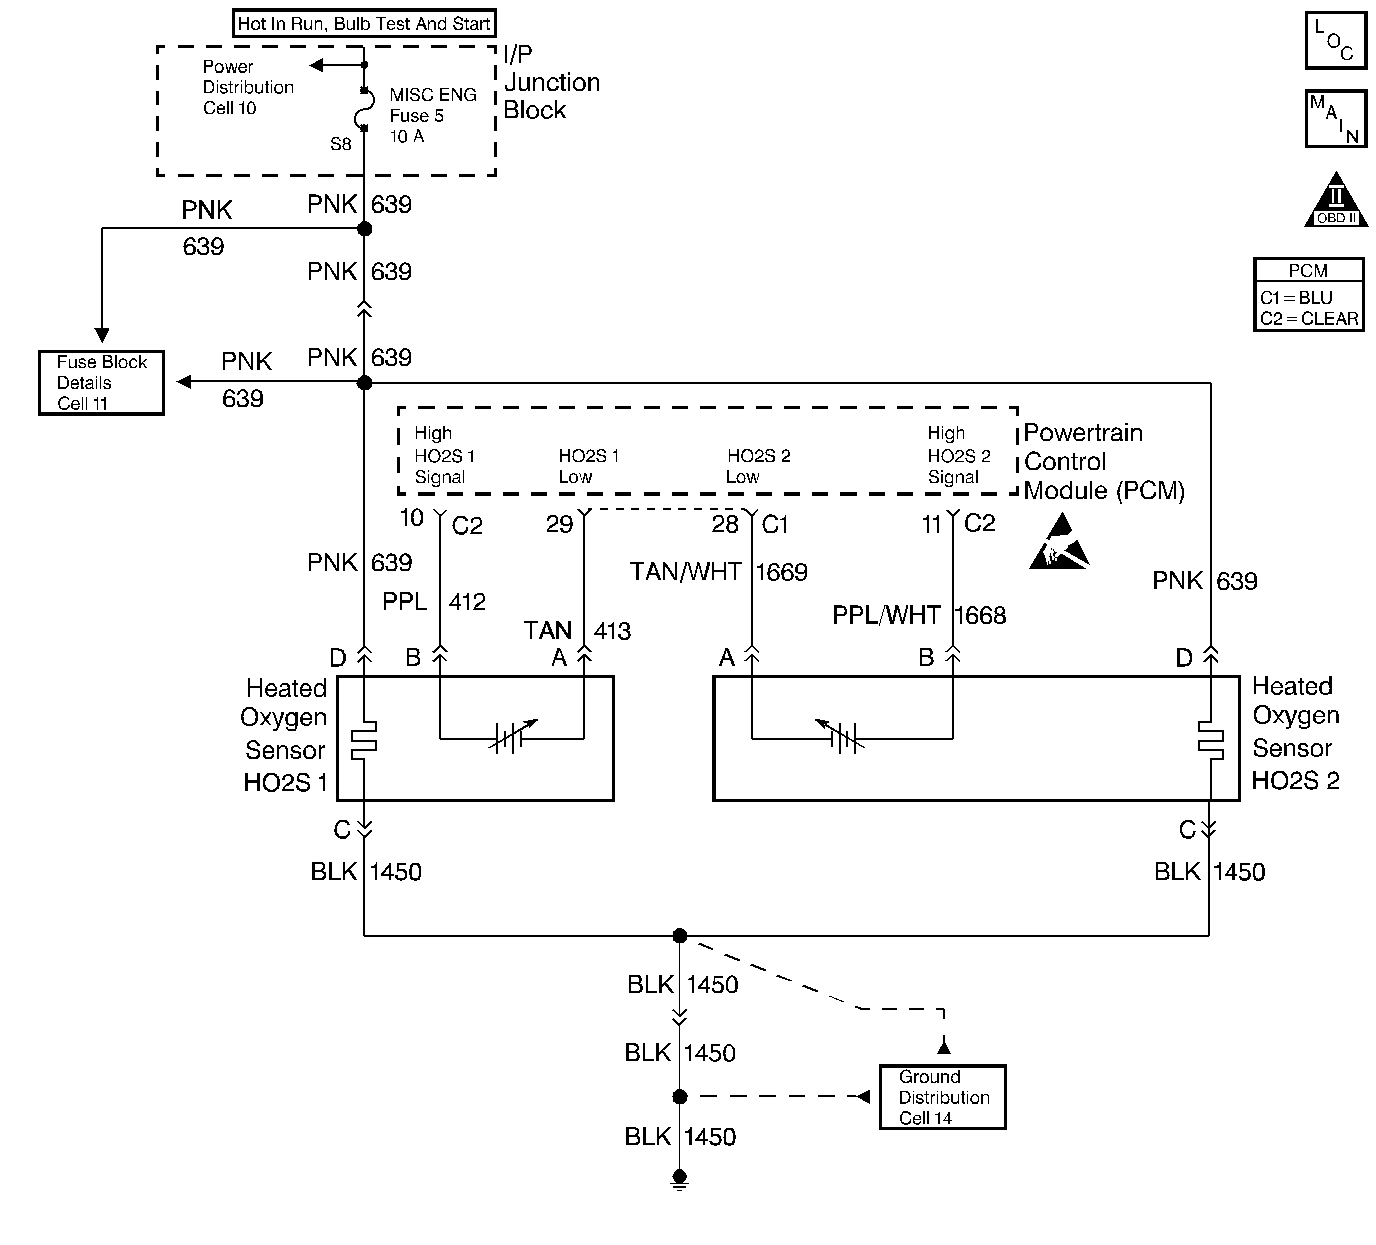
A poor connection in the HO2S heater ignition feed or ground circuit may cause the DTC to set. Check HO2S heater circuitry for intermittent malfunctions or poor connections. If connections and wiring are OK and the DTC continues to set, replace the HO2S 1.
Reviewing the Fail Records vehicle mileage since the diagnostic test last failed may help determine how often the condition that caused the DTC to be set occurs. This may assist in diagnosing the condition.
Test Description
Numbers below refer to the step numbers on the Diagnostic Table.
-
This step checks for conditions which may cause the DTC to set with a good heated oxygen sensor. Correct any of the described conditions if present.
-
Before replacing the HO2S, check for silicon contamination. Refer to
Notice: Contamination of the oxygen sensor can result from the use of an inappropriate RTV sealant (not oxygen sensor safe) or excessive engine coolant or oil consumption. Remove the HO2S and visually inspect the portion of the sensor exposed to the exhaust stream in order to check for contamination. If contaminated, the portion of the sensor exposed to the exhaust stream will have a white powdery coating. Silicon contamination causes a high but false HO2S signal voltage (rich exhaust indication). The control module will then reduce the amount of fuel delivered to the engine, causing a severe driveability problem. Eliminate the source of contamination before replacing the oxygen sensor.
.
Step | Action | Values | Yes | No | ||||||||
|---|---|---|---|---|---|---|---|---|---|---|---|---|
1 | Was the Powertrain On-Board Diagnostic (OBD) System Check performed? | -- | ||||||||||
2 |
Important:: If any DTCs are set (except P1133), go to those DTCs before proceeding with this diagnostic table.
Does the scan tool indicate DTC failed this ignition? | -- | Go to Diagnostic Aids | |||||||||
3 |
Was a problem found? | -- | ||||||||||
Visually/physically inspect the following items:
Was a problem found in any of the above areas? | -- | |||||||||||
5 |
Does the scan tool indicate voltage near the specified value? | 450 mV | ||||||||||
6 |
Does scan tool indicate voltage less than the specified value? | 300 mV | ||||||||||
Replace affected Heated Oxygen Sensors. Refer to Heated Oxygen Sensor Replacement . Is action complete? | -- | -- | ||||||||||
8 | Repair condition as necessary. Is action complete? | -- | -- | |||||||||
9 | Repair open HO2S 1 low signal circuit or grounded HO2S 1 high signal circuit. Refer to Heated Oxygen Sensor Wiring Repairs . Is action complete? | -- | -- | |||||||||
10 | Repair open HO2S 1 high signal circuit or poor connections at the PCM. Refer to Heated Oxygen Sensor Wiring Repairs . Is action complete? | -- | -- | |||||||||
11 |
Does the scan tool indicate DTC failed this ignition? | -- | System OK |
