For 1990-2009 cars only
Removal Procedure
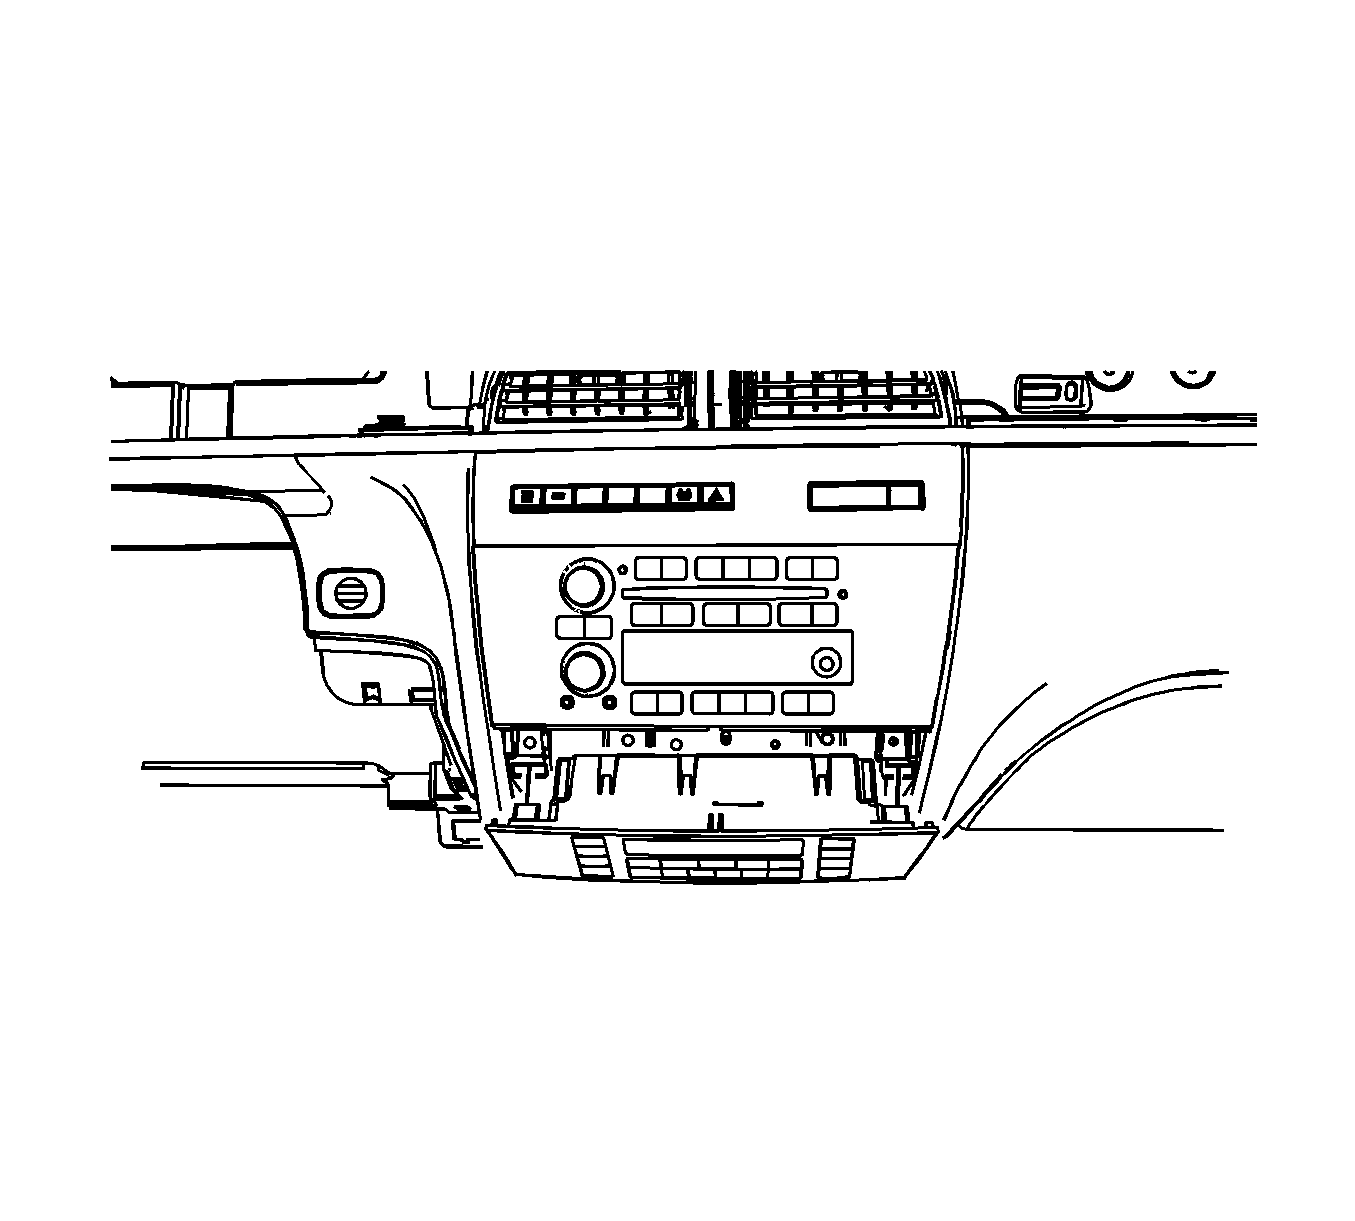
- Remove the instrument panel lower trim plate. Refer to Instrument Panel Lower Trim Plate Replacement.
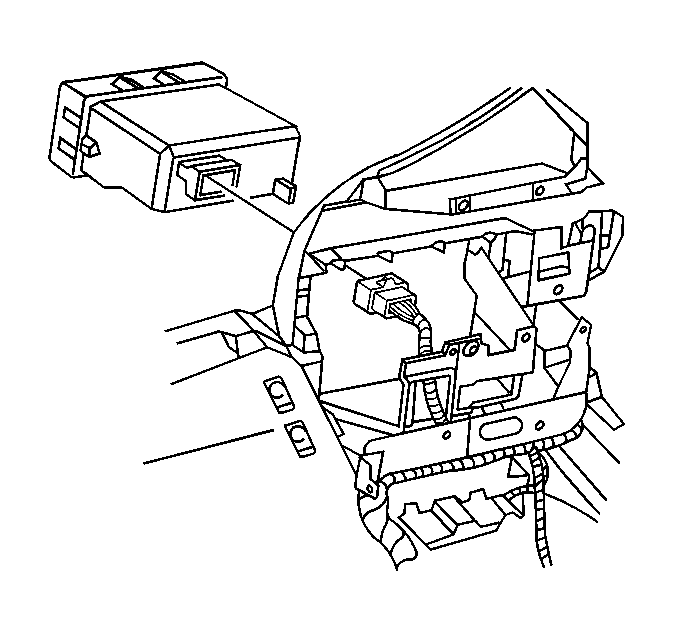
- Remove the HVAC control module mounting screws (1).
- Pull the HVAC control module rearward from the instrument panel.
- Disconnect the electrical connectors form the HVAC control module.
- Remove the HVAC control module.

Note: Retaining clips hold the HVAC control module in place.
Installation Procedure
- Connect the electrical connectors to the HVAC control module.
- Install the HVAC control module.
- Install the HVAC control module mounting screws.
- Install the instrument panel lower trim plate. Refer to Instrument Panel Lower Trim Plate Replacement.
- Start the engine and run for 1 minute. Refer to Control Module References for programming and setup information.
Note: The key should be in the off position when connecting the electrical connectors to ensure proper calibration.
Caution: Refer to Fastener Caution in the Preface section.
Tighten
Tighten the screws to 2 N·m (18 lb in).
Note: Do not adjust any controls on the HVAC control module while the HVAC control module is calibrating. If interrupted improper HVAC performance will result.
