For 1990-2009 cars only
Removal Procedure
- Raise and support the vehicle. Refer to Lifting and Jacking the Vehicle.
- Remove the left front tire and wheel. Refer to Tire and Wheel Removal and Installation.
- Remove the left engine splash shield. Refer to Engine Splash Shield Replacement.
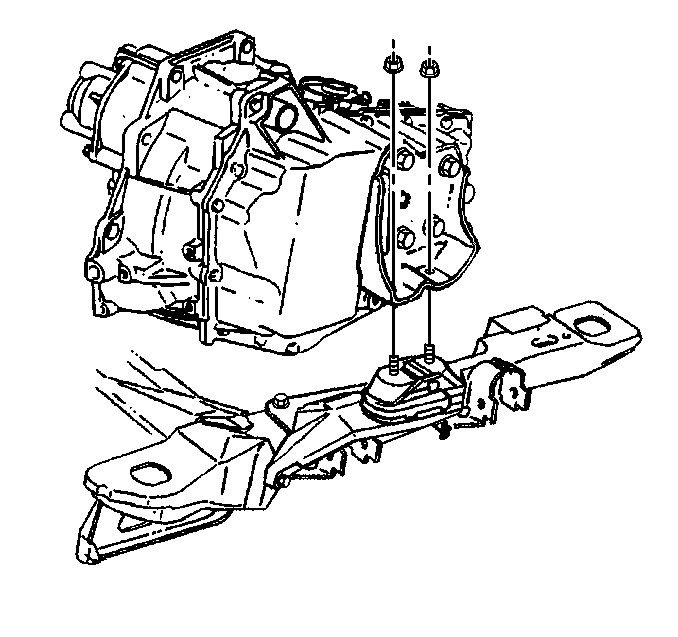
- Use floor stands to support the transaxle.
- With a jack, slightly take the weight off mount, and remove the transaxle bracket to transaxle mount upper nuts.
- Remove the transaxle bracket to transaxle bolts.
- Remove the transaxle bracket.
Installation Procedure
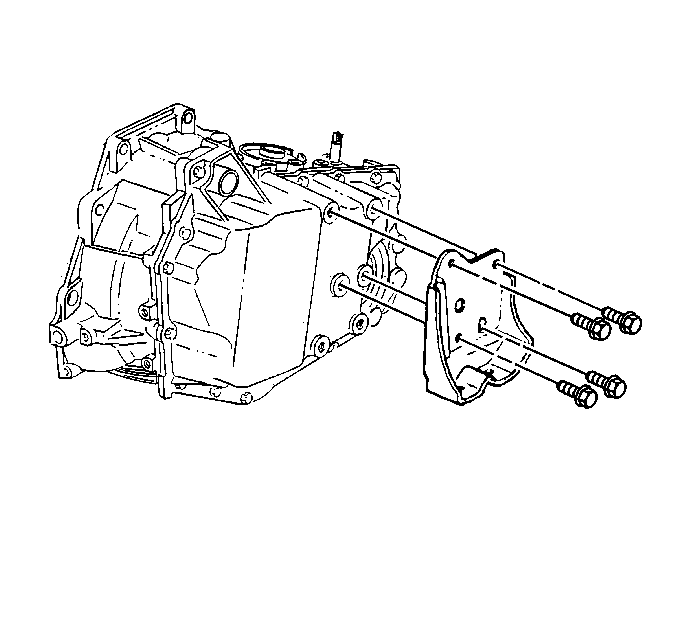
- Position the transaxle bracket to the transaxle.
- Hand start the transaxle mount bracket to transaxle bolts.
- Install the transaxle bracket bolts.
- Remove the support from the transaxle.
- Install the transaxle bracket to the transaxle mount upper nuts.
- Install the left engine splash shield. Refer to Engine Splash Shield Replacement.
- Install the left front tire and wheel. Refer to Tire and Wheel Removal and Installation.
- Lower the vehicle.
Caution: Refer to Fastener Caution in the Preface section.
Tighten
Start with the forward lower bolt and work clockwise to tighten the transaxle bracket bolts to 95 N·m (70 lb ft).
Tighten
Tighten the nuts to 47 N·m (35 lb ft).
