For 1990-2009 cars only
Removal Procedure
Notice: Care should be taken to avoid chipping or scratching the coating when handling the suspension coil spring. Damage to the coating can cause premature failure.
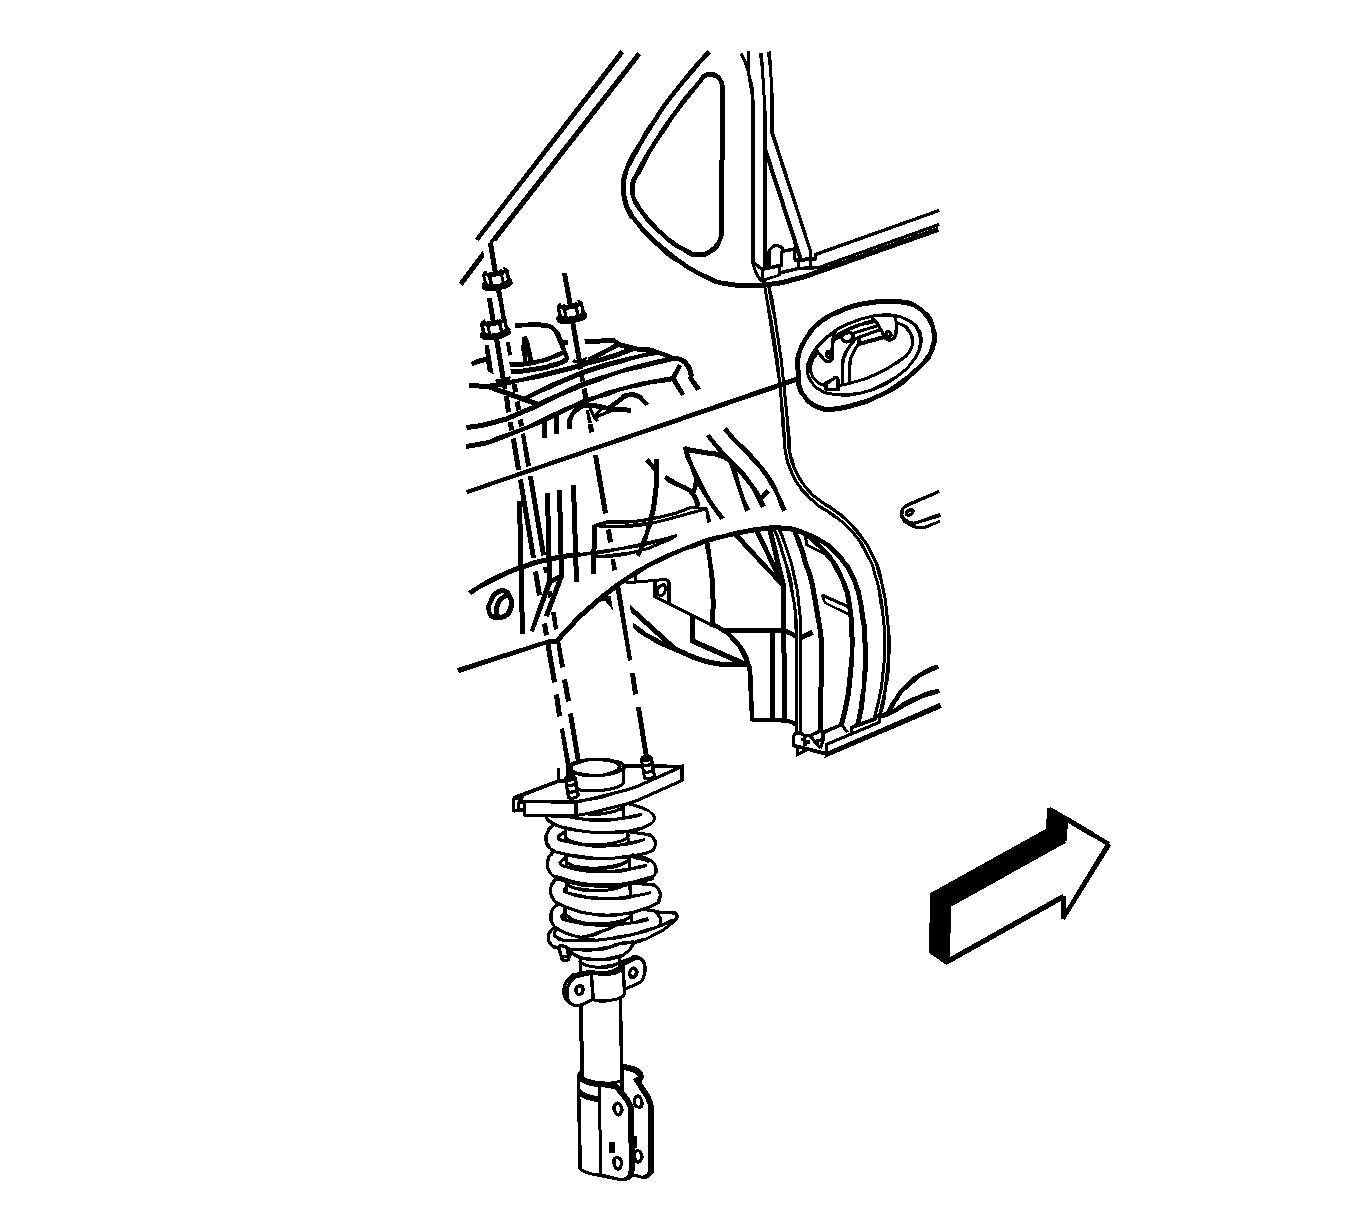
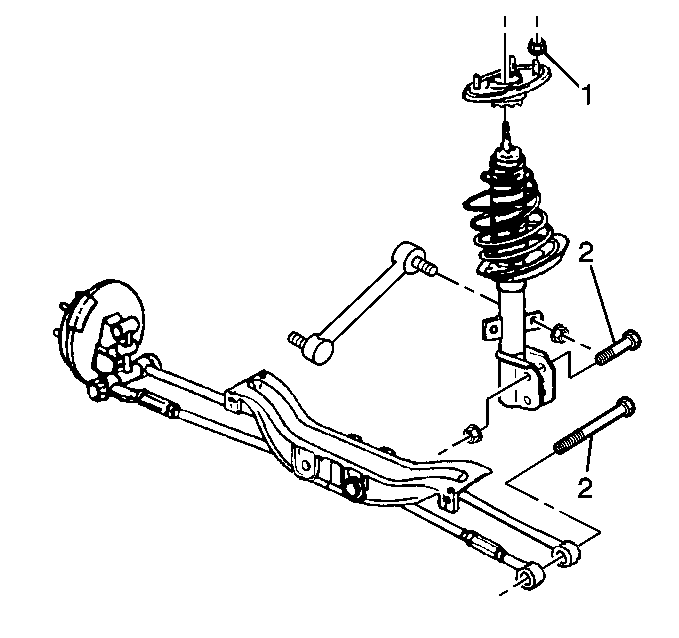
- Remove the strut-to-body mount nuts.
- Raise and support the vehicle. Refer to Lifting and Jacking the Vehicle .
- Remove the tire and wheel assembly. Refer to Tire and Wheel Removal and Installation .
- Remove the stabilizer shaft link from the strut. Refer to Stabilizer Shaft Link Replacement .
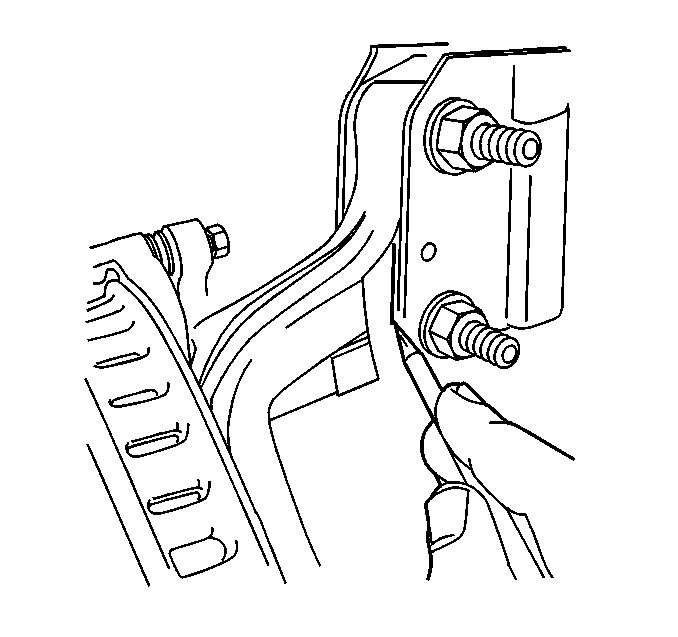
- Scribe the strut to the knuckle.
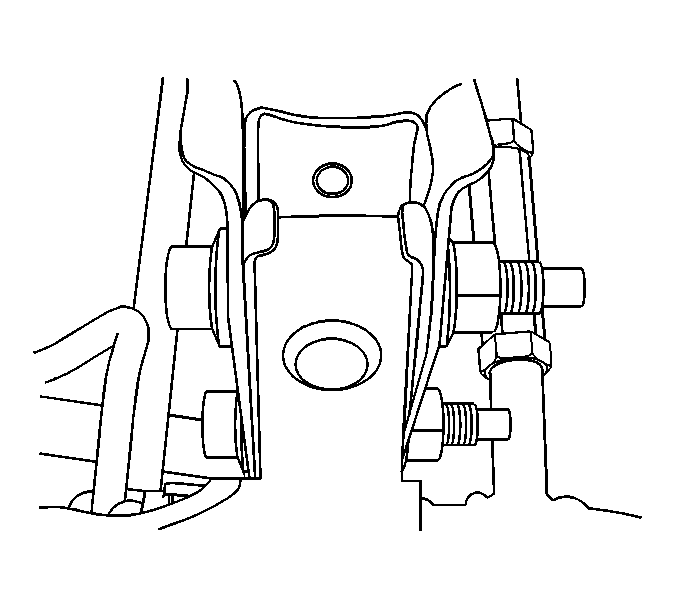
- Remove the strut to knuckle bolts.
- Remove the strut from the vehicle.
Notice: The knuckle must be retained after the strut-to-knuckle bolts have been removed. Failure to observe this may cause ball joint and/or wheel drive shaft damage.
Installation Procedure
Notice: Care should be taken to avoid chipping or scratching the coating when handling the suspension coil spring. Damage to the coating can cause premature failure.
- Install the strut into place.
- Install the strut to knuckle bolts.
- Connect the stabilizer shaft link to the strut. Refer to Stabilizer Shaft Link Replacement .
- Install the tire and wheel. Refer to Tire and Wheel Removal and Installation .
- Install strut to body mount nuts (1).
- Lower the vehicle.
- Adjust the rear wheel alignment. Refer to Wheel Alignment Specifications .
Notice: Refer to Fastener Notice in the Preface section.
Tighten
Tighten the strut to knuckle bolts and nuts to 120 N·m
(89 lb ft).
Tighten
Tighten the strut to body mount nuts to 45 N·m
(33 lb ft).
