Removal Procedure
Important: Clean the fuel and evaporative emission (EVAP) connections and surrounding areas prior to disconnecting the lines in order to avoid possible system contamination.
- Relieve the fuel system fuel pressure. Refer to Fuel Pressure Relief .
- Drain the fuel tank. Refer to Fuel Tank Draining .
- Raise and support the vehicle. Refer to Lifting and Jacking the Vehicle .
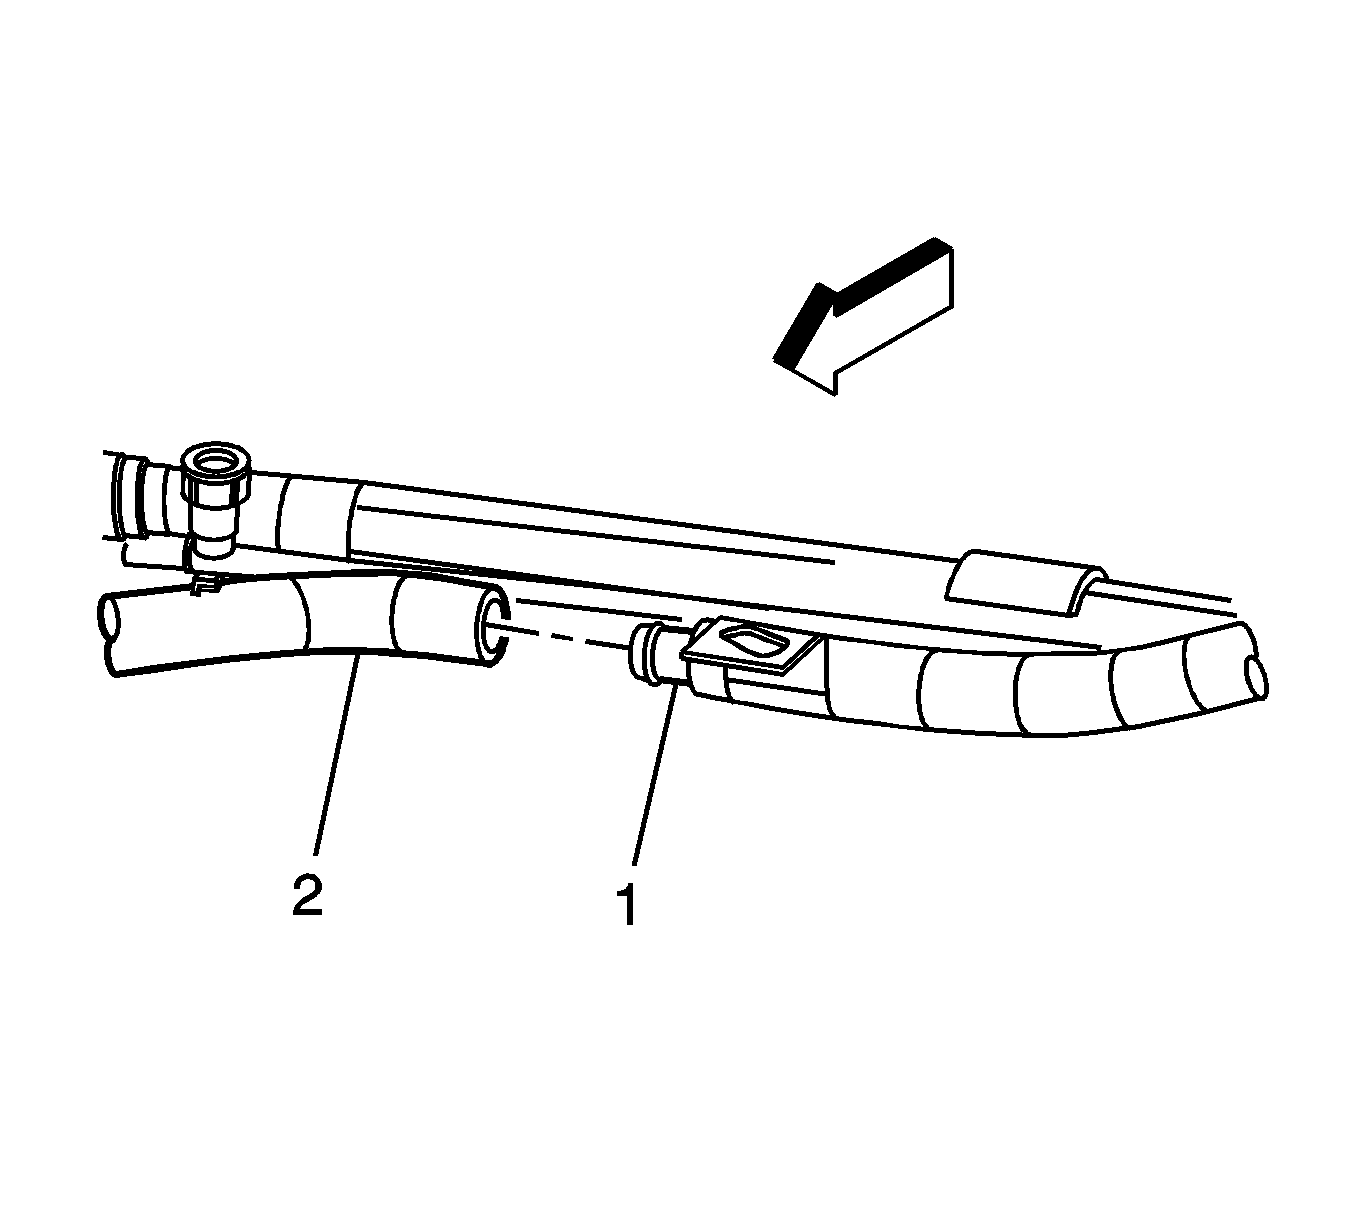
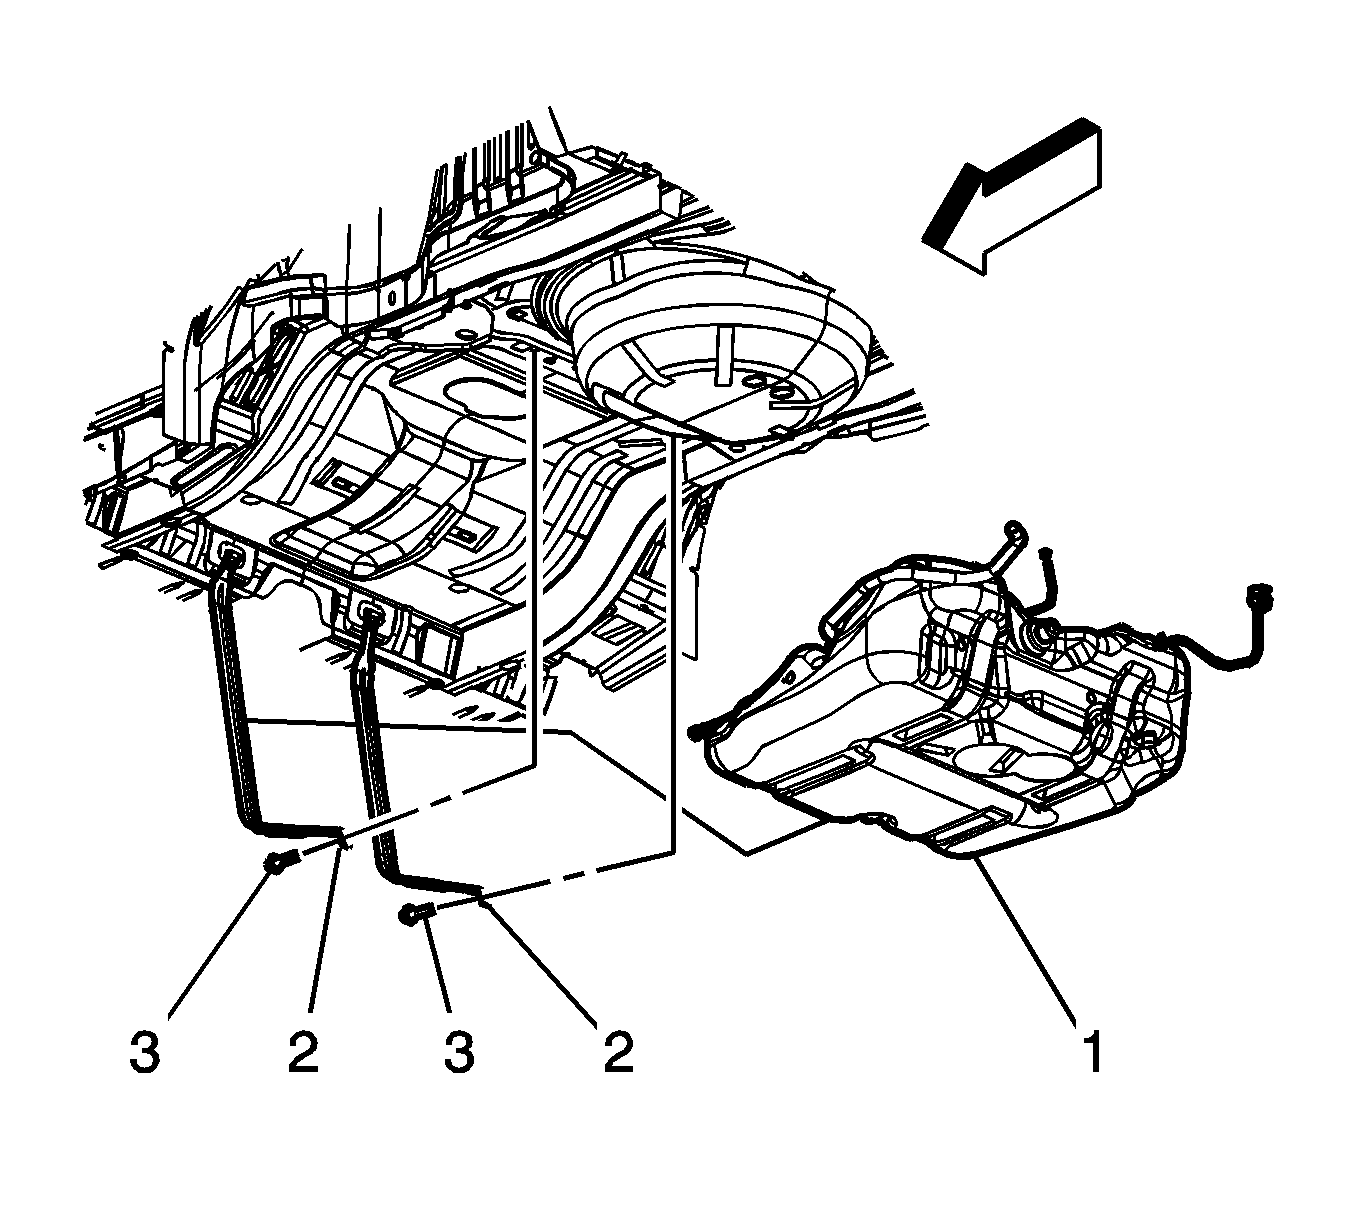
- Loosen the fuel fill hose clamp (1) at the fuel tank.
- Remove the fuel tank fill hose (2) from the fuel tank (3).
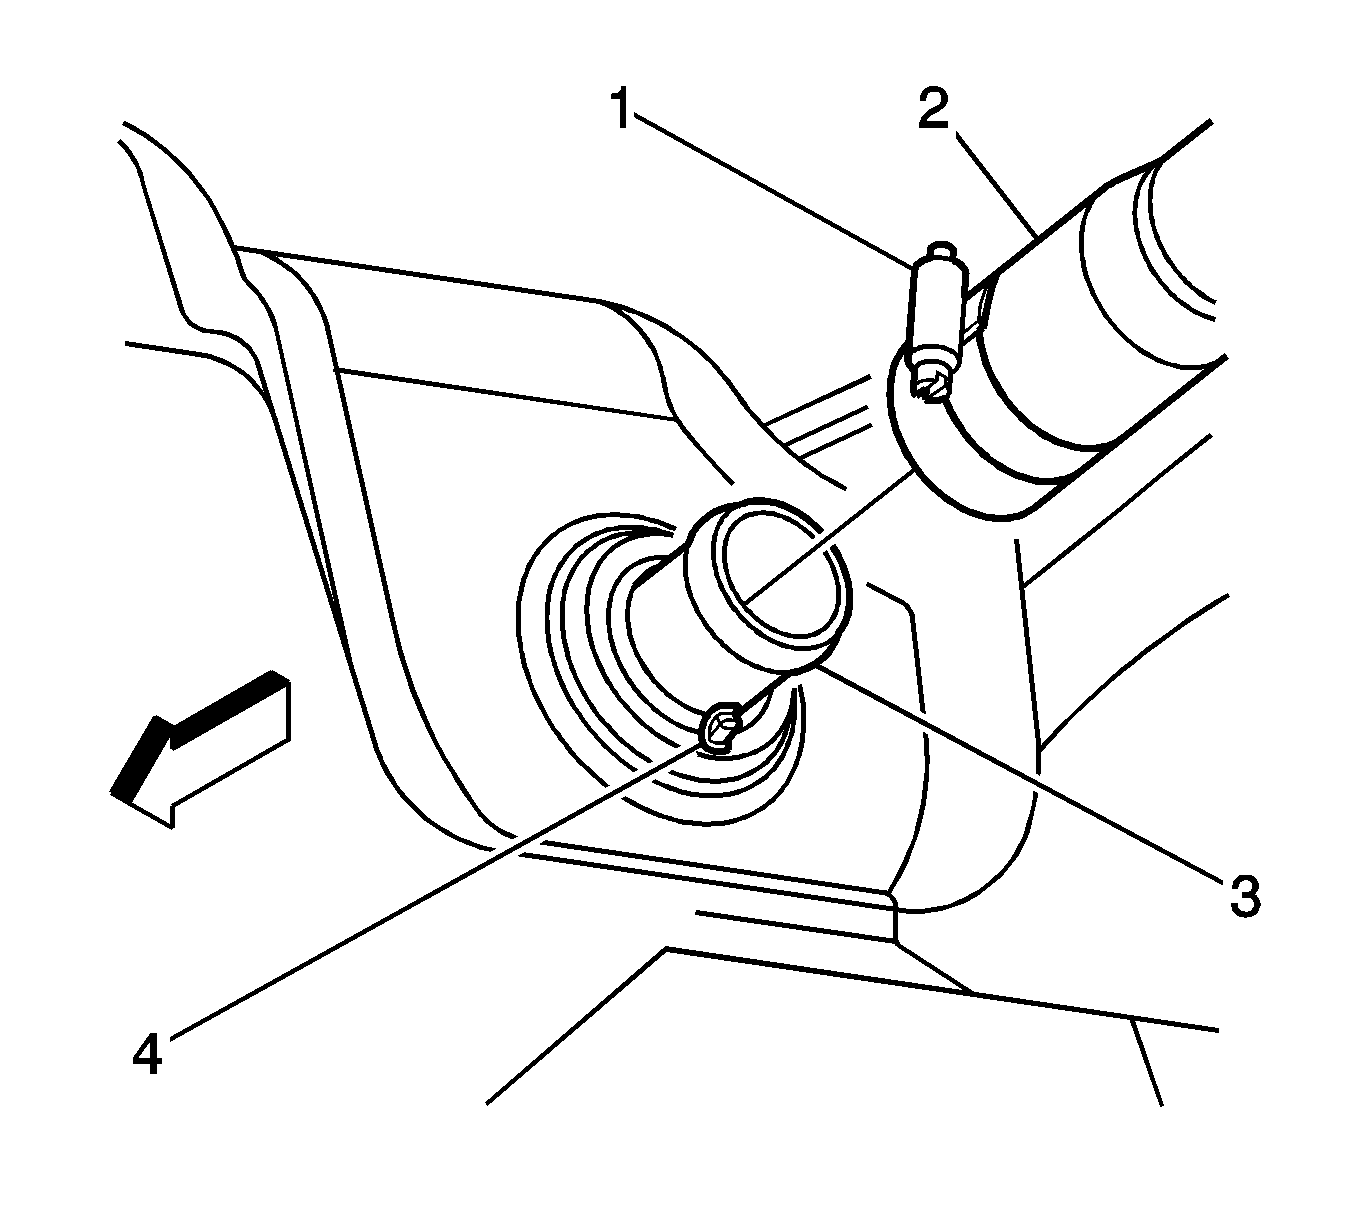
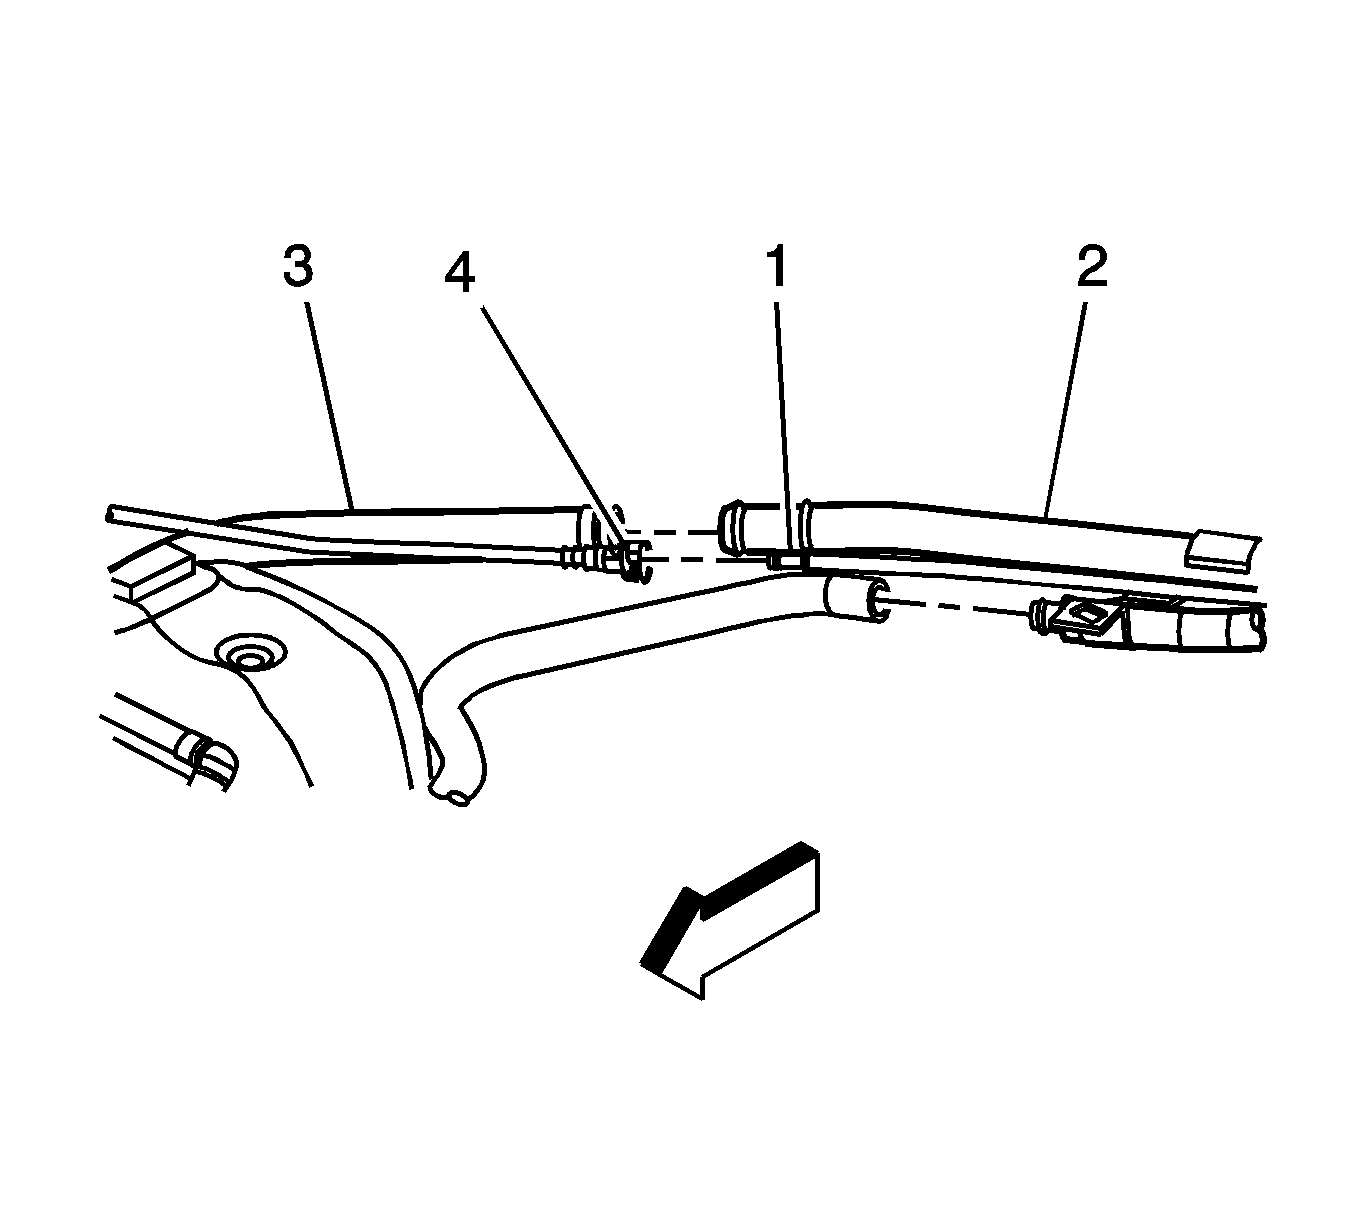
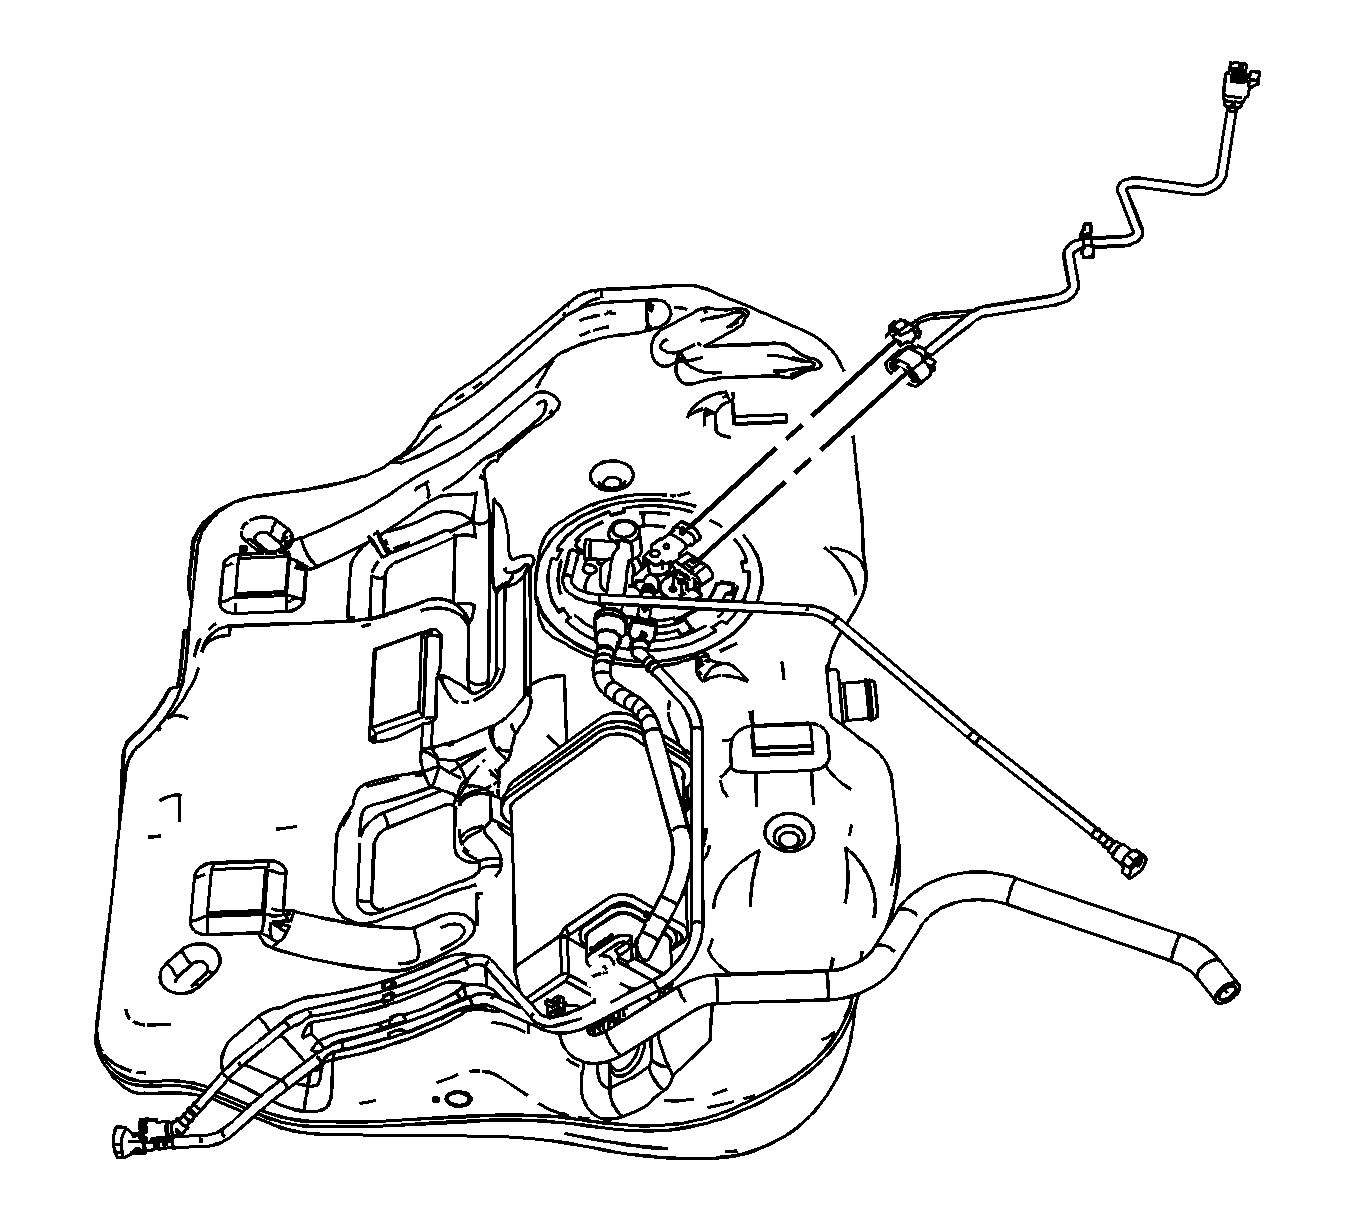
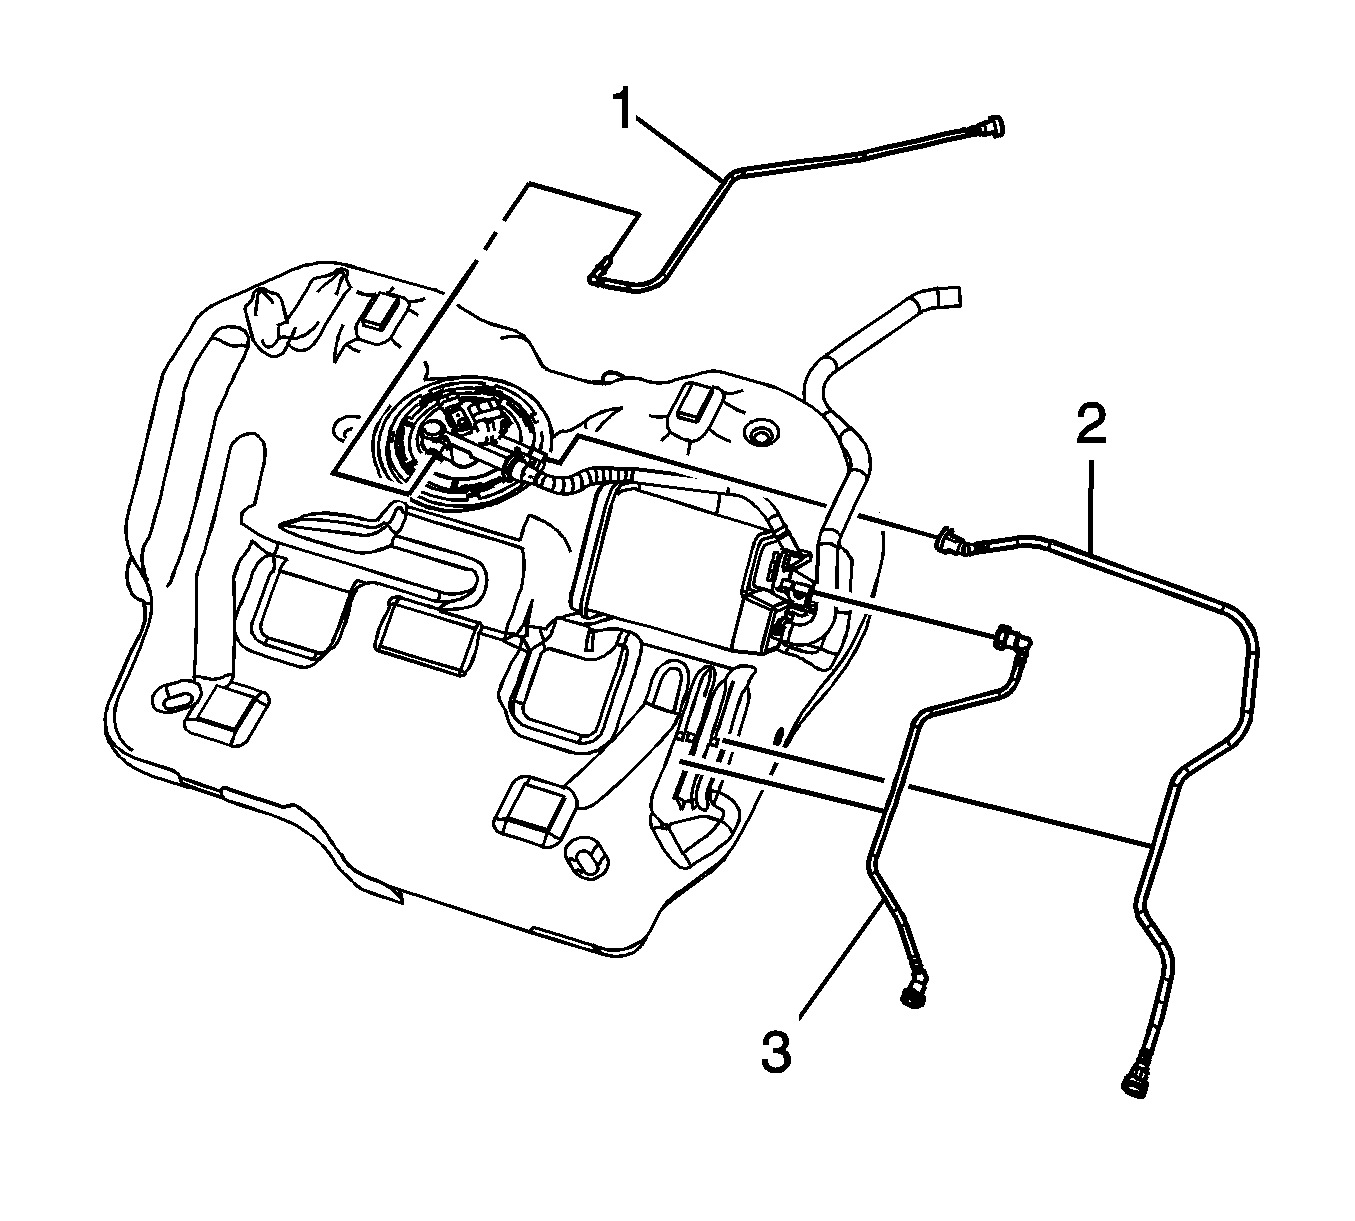
- Disconnect the EVAP vent solenoid hose (2) on the tank from the EVAP vent valve solenoid hose (1).
- Disconnect the EVAP vent pipe quick connect fitting (4) from the fill pipe EVAP vent pipe quick connect fitting (1). Refer to Plastic Collar Quick Connect Fitting Service .
- Disconnect the fuel feed (3), and the EVAP (4) lines from the fuel tank lines (1, 2). Refer to Plastic Collar Quick Connect Fitting Service .
- Support the exhaust system.
- Remove the rubber exhaust pipe hangers in order to allow the exhaust system to drop slightly.
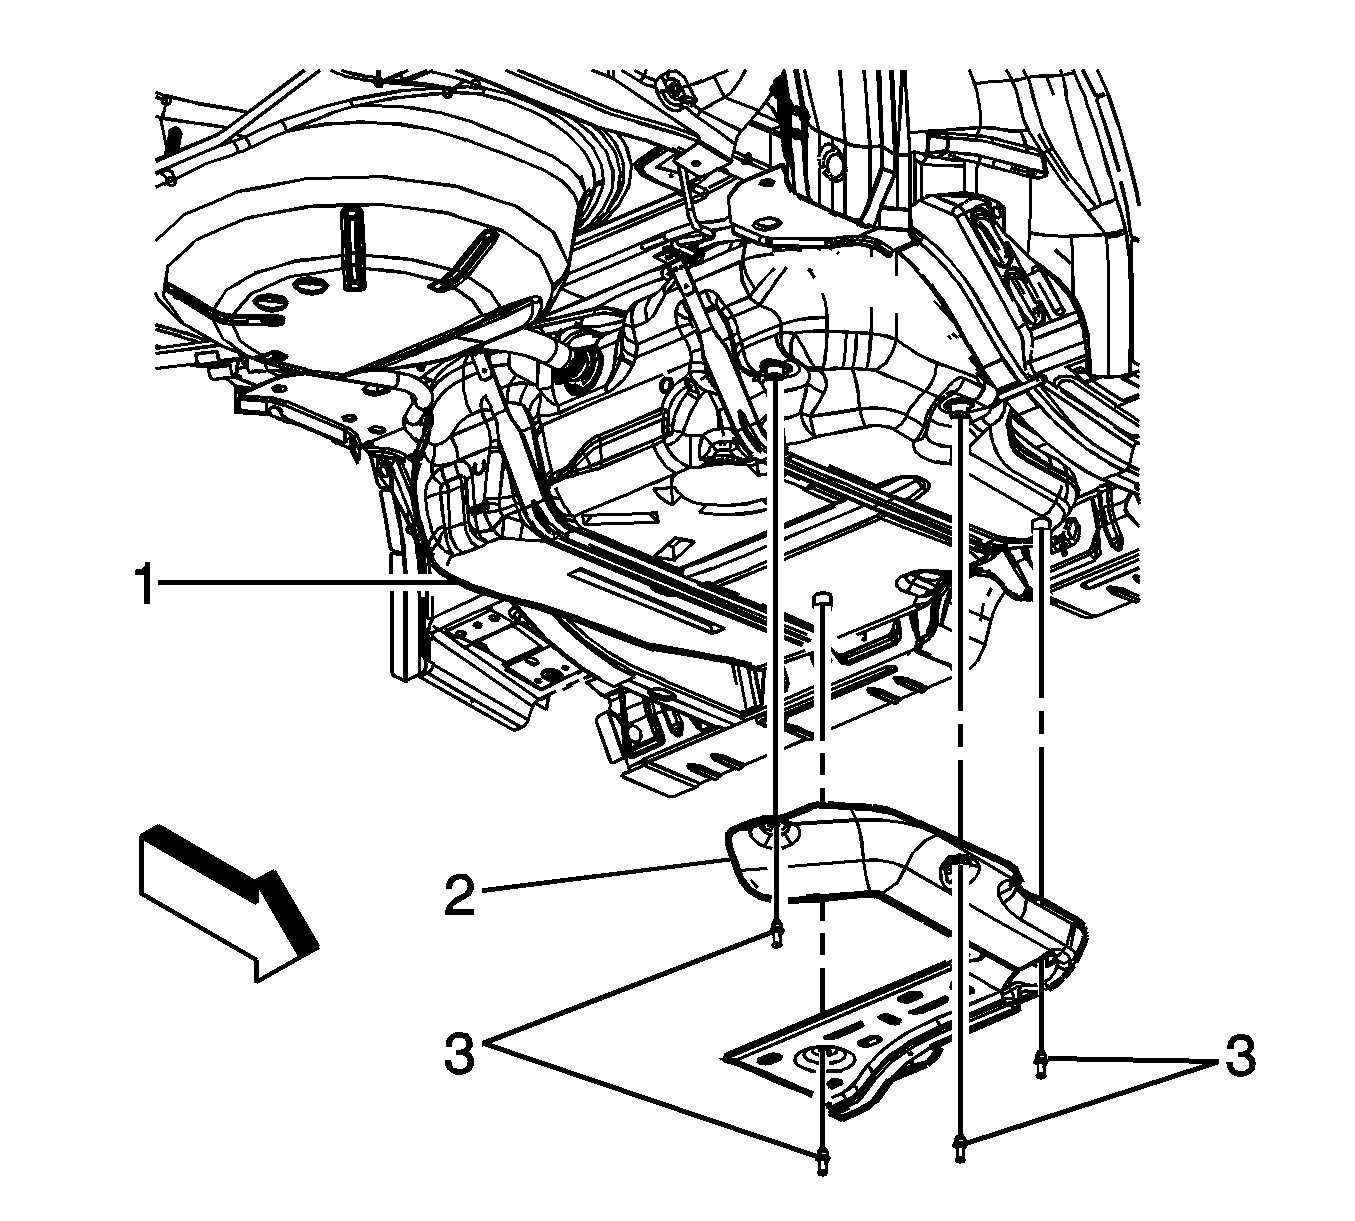
- Remove the fuel tank shield retainers (3).
- Remove the fuel tank shield (2).
- Support the fuel tank with a suitable adjustable jack.
- Remove the fuel tank strap bolts (3).
- Using the jack lower the fuel tank.
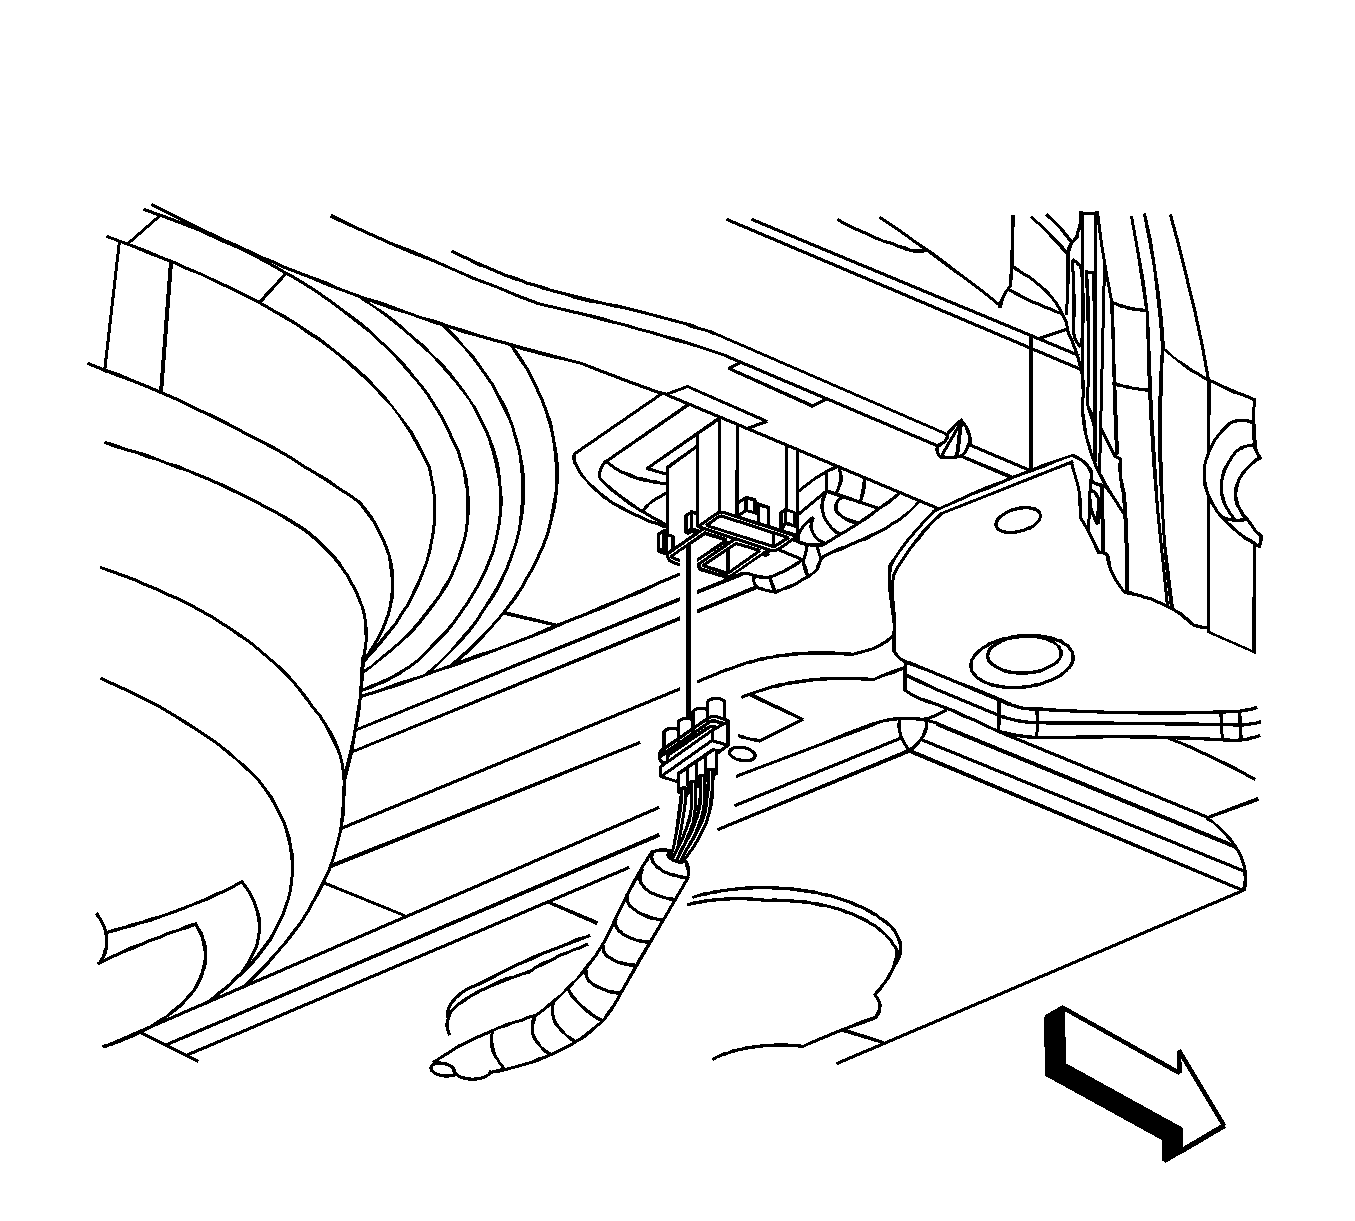
- Disconnect the fuel sender jumper harness electrical connector.
- Remove the fuel tank and place the tank in a suitable work area.
- Disconnect and remove the fuel pressure sensor and fuel sender jumper harness electrical connectors.
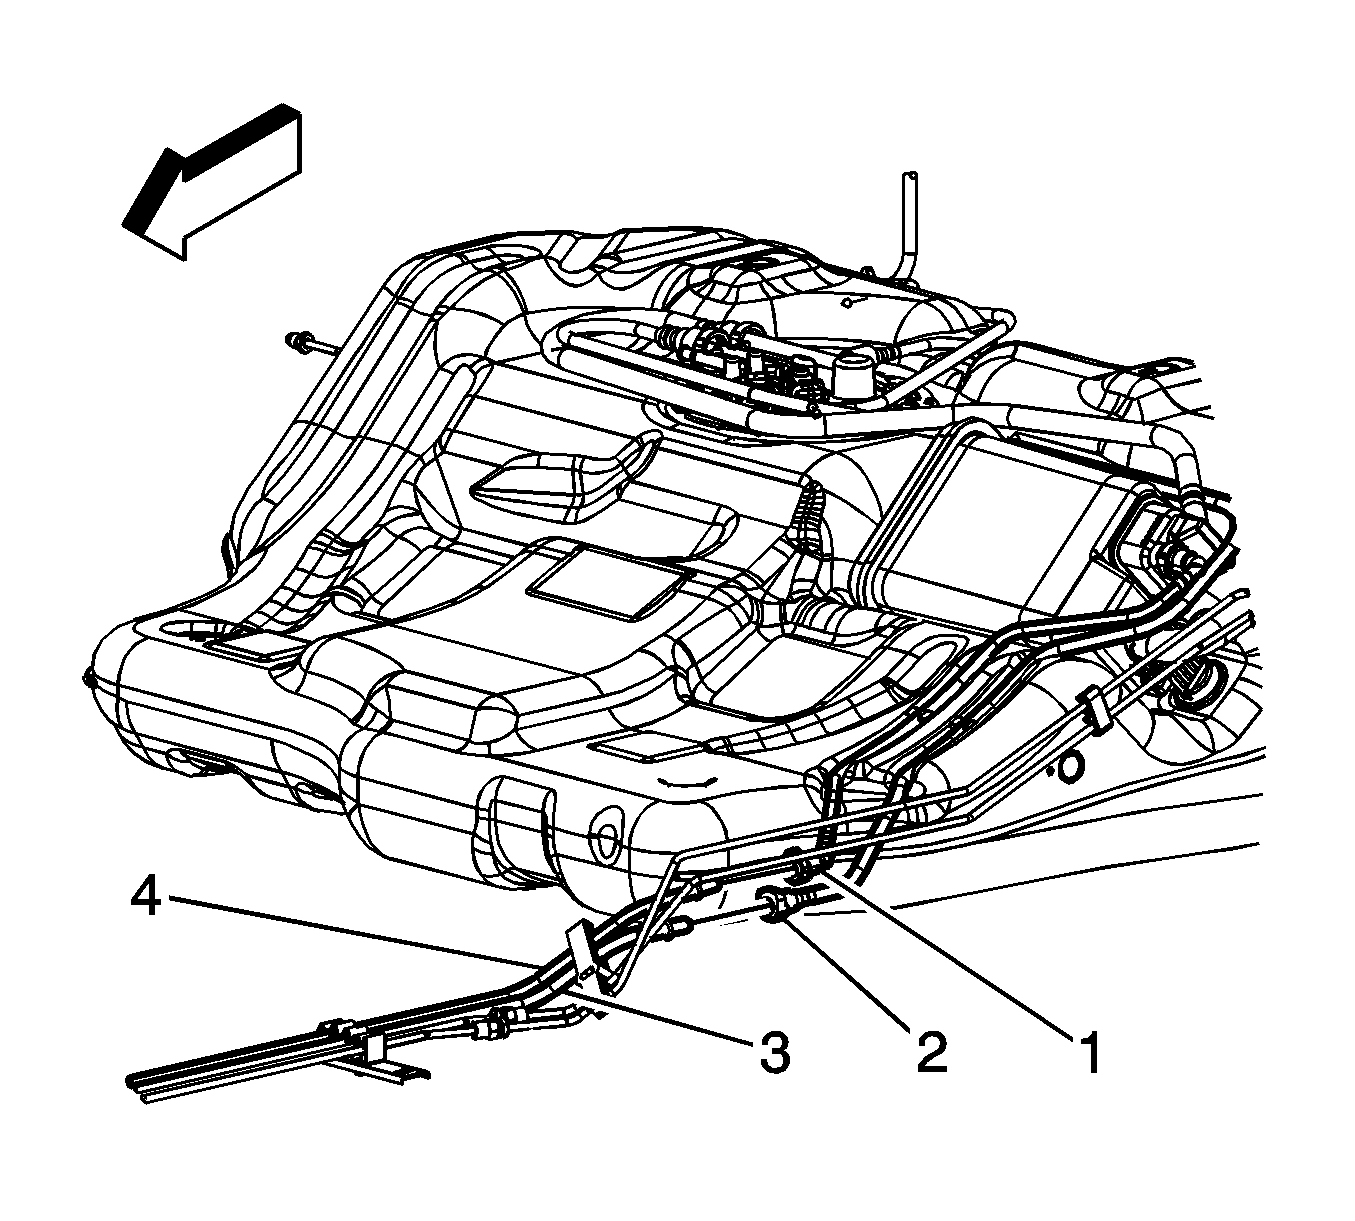
- Disconnect and remove the fuel feed line (3), and the EVAP lines (1, 2). Refer to Plastic Collar Quick Connect Fitting Service .
- Remove the EVAP canister. Refer to Evaporative Emission Canister Replacement .
- Remove the insulator pads from the fuel tank. Note the location of the insulator pads for installation.
Notice: Do not bend the fuel tank straps as this may damage the straps.
Important: Note the routing of the lines for installation.
Installation Procedure
Notice:
• Do not attempt to straighten kinked nylon pipes. Replace any kinked
nylon pipes in order to prevent damage to the vehicle. • Do not attempt to repair sections of nylon pipes. Replace damaged
nylon pipes. • Replace the vapor pipes with original equipment or parts that
meet GM specifications. • Replace the vapor hoses with original equipment or parts meeting
GM specifications. Use only reinforced fuel-resistant hose identified with
the word Fluoroelastomer or GM 6163M on the hose.
- Install the insulator pads to the fuel tank.
- Install the EVAP canister. Refer to Evaporative Emission Canister Replacement .
- Install and connect the fuel feed line (3), and the EVAP lines (1, 2). Refer to Plastic Collar Quick Connect Fitting Service .
- Install and connect the fuel pressure sensor and fuel sender jumper harness electrical connectors.
- Install the fuel tank onto a suitable jack.
- Partially raise the fuel tank until the electrical connections can be made.
- Connect the fuel sender jumper harness electrical connector.
- Completely raise the tank.
- Install the fuel tank strap bolts (3).
- Remove the jack from the fuel tank.
- Position the fuel tank shield (2) to the fuel tank.
- Install the shield retainers (3).
- Install the rubber exhaust pipe hangers.
- Remove the support from the exhaust system.
- Connect the fuel feed (3) , and EVAP (4) lines to the fuel tank lines (1, 2). Refer to Plastic Collar Quick Connect Fitting Service .
- Connect the EVAP vent pipe quick connect fitting (4) to the fill pipe EVAP vent pipe quick connect fitting (1). Plastic Collar Quick Connect Fitting Service .
- Connect the EVAP vent solenoid hose (2) on the tank to the EVAP vent valve solenoid hose (1).
- Install the fuel tank fill hose (2) onto the fuel tank (3). Install the hose over the orientation feature (4) on the tank until fully seated to the tank.
- Tighten the fuel fill hose clamp (1) at the fuel tank.
- Lower the vehicle.
- Add fuel and install the fuel fill cap.
- Connect the negative battery cable. Refer to Battery Negative Cable Disconnection and Connection .
- Inspect the fuel system for leaks by performing the following steps:
- Install the fuel injector sight shield. Refer to Fuel Injector Sight Shield Replacement .
Notice: Refer to Fastener Notice in the Preface section.
Tighten
Tighten the bolts to 48 N·m (35 lb ft).
Tighten
Tighten the clamp to 2.5 N·m (22 lb in).
| 23.1. | Turn ON the ignition for 2 seconds. |
| 23.2. | Turn OFF the ignition for 10 seconds. |
| 23.3. | Turn ON the ignition. |
| 23.4. | Inspect for fuel leaks. |
