For 1990-2009 cars only
Tools Required
J 38185 Hose Clamp Pliers
Removal Procedure
- Drain the coolant. Refer to Cooling System Draining and Filling in Engine Cooling.
- Use J 38185 in order to position aside the heater hose inlet and outlet clamps at the heater core.
- Disconnect the inlet and outlet heater hose from the heater core.
- Remove the RH instrument panel closeout/insulator panel. Refer to Instrument Panel Insulator Panel Replacement - Right Side in Instrument Panel, Gages, and Console.
- Remove the LH instrument panel closeout/insulator panel. Refer to Instrument Panel Insulator Panel Replacement - Left Side in Instrument Panel, Gages, and Console.
- Remove the floor carpet. Refer to Front Floor Panel Carpet Replacement in Interior Trim.
- Remove the communication interface module. Refer to Communication Interface Module Replacement in Cellular Communication.
- Remove the rear floor air outlet duct from the holes in the floor reinforcement.
- Disconnect the rear floor air outlet duct from the heater core outlet cover.
- Remove the rear floor air outlet duct.
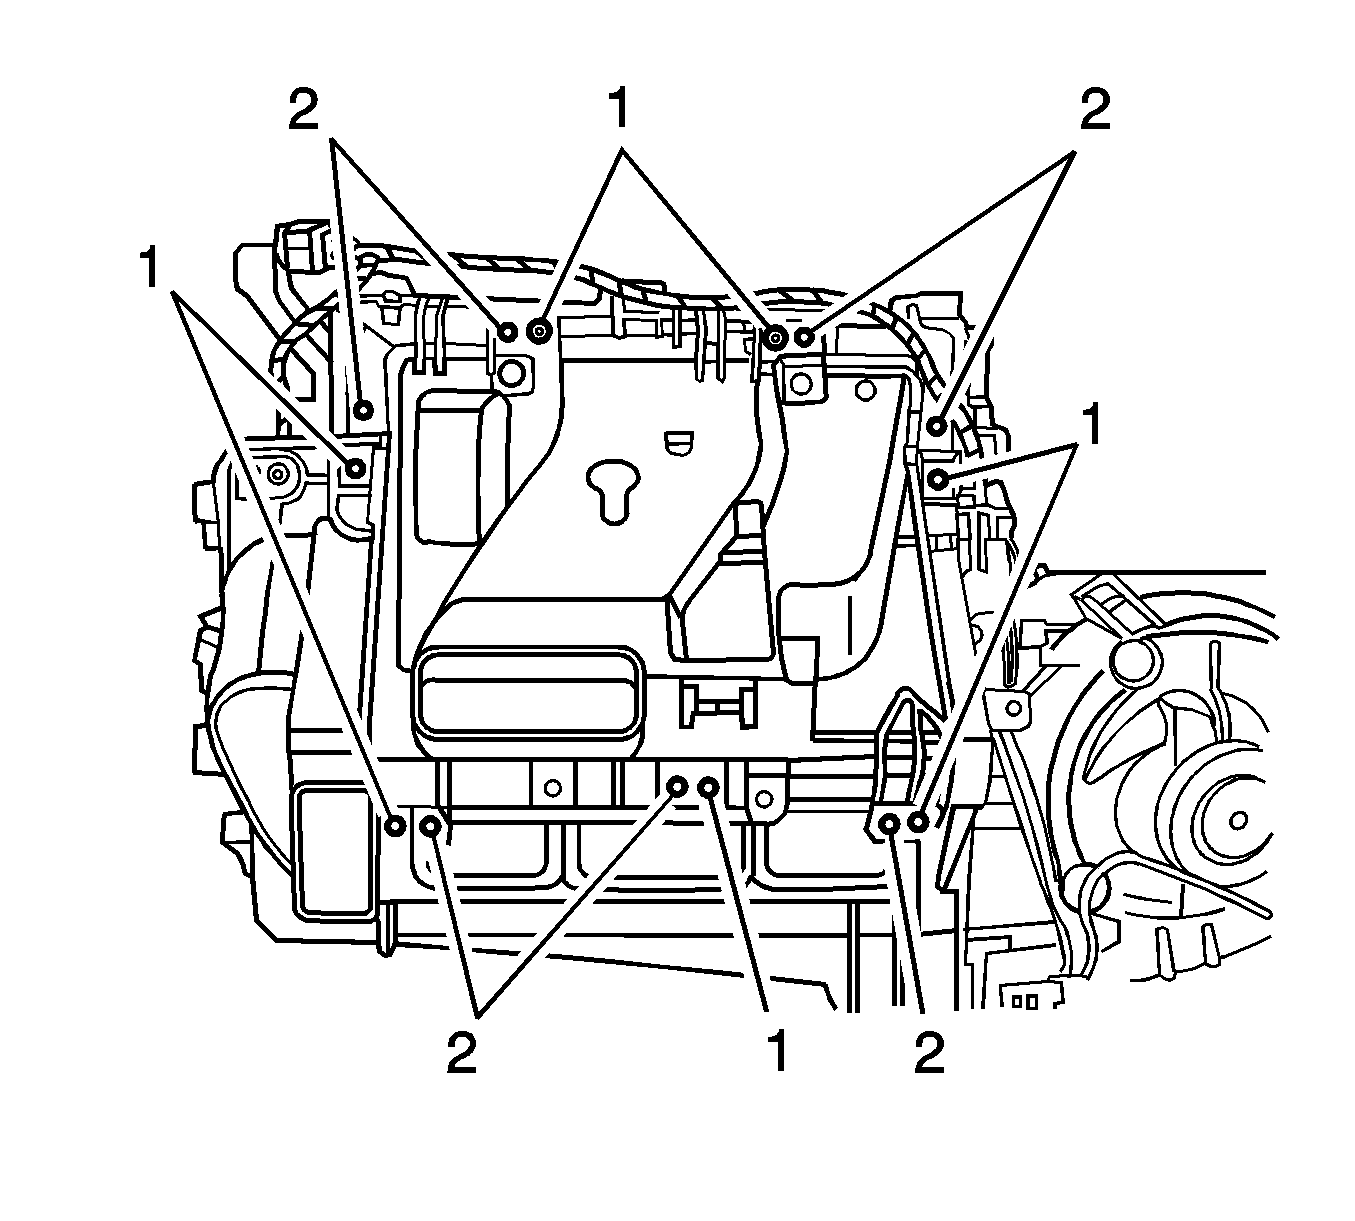
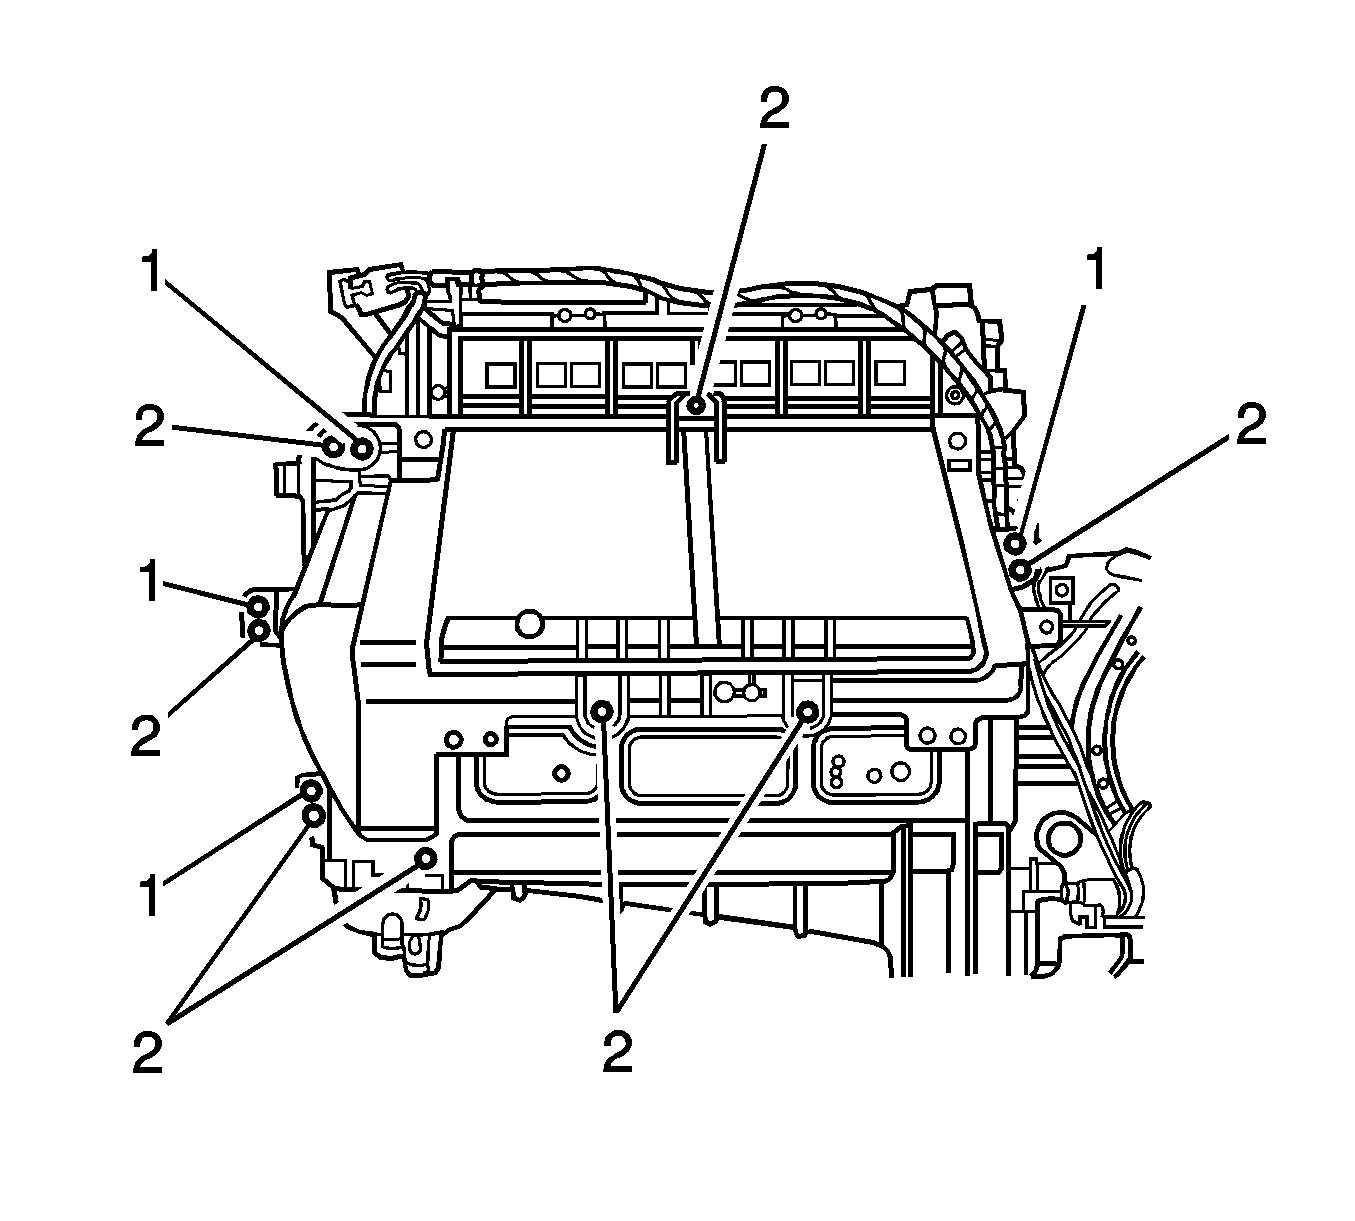
- Remove the heater core outlet cover screws (2).
- Remove the heater core outlet cover heat stakes (1) with a small chisel.
- Remove the heater core outlet cover from the HVAC module assembly.
- Remove the heater core cover screws (2).
- Remove the heater core cover heat stakes (1) with a small chisel.
- Remove the heater core cover from the HVAC module assembly.
- Remove the heater core from the HVAC module assembly.
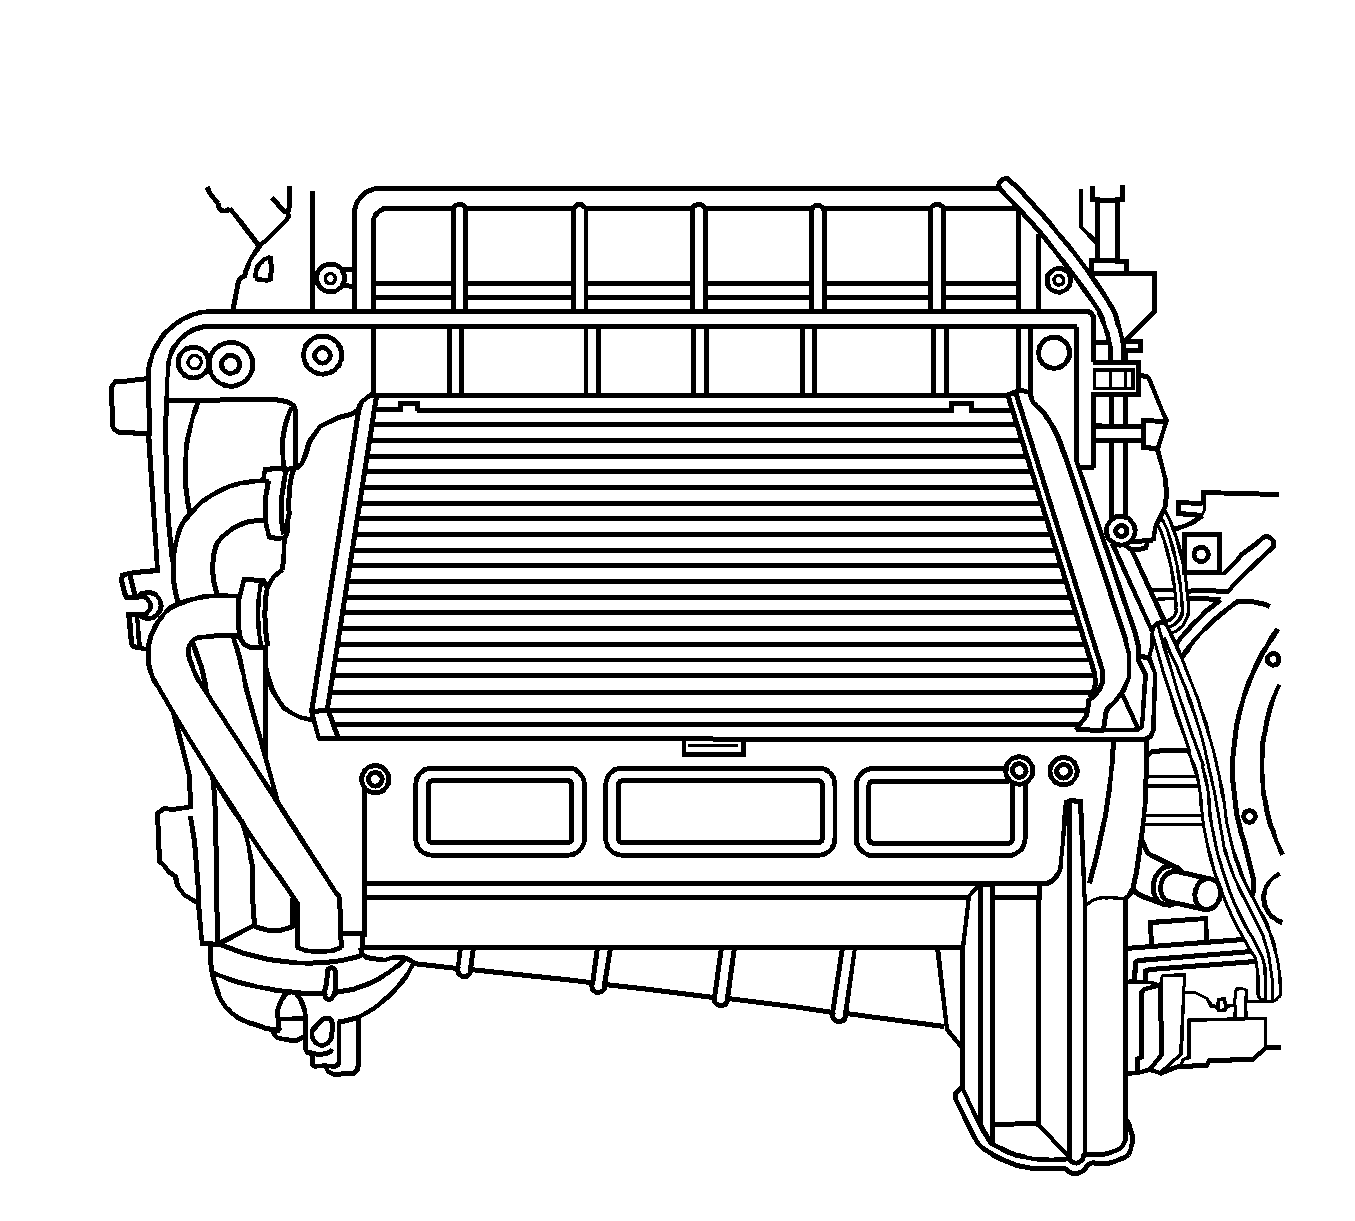

Remove the heater core foam seal (1) from the HVAC module assembly.
Installation Procedure
- Install a new heater core foam seal (1) to the HVAC module assembly.
- Install the heater core to the HVAC module assembly.
- From the inside of the heater core cover, drill the dimples adjacent to the heat stakes using a 5.5 mm (7/32 in) drill bit.
- Install the heater core cover.
- Install the heater core cover screws to the heater core cover.
- From the inside of the heater core outlet cover, drill the dimples adjacent to the heat stakes using a 5.5 mm (7/32 in) drill bit.
- Install the heater core outlet cover.
- Install the heater core outlet cover screws (2).
- Connect the rear floor air outlet duct to the heater core outlet cover.
- Install the rear floor air outlet duct to the holes in the floor reinforcement.
- Install the communication interface module. Refer to Communication Interface Module Replacement in Cellular Communication.
- Install the floor carpet. Refer to Front Floor Panel Carpet Replacement in Interior Trim.
- Install the RH instrument panel closeout/insulator panel. Refer to Instrument Panel Insulator Panel Replacement - Right Side in Instrument Panel, Gages, and Console.
- Install the RH instrument panel closeout/insulator panel. Refer to Instrument Panel Insulator Panel Replacement - Left Side in Instrument Panel, Gages, and Console.
- Connect the inlet and outlet heater hose to the heater core.
- Use J 38185 in order to reposition the heater hose inlet and outlet clamps to the heater core.
- Refill the coolant. Refer to Cooling System Draining and Filling in Engine Cooling.
Notice: Refer to Fastener Notice in the Preface section.
Tighten
Tighten all the screws to 1.5 N·m (13 lb in).
Tighten
Tighten the screws to 1.5 N·m (13 lb in).
