Removal Procedure
An eight digit identification number is stamped on the left hand fuel rail (fueling even cylinders 2,4,6). Refer to this number if servicing or part replacement is required.
Caution: In order to reduce the risk of fire and personal injury that may result from a fuel leak, always install the fuel injector O-rings in the proper position. If the upper and lower O-rings are different colors (black and brown), be sure to install the black O-ring in the upper position and the brown O-ring in the lower position on the fuel injector. The O-rings are the same size but are made of different materials.
Important: Important when servicing the fuel rail assembly, precautions must be taken to prevent dirt and other contaminants from entering the fuel passages. It is recommended that the fittings be capped, and the holes be plugged during servicing.
- Relieve fuel system pressure. Refer to Fuel Pressure Relief .
- Remove the upper intake manifold. Refer to Intake Manifold Replacement in Engine Mechanical.
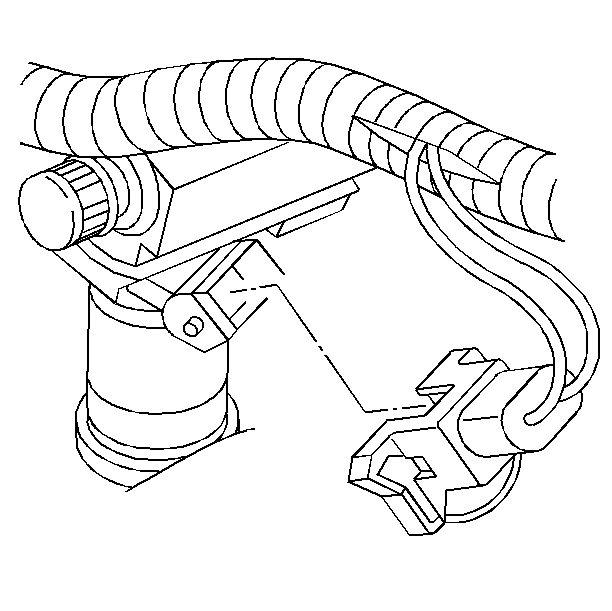
- Disconnect the engine fuel feed pipe at fuel rail.
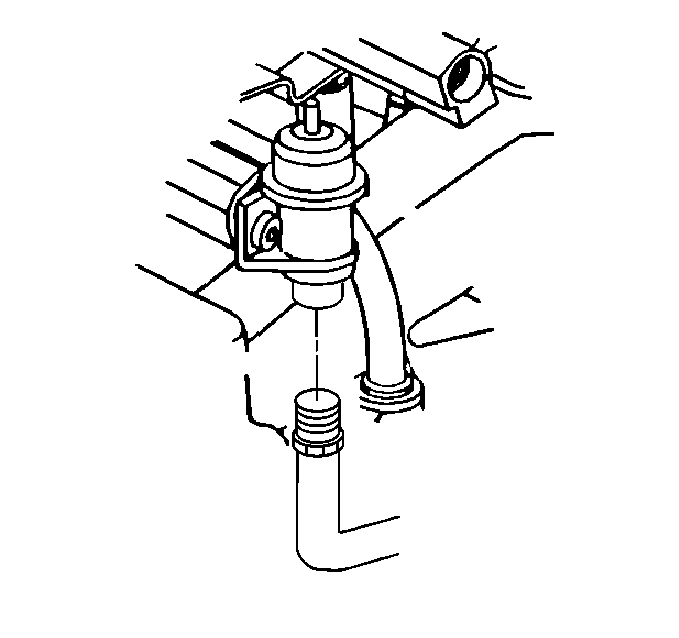
- Disconnect the engine fuel return pipe at the fuel pressure regulator.
- Remove the fuel feed pipe and fuel return pipe O-rings and discard.
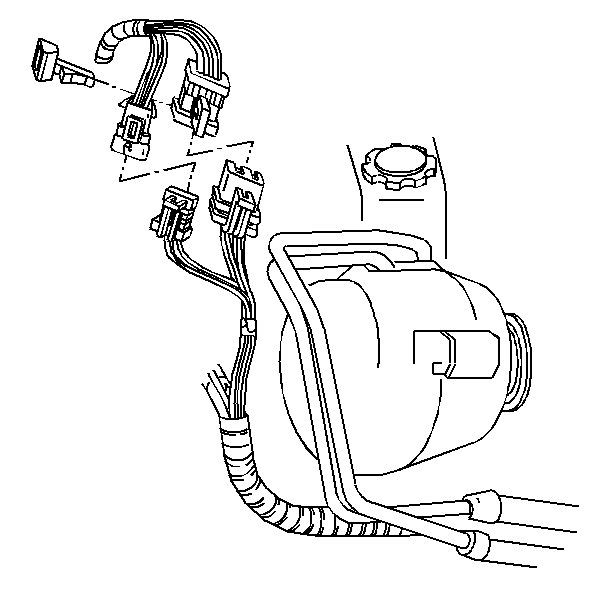
- Disconnect the main injector harness.
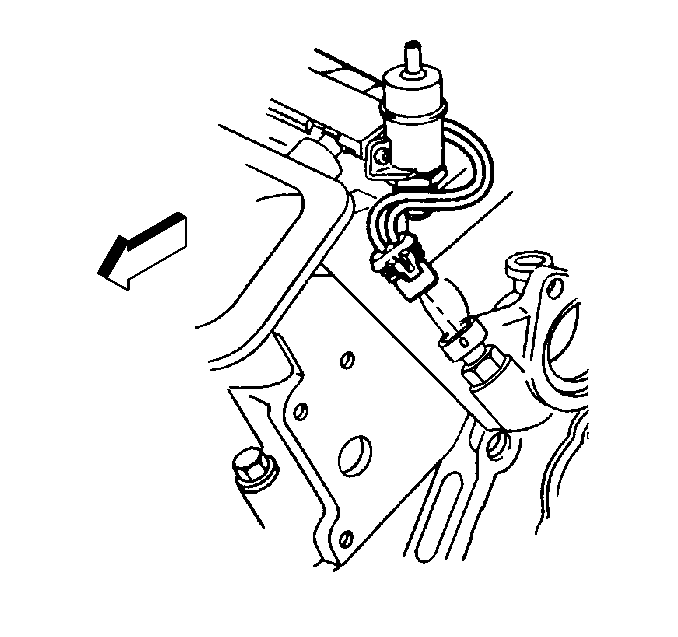
- Disconnect the coolant temperature sensor.
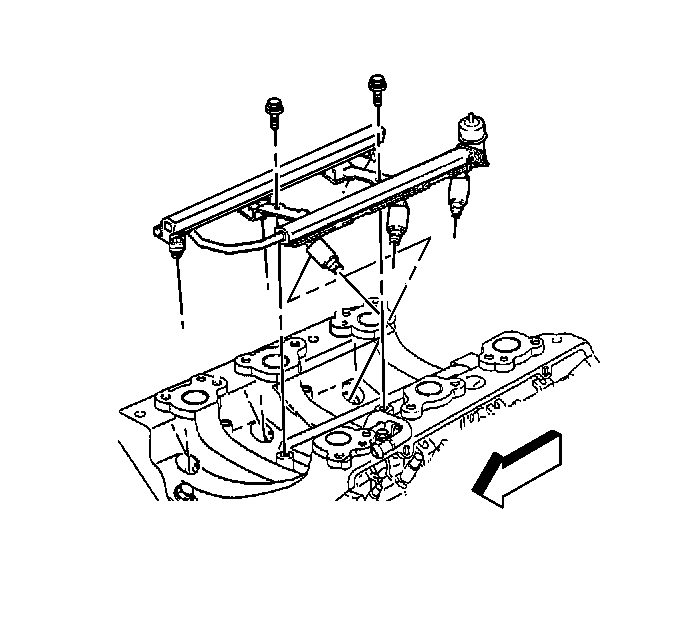
- Remove the fuel rail retaining bolts.
- Remove the fuel rail assembly.
- Disconnect the injector electrical connectors.
- Remove the injector electrical harness from the fuel rail.
- Remove the injector O-ring seal from spray tip end of each injector. Discard the seals. With the O-ring removed, the O-ring backup may slip off of the injector. Be sure to retain the O-ring backup for reuse.

Installation Procedure
Notice:
• Use care when servicing the fuel system components, especially
the fuel injector electrical connectors, the fuel injector tips, and
the injector O-rings. Plug the inlet and the outlet ports of the fuel rail
in order to prevent contamination. • Do not use compressed air to clean the fuel rail assembly as this
may damage the fuel rail components. • Do not immerse the fuel rail assembly in a solvent bath in order
to prevent damage to the fuel rail assembly.
- Install the injector electrical harness to the fuel rail.
- Connect the injector electrical connectors.
- Ensure that O-ring backups are on injectors before installing new O-rings. Lubricate new injector O-ring seals with clean engine oil and install on spray tip end of each injector.
- Install the fuel rail assembly into the intake manifold. Tilt the rail assembly to install the injectors.
- Install the fuel rail attaching bolts.
- Connect the coolant temperature sensor.
- Connect the main injector harness.
- Install the new O-rings on fuel feed pipe and fuel return pipe.
- Install the fuel feed pipe at the fuel rail.
- Connect the fuel return pipe at the fuel pressure regulator.
- Install the upper intake manifold. Refer to Intake Manifold Replacement in Engine Mechanical.
- Tighten the fuel filler cap.
- Connect the negative battery cable.
- Check for fuel leaks.
Notice: Use the correct fastener in the correct location. Replacement fasteners must be the correct part number for that application. Fasteners requiring replacement or fasteners requiring the use of thread locking compound or sealant are identified in the service procedure. Do not use paints, lubricants, or corrosion inhibitors on fasteners or fastener joint surfaces unless specified. These coatings affect fastener torque and joint clamping force and may damage the fastener. Use the correct tightening sequence and specifications when installing fasteners in order to avoid damage to parts and systems.
Tighten
Tighten the bolt to 10 N·m (7 lb ft).
Tighten
Tighten the nut to 17 N·m (13 lb ft).
Tighten
Tighten the nut to 17 N·m (13 lb ft).
| 14.1. | Turn the ignition switch ON for 2 seconds. |
| 14.2. | Then the ignition switch OFF for 10 seconds. |
| 14.3. | Turn the ignition switch ON. |
| 14.4. | Check for fuel leaks. |
