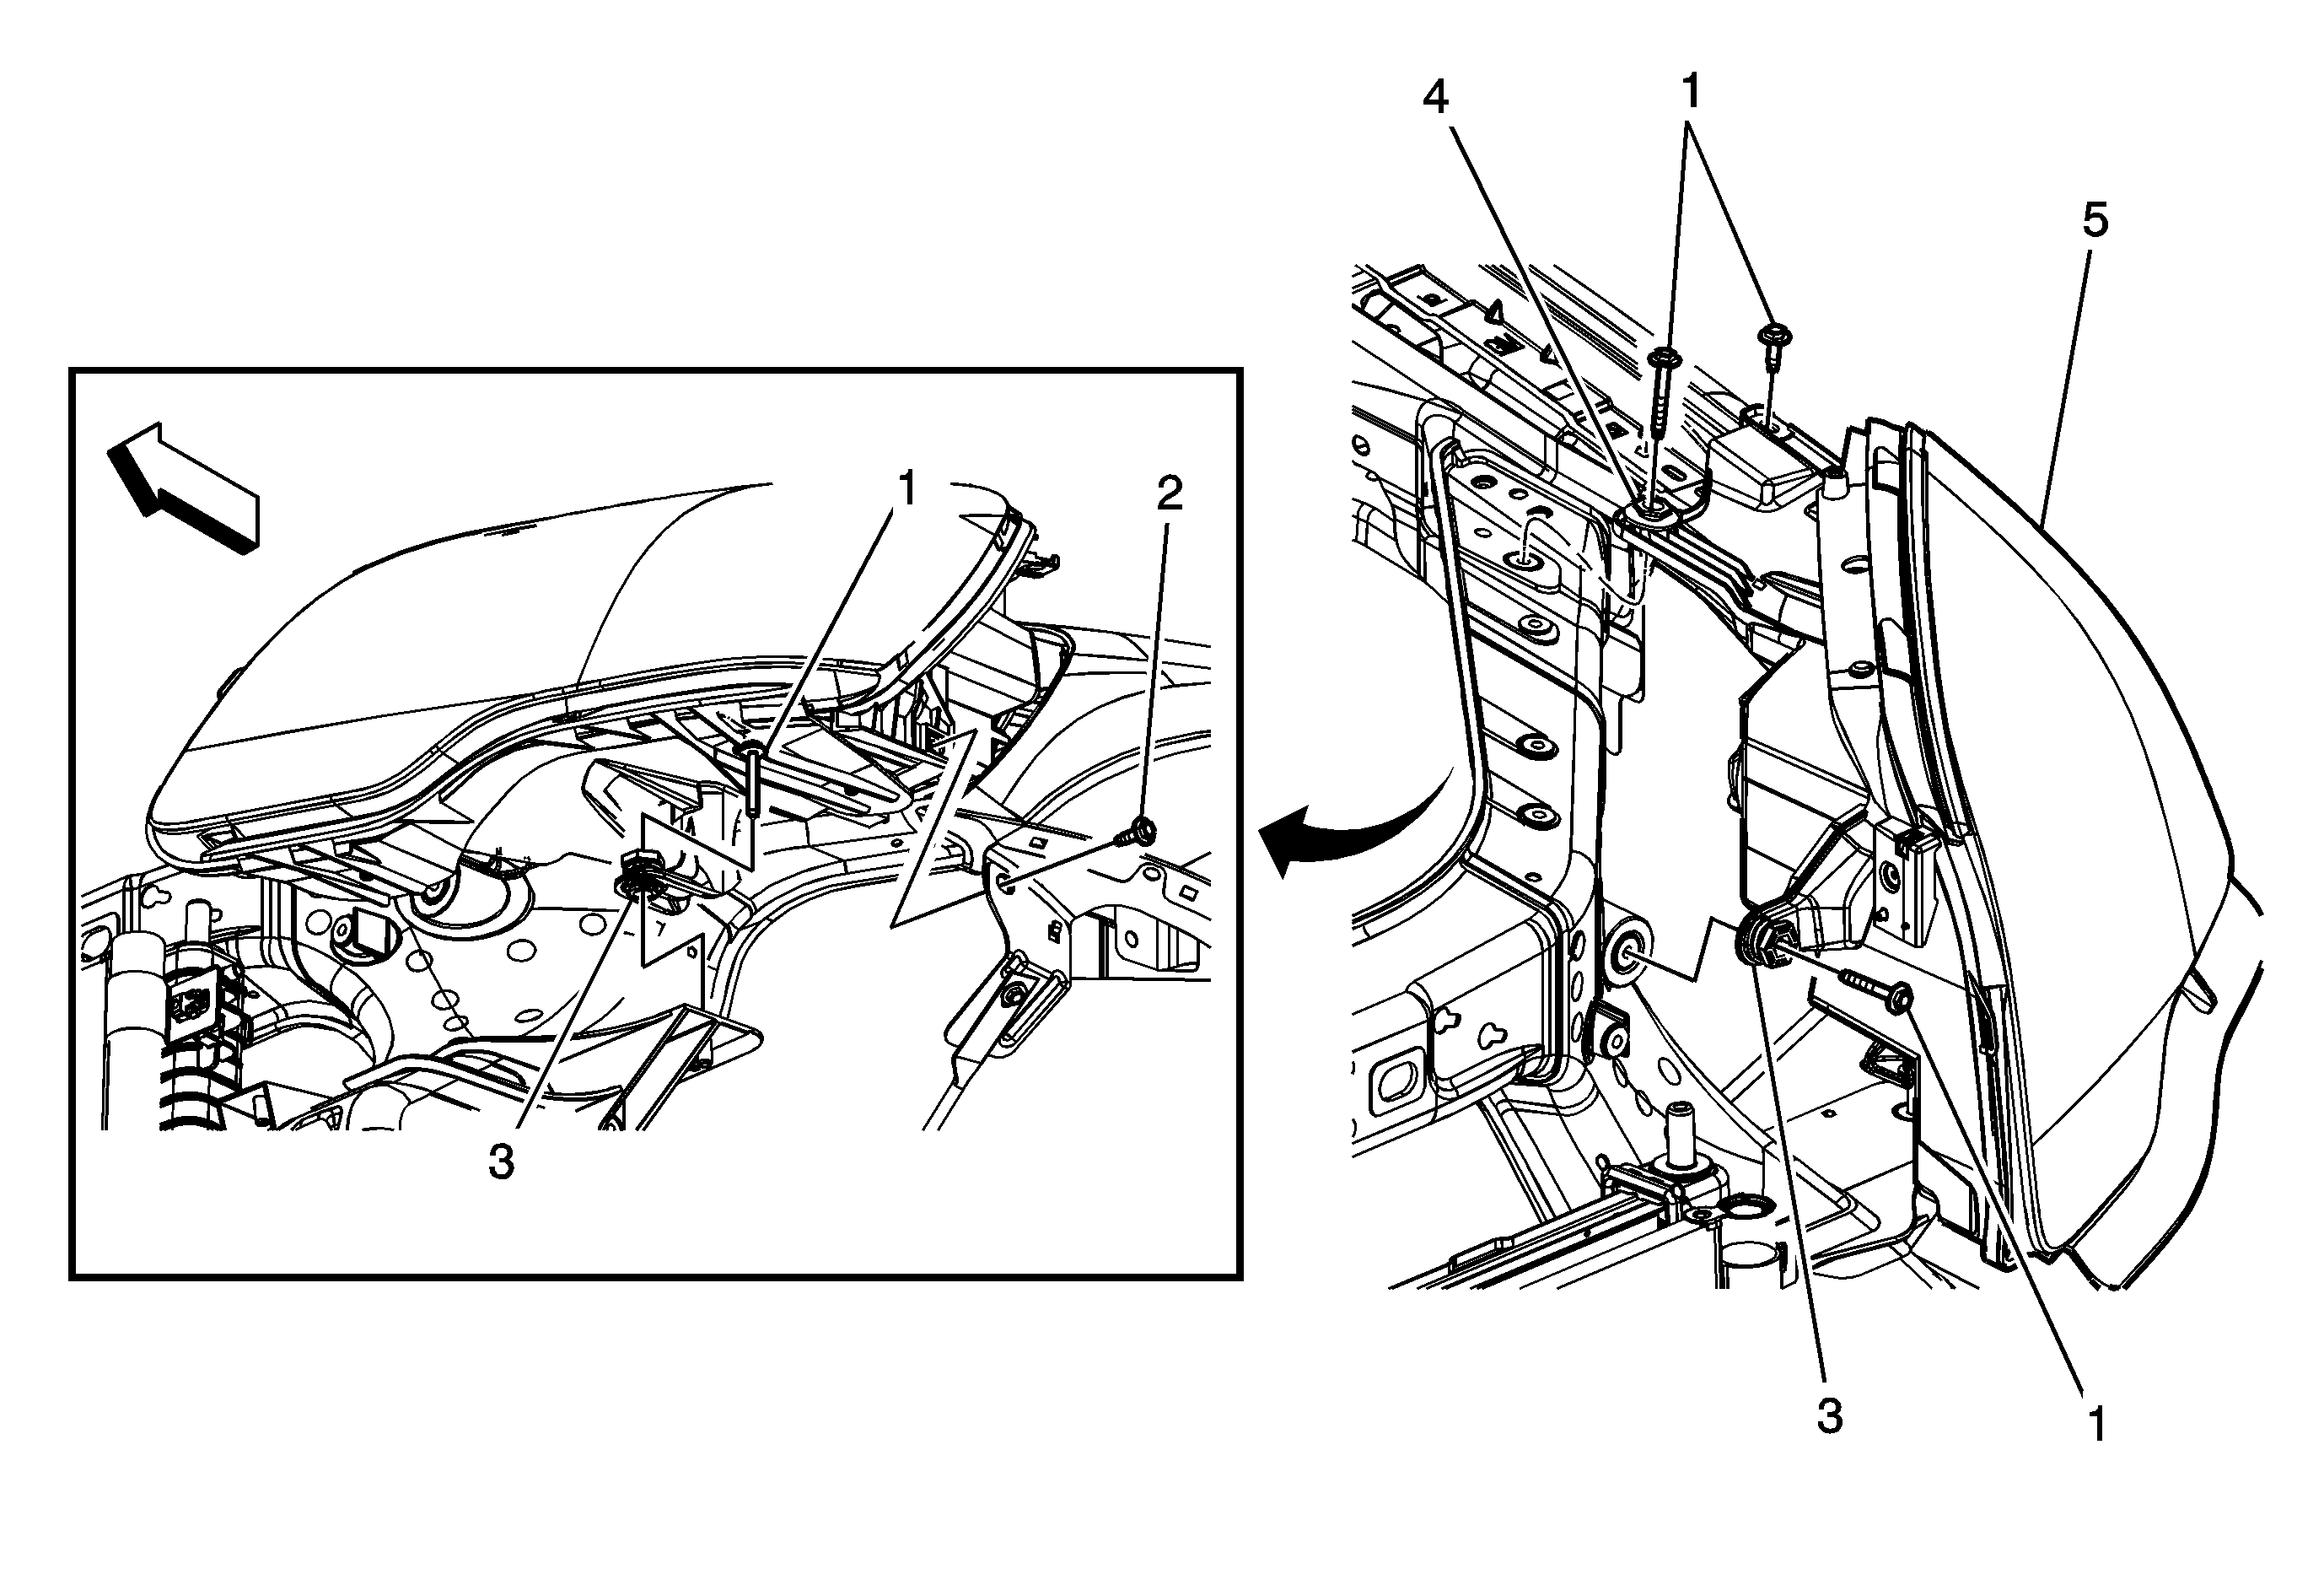
Headlamp Capsule Replacement Acadia TVD
Callout | Component Name | ||||
|---|---|---|---|---|---|
|
Caution: The high intensity discharge system produces high voltage and current. In order to reduce the risk of severe shocks and burns, the battery negative cable must be disconnected any time service work is being performed on or around the high intensity discharge system. Caution: The high intensity discharge system produces high voltage and current.
To reduce the risk of severe shocks and burns:
Preliminary ProcedureRemove the front bumper fascia. Refer to Front Bumper Fascia Replacement . | |||||
1 | Headlamp Assembly Bolts (Qty: 4) Notice: Refer to Fastener Notice in the Preface section. Tighten | ||||
2 | Fender Brace to Headlamp Screw Tighten | ||||
3 | Headlamp Horizontal and Vertical Adjustment Nuts Procedure
| ||||
4 | Headlamp Vertical Adjuster Bolt Bushing | ||||
5 | Headlamp Capsule Assembly Procedure
| ||||
Headlamp Capsule Replacement Enclave TVC TSH
Callout | Component Name | ||||
|---|---|---|---|---|---|
|
Caution: The high intensity discharge system produces high voltage and current. In order to reduce the risk of severe shocks and burns, the battery negative cable must be disconnected any time service work is being performed on or around the high intensity discharge system. Caution: The high intensity discharge system produces high voltage and current.
To reduce the risk of severe shocks and burns:
Preliminary ProcedureRemove the front bumper fascia. Refer to Front Bumper Fascia Replacement . | |||||
1 | Headlamp Assembly Bolts (Qty: 4) Notice: Refer to Fastener Notice in the Preface section. Tighten | ||||
2 | Fender Brace to Headlamp Screw Tighten | ||||
3 | Headlamp Horizontal and Vertical Adjustment Nuts Procedure
| ||||
4 | Headlamp Vertical Adjuster Bolt Bushing | ||||
5 | Headlamp Capsule Assembly Procedure
| ||||
Headlamp Capsule Replacement OUTLOOK
Callout | Component Name | ||||
|---|---|---|---|---|---|
|
Caution: The high intensity discharge system produces high voltage and current. In order to reduce the risk of severe shocks and burns, the battery negative cable must be disconnected any time service work is being performed on or around the high intensity discharge system. Caution: The high intensity discharge system produces high voltage and current.
To reduce the risk of severe shocks and burns:
Preliminary ProcedureRemove the front bumper fascia. Refer to Front Bumper Fascia Replacement . | |||||
1 | Headlamp Assembly Bolt (Qty: 4) Notice: Refer to Fastener Notice in the Preface section. Tighten | ||||
2 | Fender Brace to Headlamp Screw Tighten | ||||
3 | Headlamp Adjuster Nut | ||||
4 | Headlamp Vertical Adjuster Bolt Bushing | ||||
5 | Headlamp Capsule Assembly ProcedureDisconnect the forward lamp harness electrical connector from the headlamp prior to removing the headlamp assembly from the vehicle. | ||||
