Removal Procedure
- Place the vehicle on a level surface and apply the park brake.
- With the engine OFF, apply and release the brake pedal several times until the brake pedal becomes firm to deplete the vacuum reserve in the vacuum brake booster.
- Remove the air cleaner assembly. Refer to Air Cleaner Assembly Replacement.
- Remove the windshield washer solvent heater. Refer to Windshield Washer Solvent Heater Replacement.
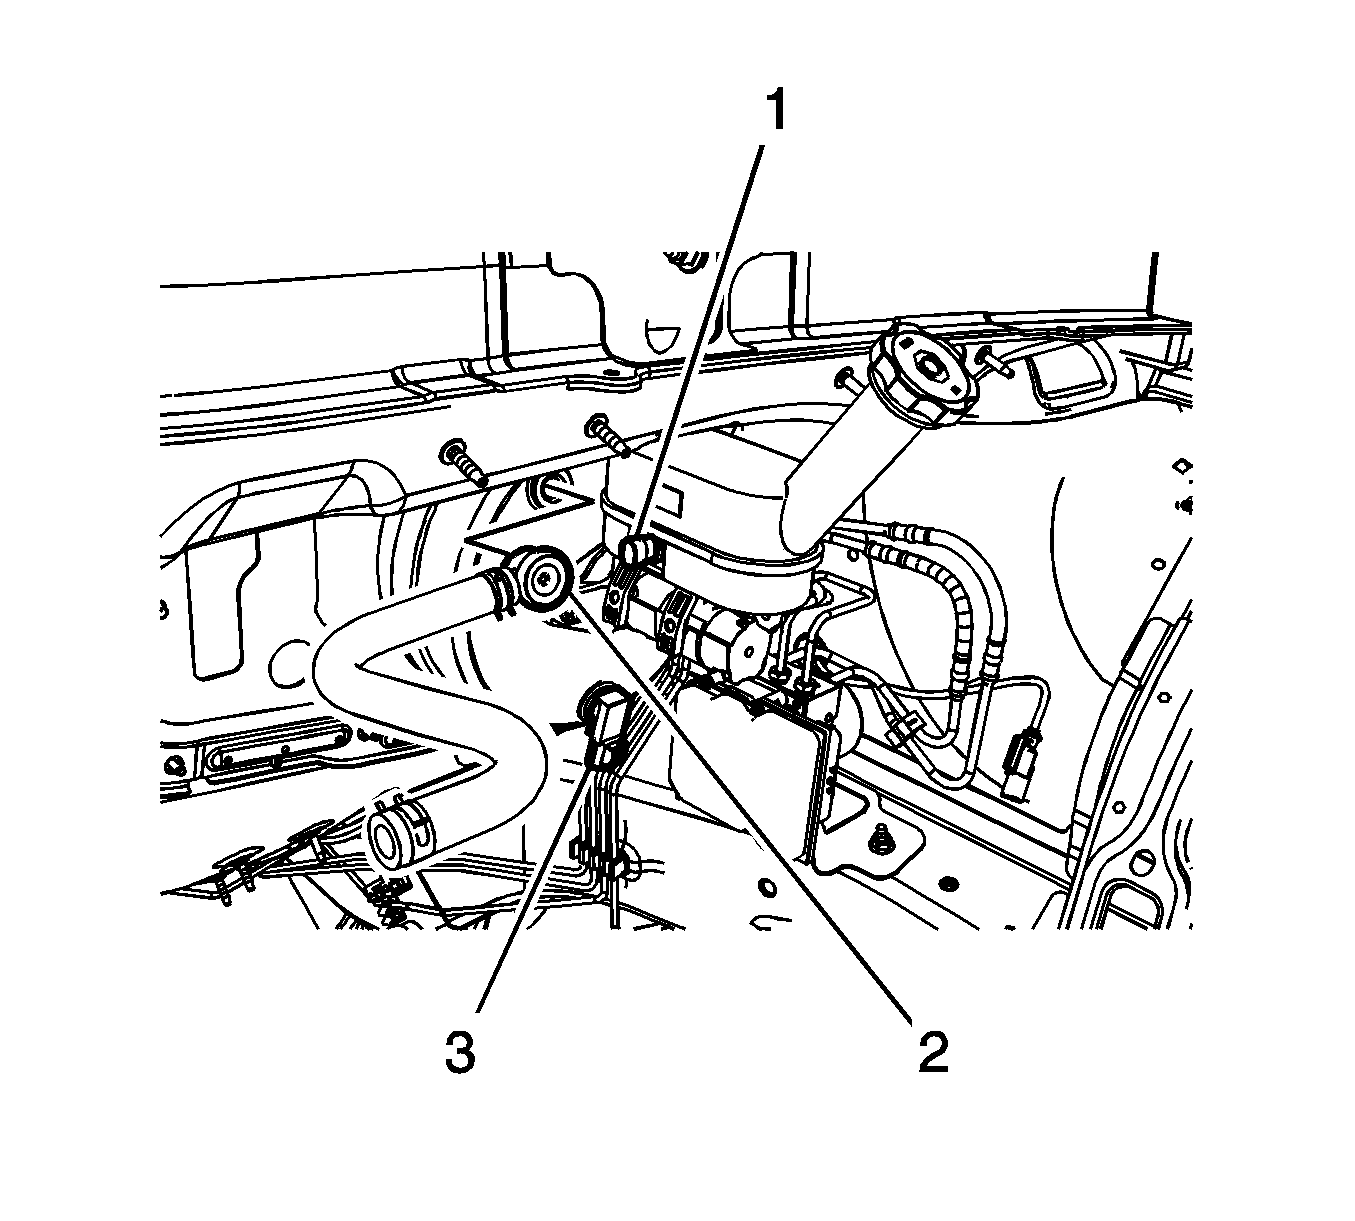
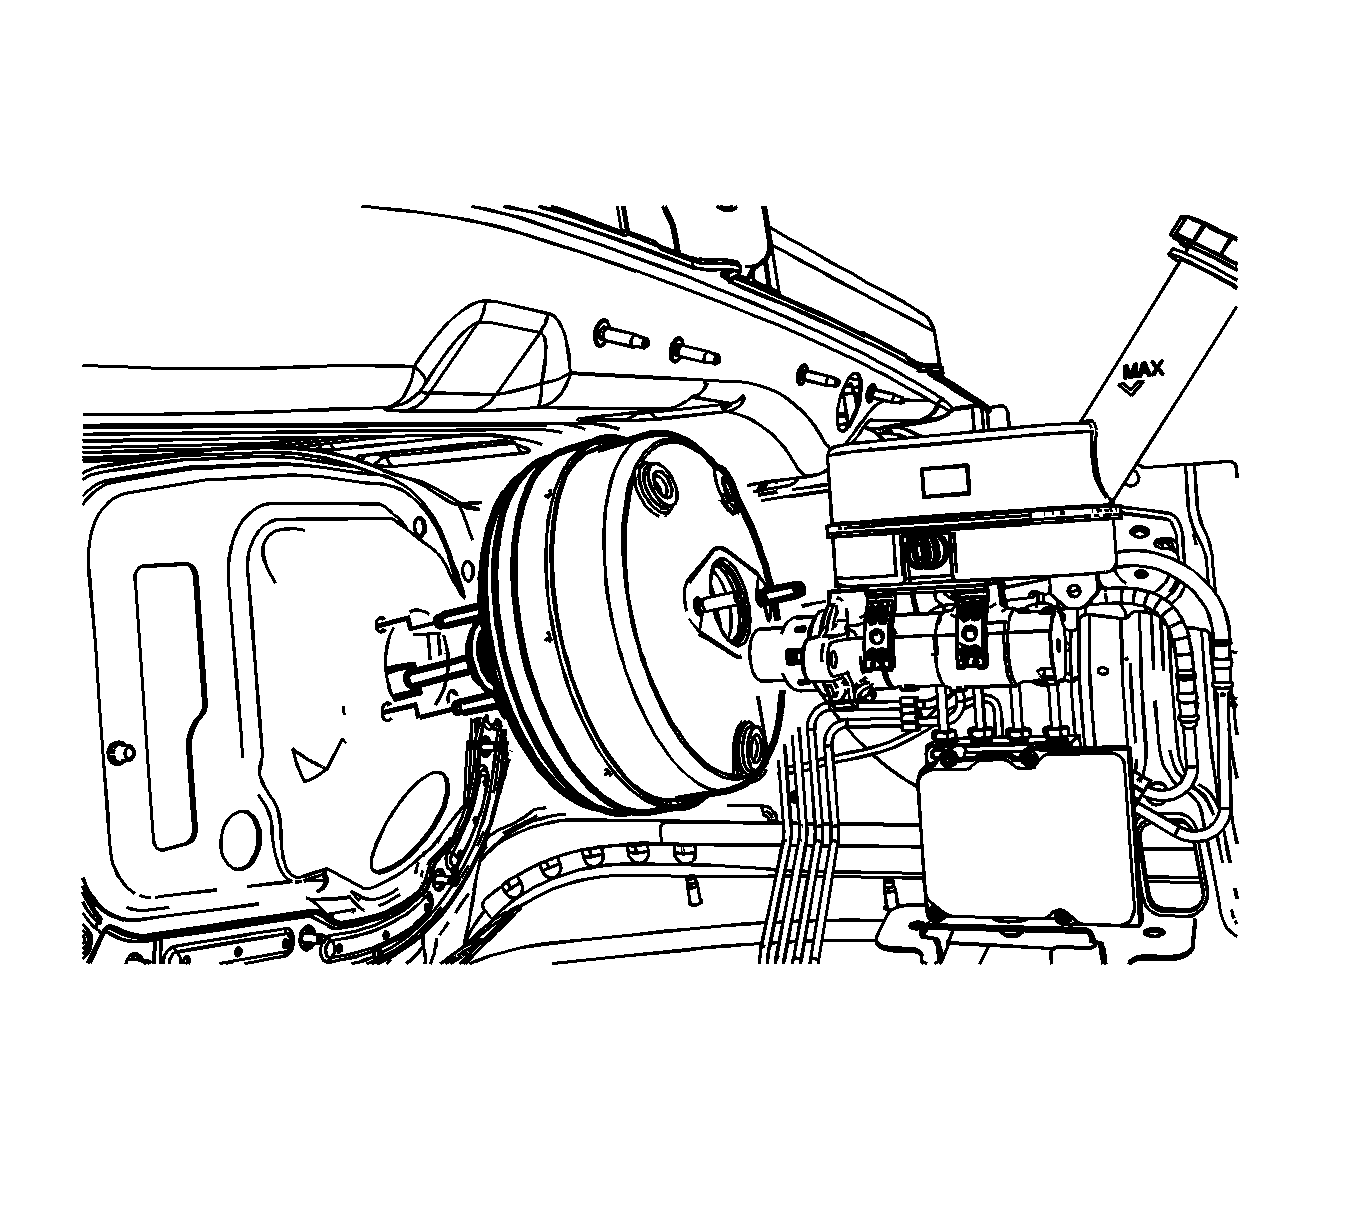
- Disconnect the master cylinder fluid level sensor electrical connector (1).
- Remove the vacuum brake booster check valve and hose assembly (2) from the vacuum brake booster and position aside.
- Remove the vacuum brake booster vacuum sensor (3) and position aside.
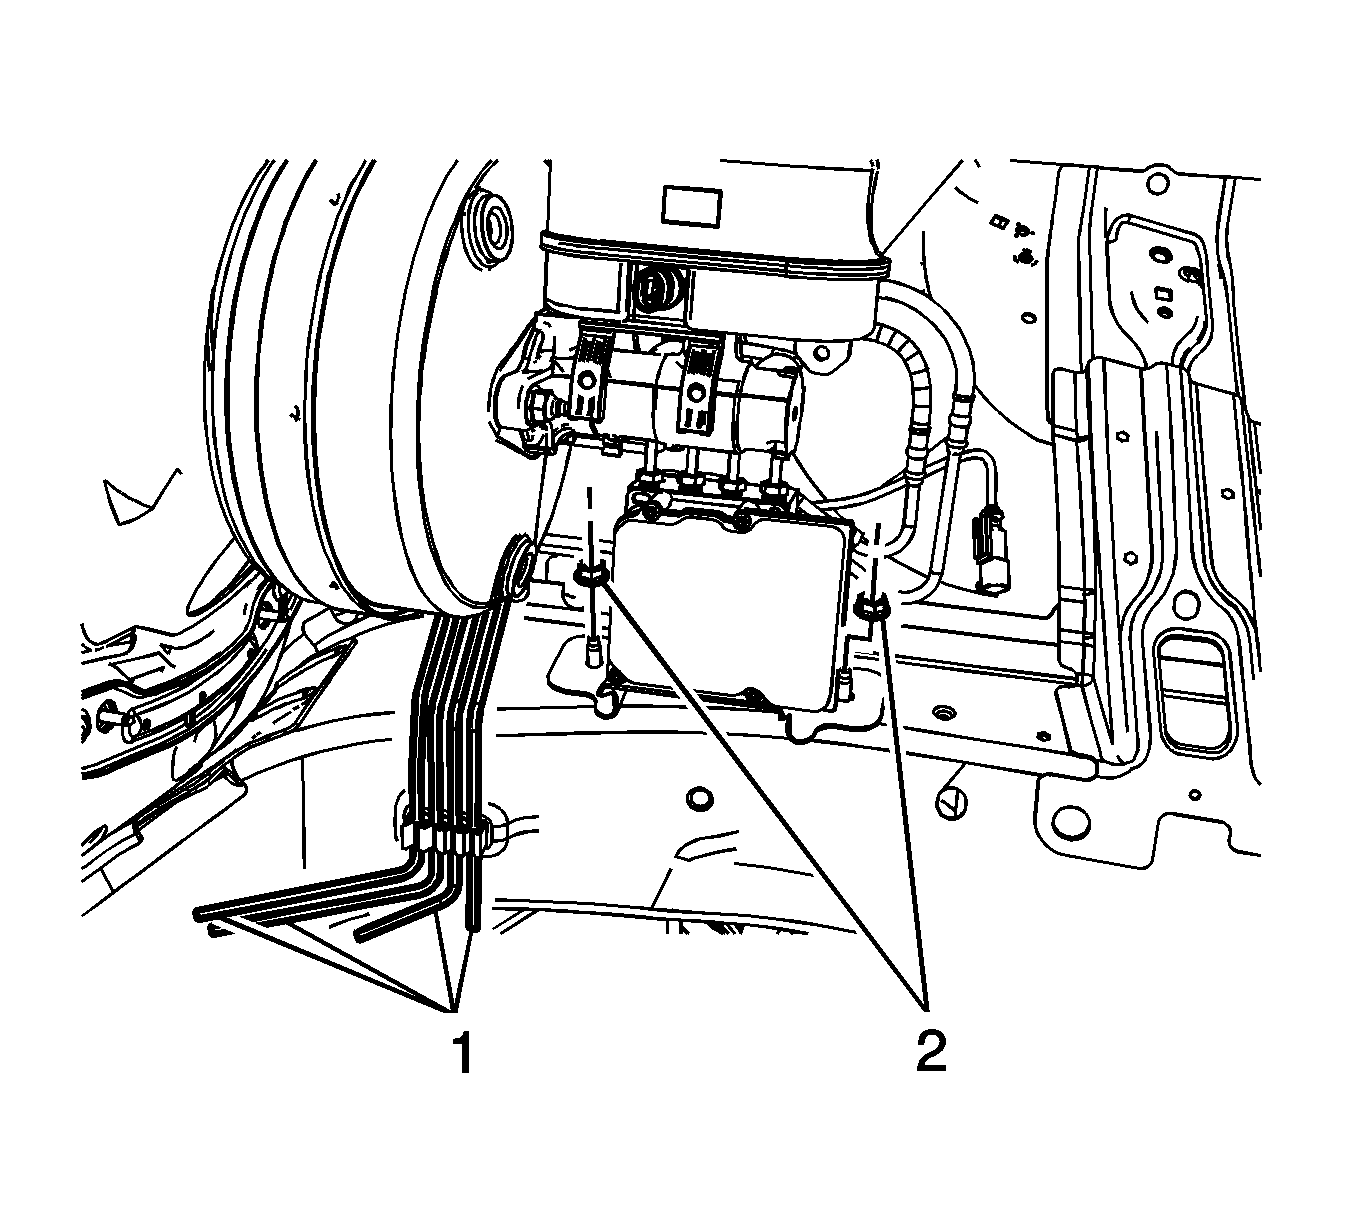
- Release the front and rear brake pipes (1) from the routing clip on the frame rail.
- Remove the 2 nuts (2) from the brake pressure modulator valve (BPMV) assembly.
- Carefully lift the BPMV assembly over the studs and position forward slightly.
- Remove the 2 brake master cylinder nuts.
- Without disconnecting the brake pipes from the master cylinder, remove the master cylinder assembly and position aside.
- Remove the left side instrument panel insulator panel. Refer to Instrument Panel Insulator Panel Replacement - Left Side.
- Remove the driver knee bolster. Refer to Driver Knee Bolster Replacement.
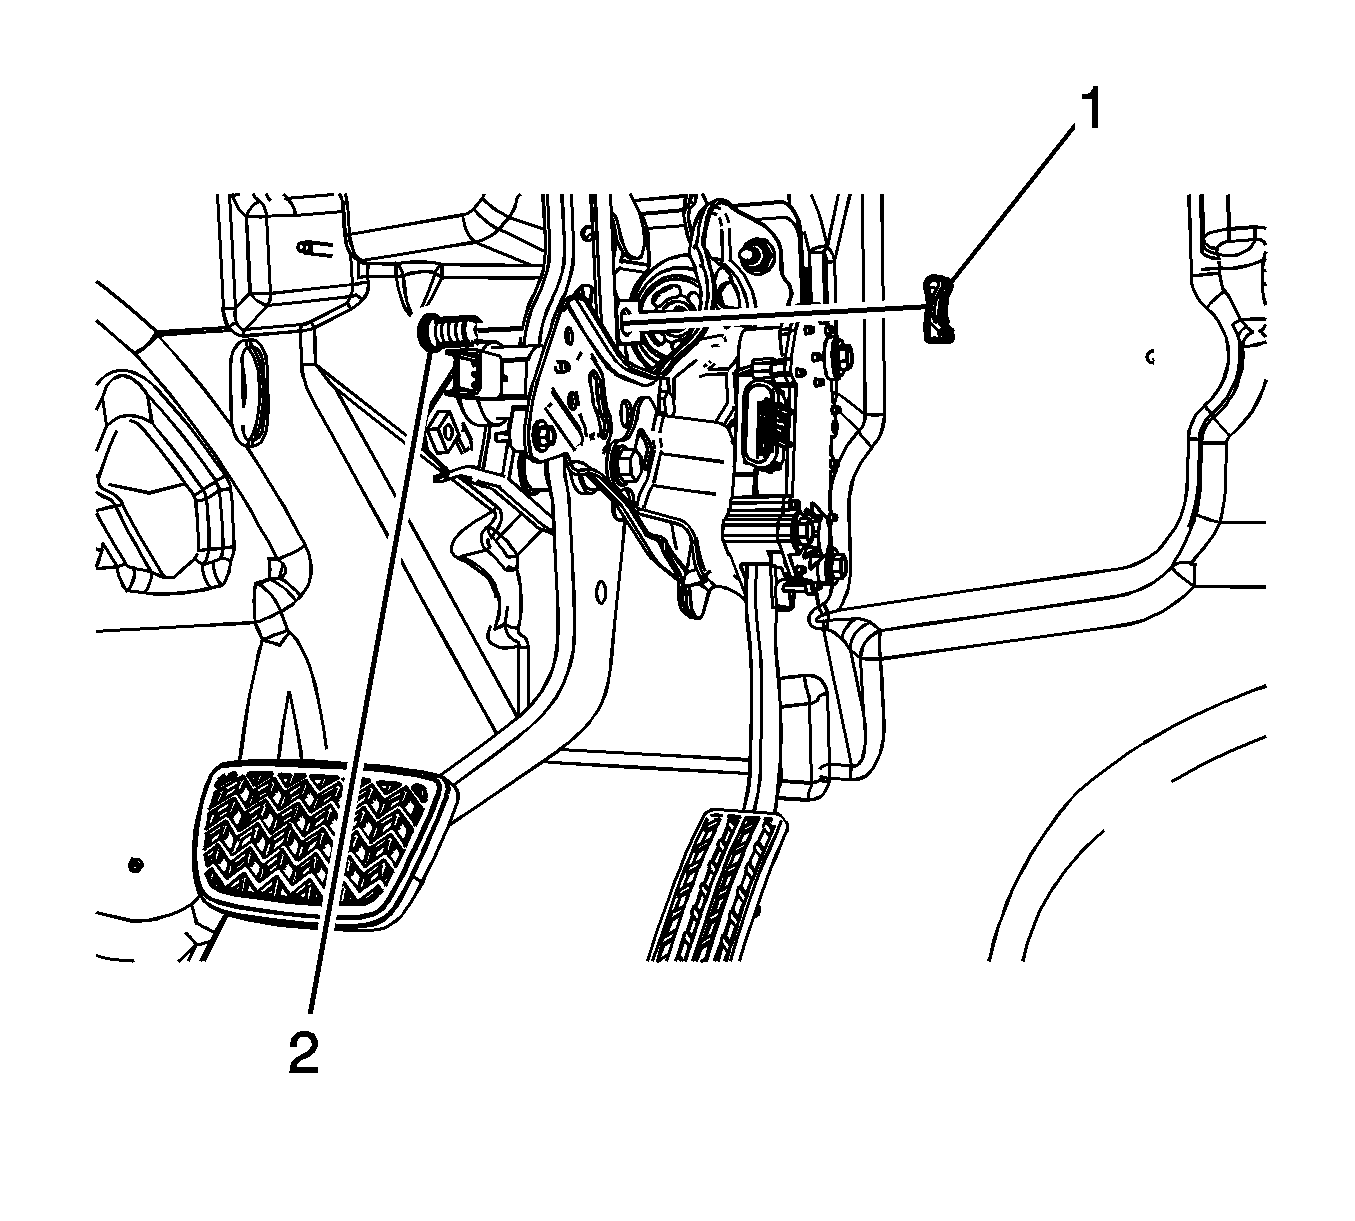
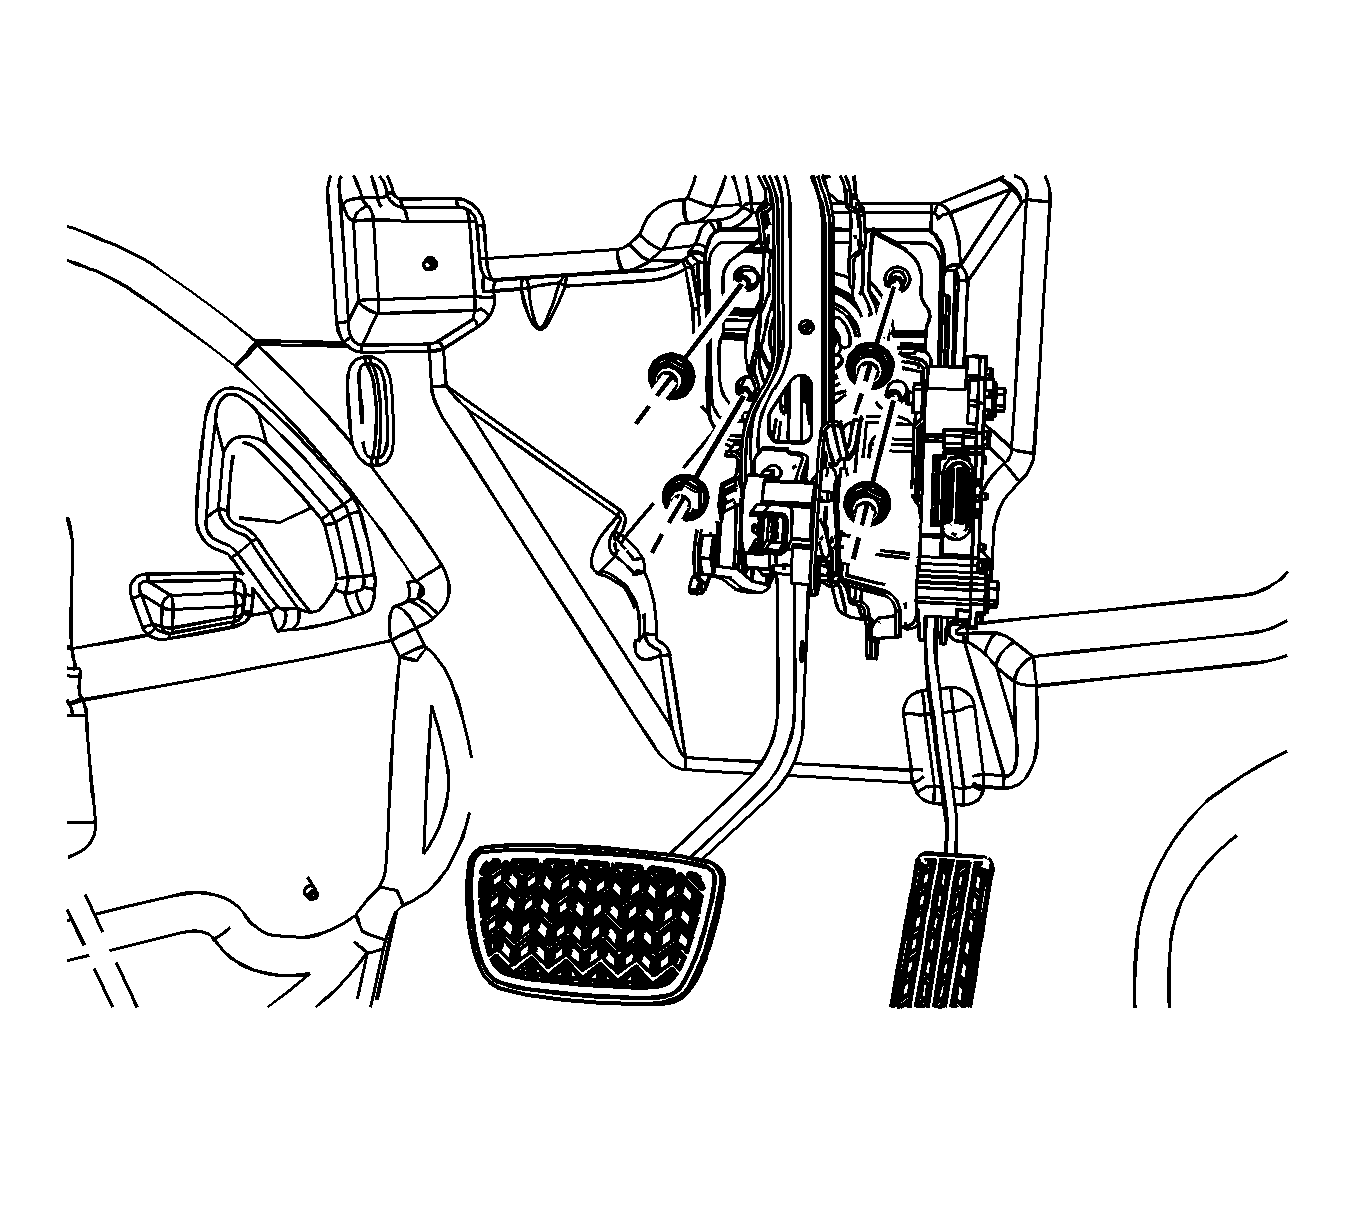
- Remove the brake pedal pushrod retaining clip (1).
- Remove the brake pedal pushrod clevis pin (2) and disconnect the pushrod from the brake pedal.
- Remove the intermediate steering shaft. Refer to Intermediate Steering Shaft Replacement.
- Remove the 4 vacuum brake booster nuts.
- Pull the vacuum brake booster forward and tilt upward slightly until the mounting studs clear the dash panel.
- Remove the vacuum brake booster.
Important: It is not necessary to disconnect the brake pipes from the BPMV assembly.
Important: It is not necessary to disconnect the brake pipes from the master cylinder.
Place the brake master cylinder in an upright position and support with heavy mechanics wire or equivalent.
Installation Procedure
- Align the vacuum brake booster mounting studs to the dash panel.
- Install the vacuum brake booster.
- Install the 4 vacuum brake booster nuts.
- Install the intermediate steering shaft. Refer to Intermediate Steering Shaft Replacement.
- Connect the brake pedal pushrod to the brake pedal and install the clevis pin (2).
- Install the brake pedal pushrod retaining clip (1).
- Install the driver knee bolster. Refer to Driver Knee Bolster Replacement.
- Install the left side instrument panel insulator panel. Refer to Instrument Panel Insulator Panel Replacement - Left Side.
- Position the master cylinder to the vacuum booster. Inspect the master cylinder to vacuum brake booster seal for damage and replace, if necessary.
- Install the 2 brake master cylinder nuts.
- Position the BPMV assembly over the studs.
- Install the 2 nuts (2) to the BPMV and bracket assembly.
- Install the front and rear brake pipes (1) to the routing clip on the frame rail.
- Connect the master cylinder fluid level sensor electrical connector (1).
- Install the vacuum brake booster vacuum sensor (3).
- Install the vacuum brake booster check valve and hose assembly (2) to the vacuum brake booster.
- Install the windshield washer solvent heater. Refer to Windshield Washer Solvent Heater Replacement.
- Install the air cleaner assembly. Refer to Air Cleaner Assembly Replacement.
Important: Inspect the vacuum brake booster to dash panel gasket for damage and replace, if necessary.
Notice: Refer to Fastener Notice in the Preface section.
Tighten
Tighten the nuts to 25 N·m (18 lb ft).
Important: Ensure the master cylinder to vacuum brake booster seal is properly installed on the back of the master cylinder housing and is not damaged.
Tighten
Tighten the nuts to 20 N·m (15 lb ft).
Tighten
Tighten the nuts to 20 N·m (15 lb ft).
Important: If necessary, a small amount of denatured alcohol may be used to aid installation of the brake booster vacuum sensor. Do not use soap.
Important: If necessary, a small amount of denatured alcohol may be used to aid installation of the brake booster check valve. Do not use soap.
