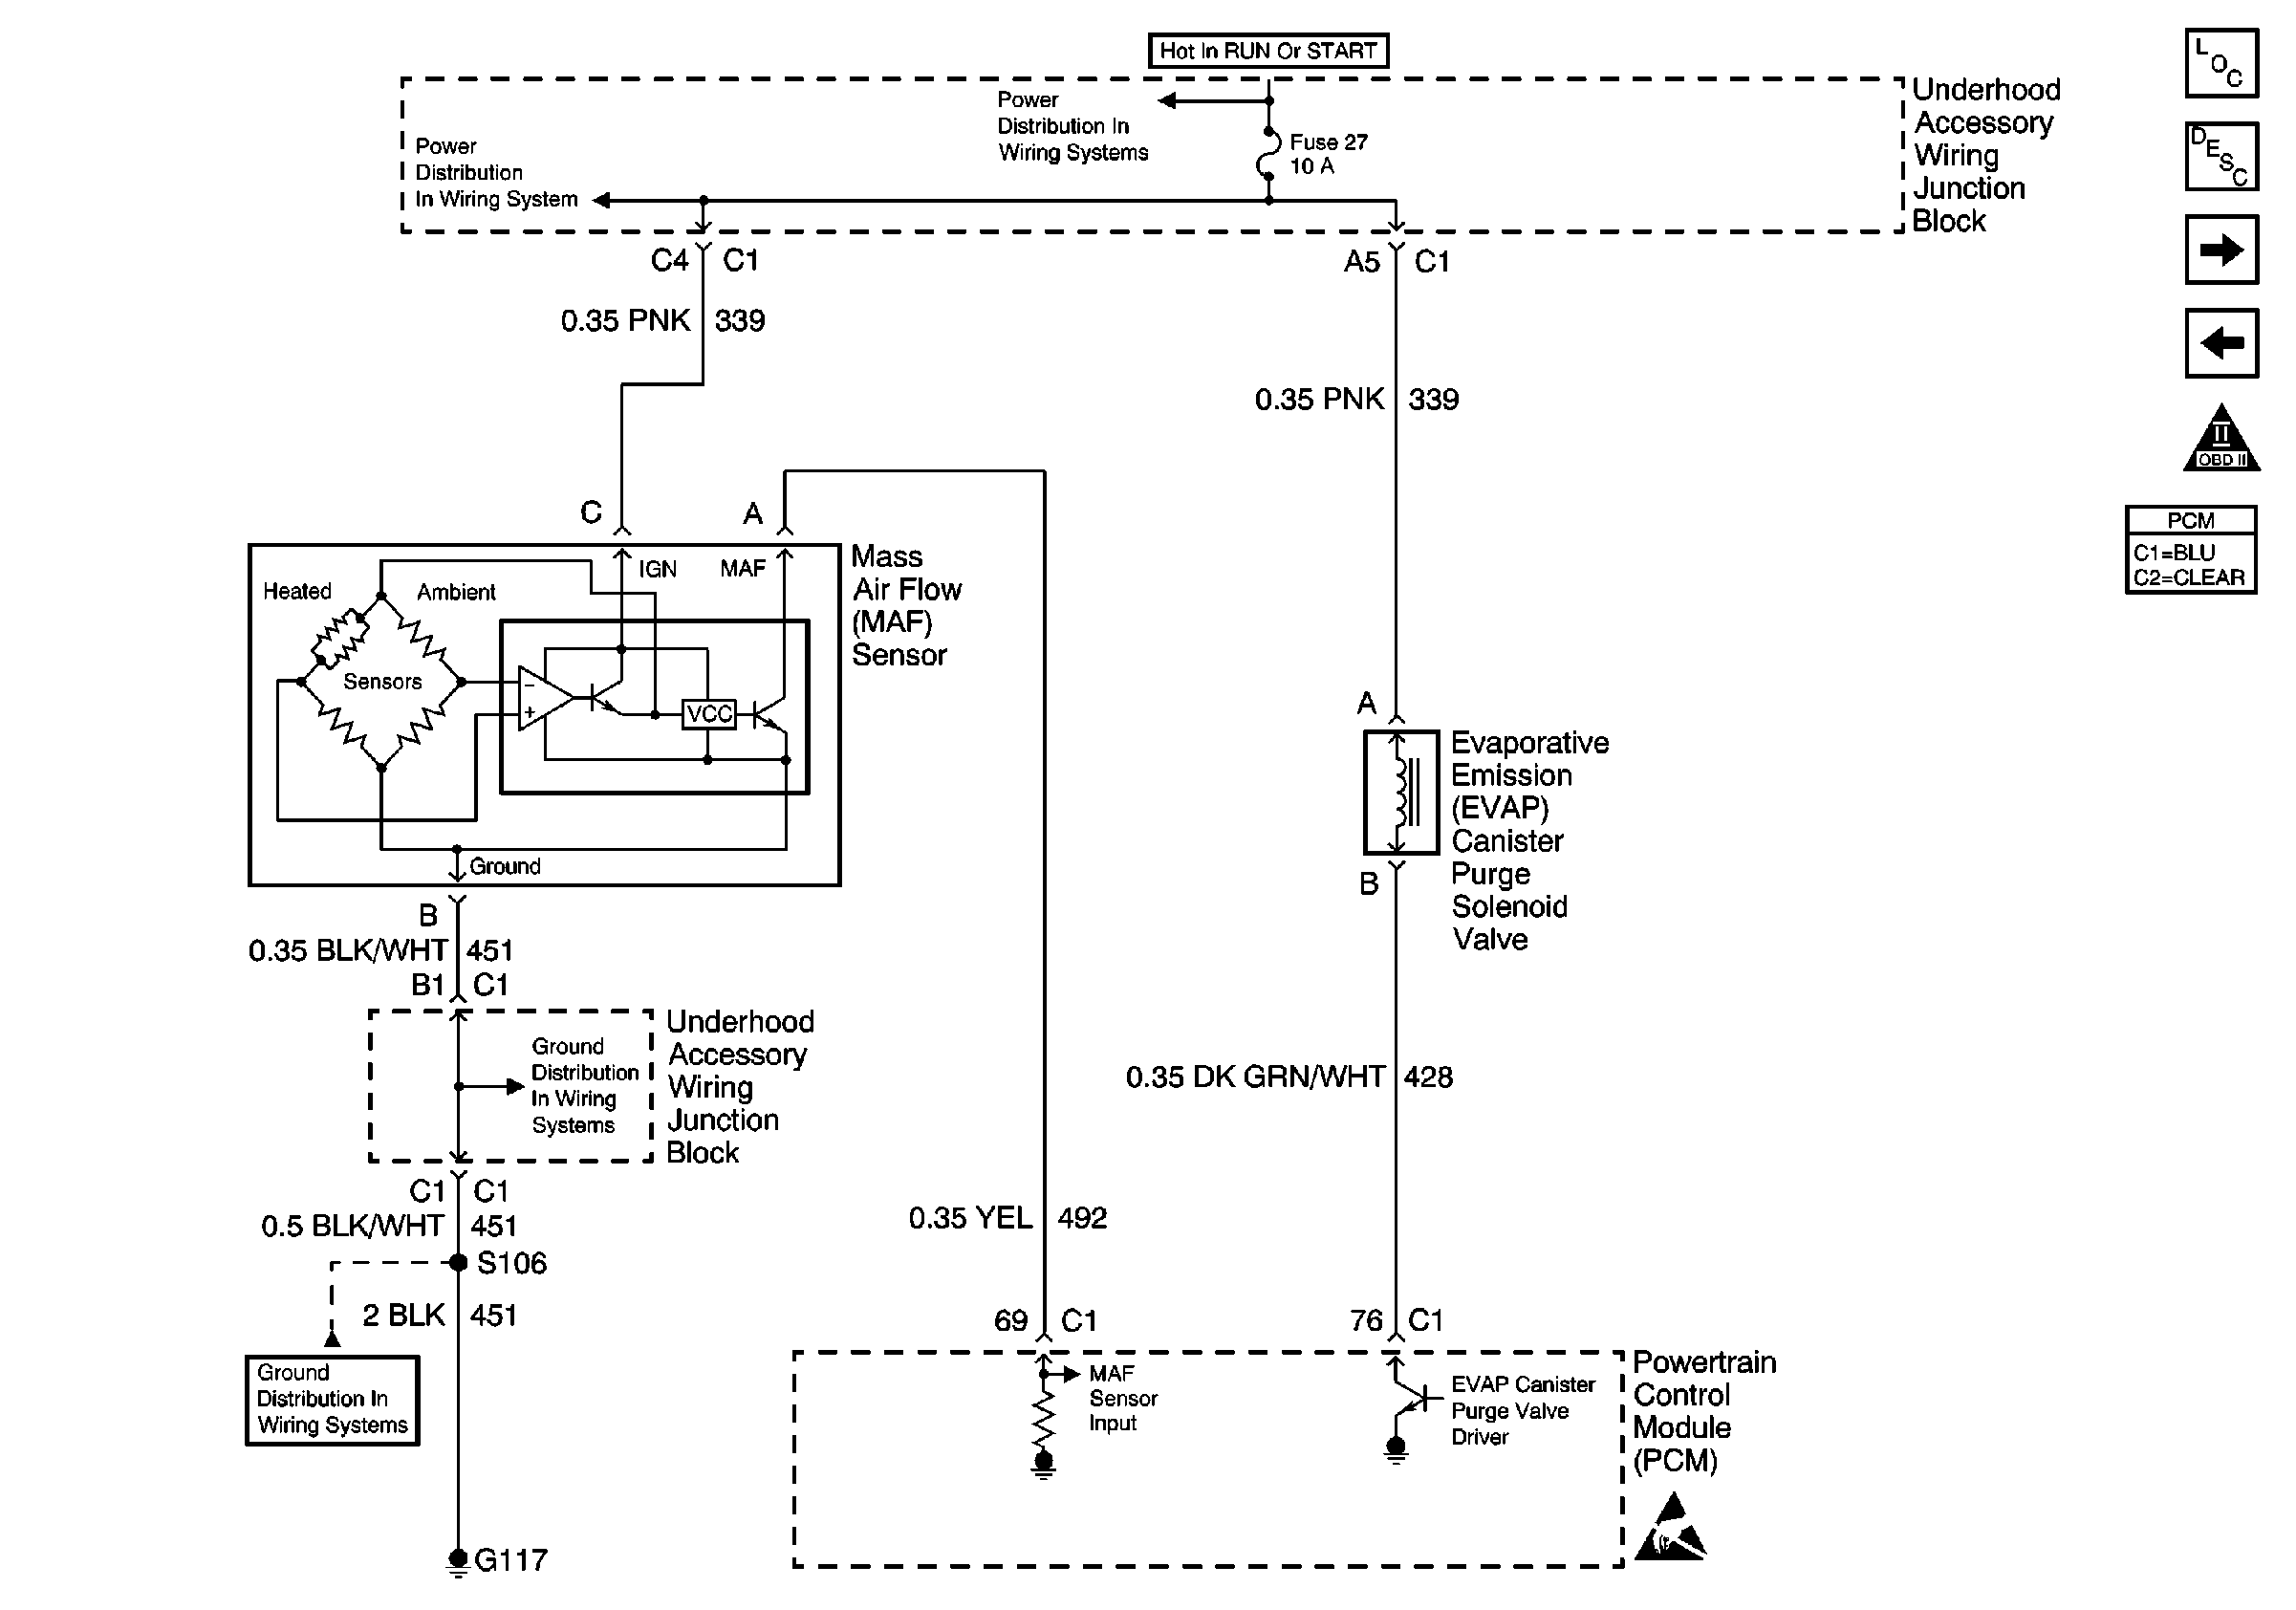
Refer to
MAF and EVAP

.
Circuit Description
The Fuel Tank Pressure sensor responds to changes in fuel tank pressure or vacuum. The fuel tank pressure sensor signal voltage to the PCM varies from a minimum of about 0.2 volts with pressure in the fuel tank to above 4 volts with a high vacuum situation in the fuel tank (EVAP canister vent valve stuck closed). The fuel tank pressure sensor is used to detect vacuum decay and excess vacuum during the enhanced EVAP diagnostic routine.
The Fuel Tank Pressure Sensor Diagnosis table is intended to isolate and diagnose electrical problems with the sensor wiring or the sensor.
Diagnostic Aids
Check for the following conditions:
| • | Inspect PCM harness connectors for backed out terminals, improper mating, broken locks, improperly formed or damaged terminals, and poor terminal to wire connection. |
| • | Inspect the wiring harness for damage. |
| • | If the harness appears to be OK, observe the Fuel Tank Pressure display on the scan tool while moving connectors and wiring harnesses related to the sensor. A change in the display will indicate the location of the malfunction. |
Test Description
Number(s) below refer to the step number(s) on the Diagnostic Table.
Step | Action | Value(s) | Yes | No |
|---|---|---|---|---|
1 | Was the Powertrain OBD System Check performed? | -- | ||
2 |
Is voltage near the specified value? | 5.0V | ||
3 | Check the 5 volt reference A circuit for a poor terminal connection at the PCM. Was a problem found? | -- | ||
4 | Check for an open or a faulty splice in the 5 volt reference A circuit to the fuel tank pressure sensor harness connector. Was a problem found? | -- | ||
5 |
Is voltage between the specified values? | 1.3V - 1.7V | ||
6 | Check the fuel tank pressure sensor signal circuit for a poor terminal connection at the PCM. Was a problem found? | -- | ||
7 | Check the fuel tank pressure signal circuit between the fuel tank pressure sensor connector and the PCM for an open, short to ground, or short to voltage. Was a problem found? | -- | ||
8 | Check the sensor ground circuit for a poor terminal connection at the PCM. Was a problem found? | -- | ||
9 | Check for an open or a faulty splice in the sensor ground circuit. Was a problem found? | -- | ||
10 | Check for a poor circuit terminal connection at the fuel tank pressure sensor connector. Was a problem found? | -- | ||
11 | Replace the faulty harness connector terminals as necessary. Refer to Repair Procedures in Electrical Diagnosis. Is the action complete? | -- | -- | |
12 | Locate and repair open/short circuit in wiring harness as necessary. Refer to Repair Procedures in Electrical Diagnosis. Is the action complete? | -- | -- | |
13 | Replace the fuel tank pressure sensor. Refer to Fuel Tank Pressure Sensor Replacement. Is the action complete? | -- | -- | |
Replace the PCM. Important: : The replacement PCM must be programmed. Refer to Idle Air Control (IAC) System Diagnosis . Is the action complete? | -- | -- | ||
15 |
Is Fuel Tank Pressure at the specified value? | 0 in. H2O | ||
16 |
Is the Fuel Tank Pressure at the specified value? | 5 in. H2O | System OK |

