For 1990-2009 cars only
Seat Adjuster Phase Adjustment Standard Adjuster
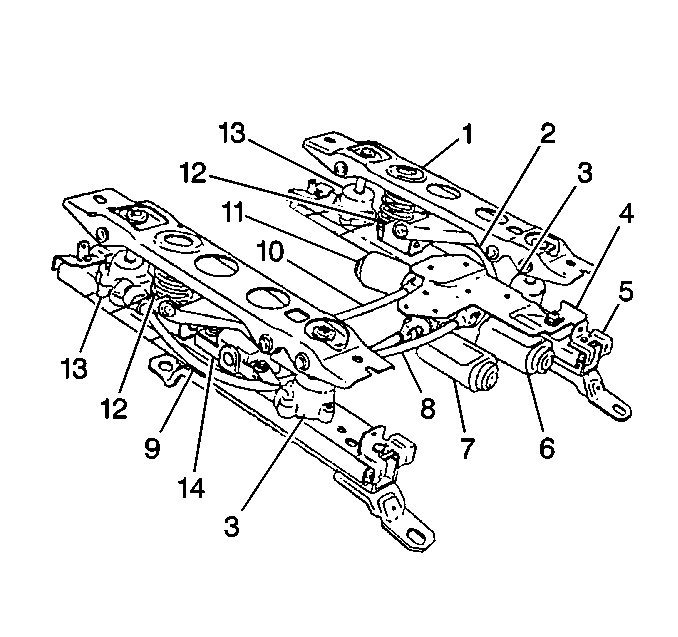
When installing the power seat adjusters, ensure that both adjusters are parallel and in phase with each other.
When one adjuster reaches the maximum horizontal or vertical travel in a given direction before the other adjuster, alignment is necessary. Use the following procedure in order to align the phase adjusters:
Horizontal Travel
- Operate the seat control switch until one adjuster reaches the full-forward position.
- Detach the horizontal drive cable (10) from the adjuster that has reached the full forward position.
- Operate the seat forward until the other adjuster reaches the full-forward position.
- Connect the detached drive cable.
- Inspect the horizontal travel of the seat. Cycle the seat travel completely forward and back.

Front or Rear Vertical Travel
- Operate the seat control switch until one adjuster has reached the fully raised position at both the front and the rear vertical travel limits.
- Disconnect both the front (8) and the rear (9) vertical drive cables from the adjusters that have reached the fully raised position.
- Operate the seat control switch until the remaining adjusters reached the fully raised position at both the front and the rear vertical travel limits.
- Connect the previously removed front and rear vertical drive cables.
- Inspect the vertical travel by operating the adjusters through one or two complete cycles.
- The above operation may be repeated on an as-required basis if the adjusters do not appear to be in phase after the test cycle.
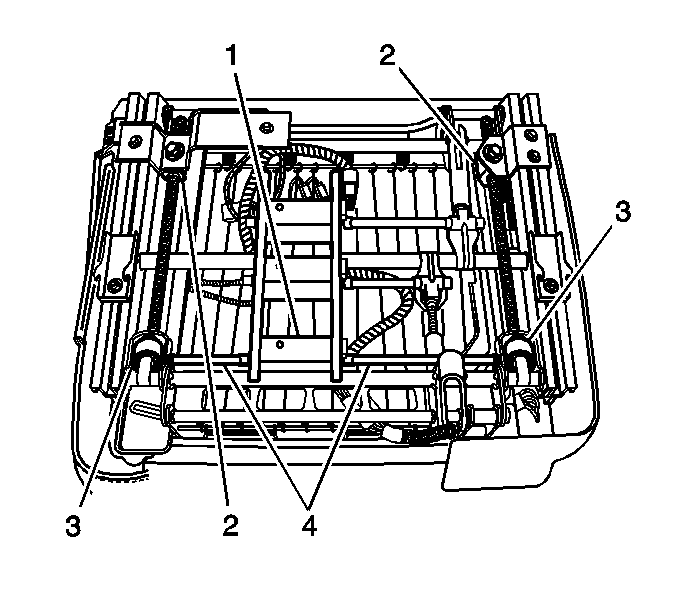
Seat Adjuster Phase Adjustment Mark II Adjuster
Adjustment Procedure
- Disable the SIR. Refer to Disabling the SIR System in SIR.
- Using the power seat switch, run the seat adjuster rearward until the drive bracket (3) and the anchor bracket (2) are together on either side of the adjuster.
- Remove the drive cable (4) from that side of the adjuster which contains the brackets.
- Use the power seat switch to run the adjuster rearward until the other pair of brackets are also together.
- Install the removed drive cable.
- Test the adjuster for proper operation.
- Enable the SIR. Refer to Enabling the SIR System in SIR.

Important: Inspect all 4 cables to verify that the cables are straight.
