For 1990-2009 cars only
Removal Procedure
- Remove the transmission. Refer to Transmission Replacement .
- Remove the drive belt. Refer to Drive Belt Replacement .
- Remove the A/C compressor from the engine. Refer to Air Conditioning Compressor Replacement .
- Secure the compressor away from the bracket area.
- Remove the engine mount. Refer to Engine Front Mount Replacement .
- Remove the engine knock sensor shield and disconnect the sensor harness. Refer to Knock Sensor 2 Replacement .
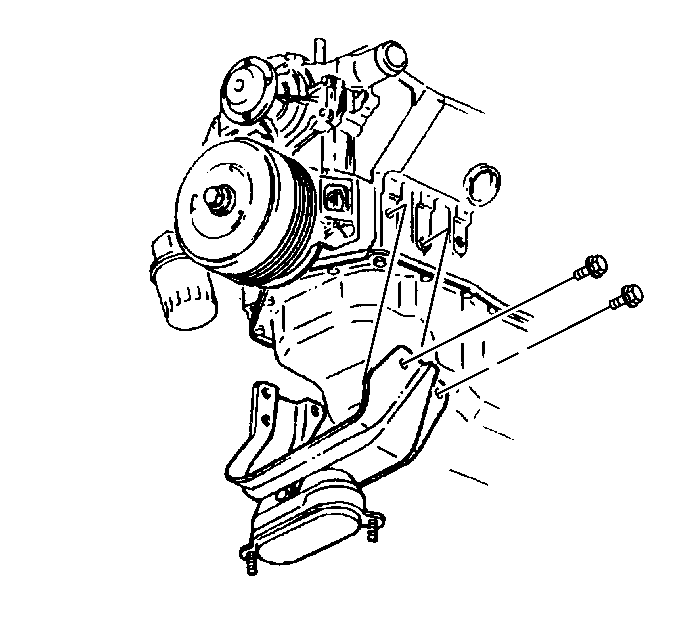
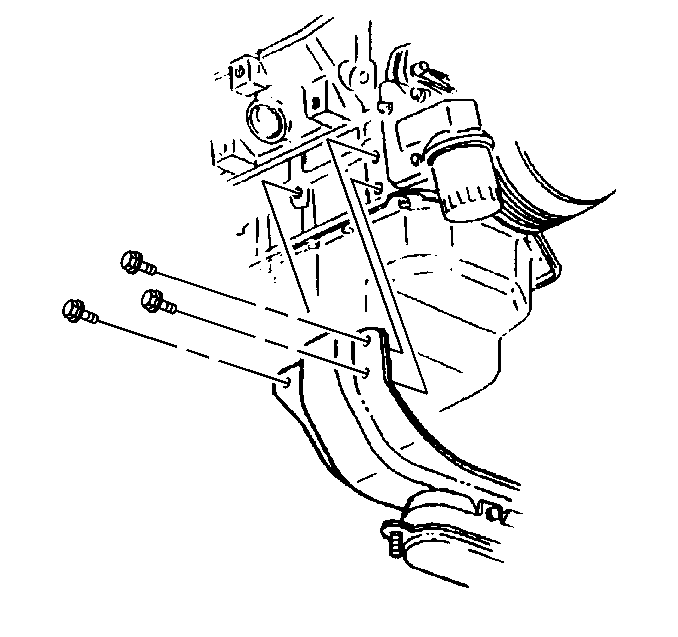
- Remove the front engine mount bracket bolts from the engine.
- Remove the rear engine mount bracket bolts from the engine.
- Remove the engine mount bracket from the vehicle.
Important: Do not discharge the air conditioning system.


Installation Procedure
- Position the engine mount bracket to the engine.
- Connect the knock sensor harness connector and install the shield. Refer to Knock Sensor 2 Replacement .
- Install the rear engine mount bracket bolts to the engine. Hand tighten the bolts at this time.
- Install the front engine mount bracket bolts to the engine. Hand tighten the bolts at this time.
- Install the engine mount bracket bolts.
- Install the engine mount. Refer to Engine Front Mount Replacement .
- Install the A/C compressor to the engine. Refer to Air Conditioning Compressor Replacement .
- Install the drive belt. Refer to Drive Belt Replacement .
- Install the transmission. Refer to Transmission Replacement .


Notice: Refer to Fastener Notice in the Preface section.
Tighten
Tighten the bolts to 102 N·m (75 lb ft).
