Exhaust Crossover Pipe Replacement 3.8L
Removal Procedure
- Remove the fuel injector sight shield. Refer to Fuel Injector Sight Shield Replacement .
- Remove the air cleaner intake duct. Refer to Air Cleaner Inlet Duct Replacement .
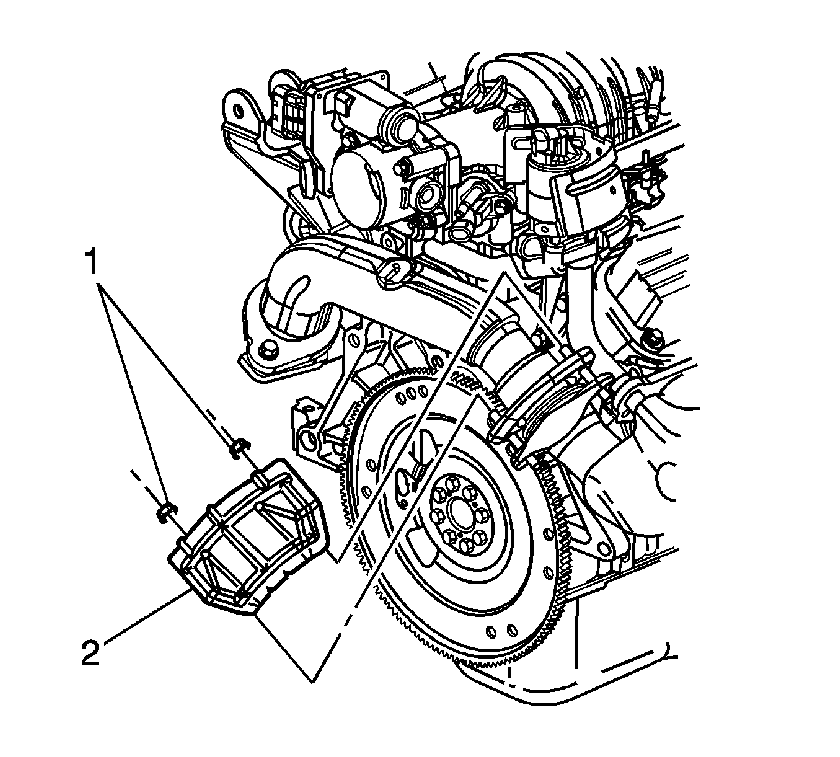
- Remove the exhaust crossover heat shield nuts (1).
- Remove the exhaust crossover heat shield (2).
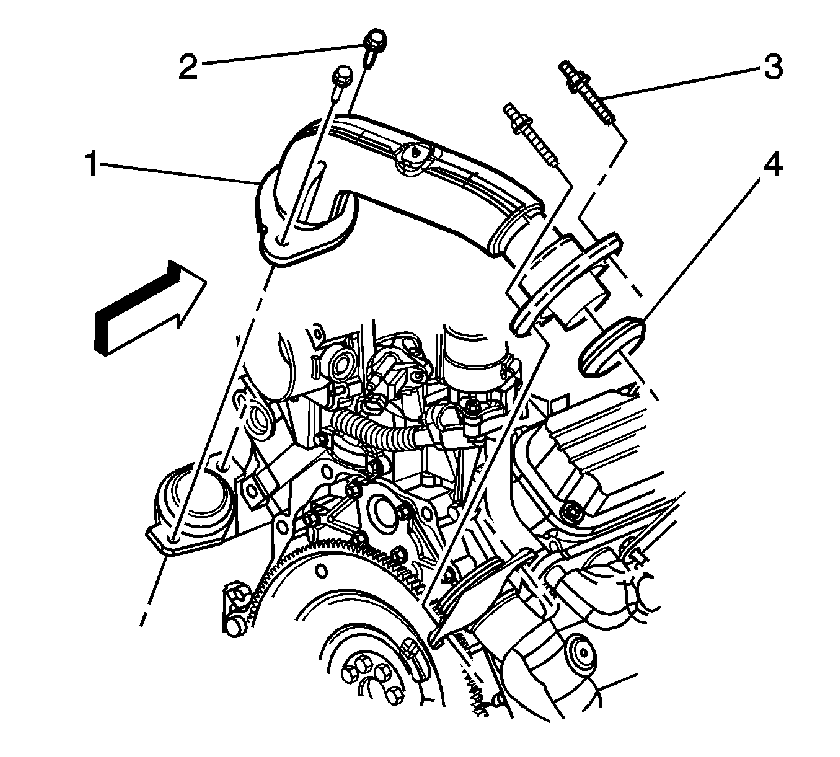
- Remove the exhaust crossover pipe studs (3) and the bolts (2).
- Remove the exhaust crossover pipe (1).
- Remove the exhaust crossover pipe seal (4).
Installation Procedure
- Install the exhaust crossover pipe seal (4) to the exhaust crossover pipe (1) at the right exhaust manifold connection.
- Install the exhaust crossover pipe (1).
- Install the exhaust crossover pipe studs (3) and the bolts (2).
- Install the exhaust crossover heat shield (2).
- Install the exhaust crossover heat shield nuts (1).
- Install the air cleaner intake duct. Refer to Air Cleaner Inlet Duct Replacement .
- Install the fuel injector sight shield. Refer to Fuel Injector Sight Shield Replacement .
Notice: Use the correct fastener in the correct location. Replacement fasteners must be the correct part number for that application. Fasteners requiring replacement or fasteners requiring the use of thread locking compound or sealant are identified in the service procedure. Do not use paints, lubricants, or corrosion inhibitors on fasteners or fastener joint surfaces unless specified. These coatings affect fastener torque and joint clamping force and may damage the fastener. Use the correct tightening sequence and specifications when installing fasteners in order to avoid damage to parts and systems.
Tighten
Tighten the studs and the bolts to 20 N·m (15 lb ft).
Tighten
Tighten the nuts to 25 N·m (18 lb ft).
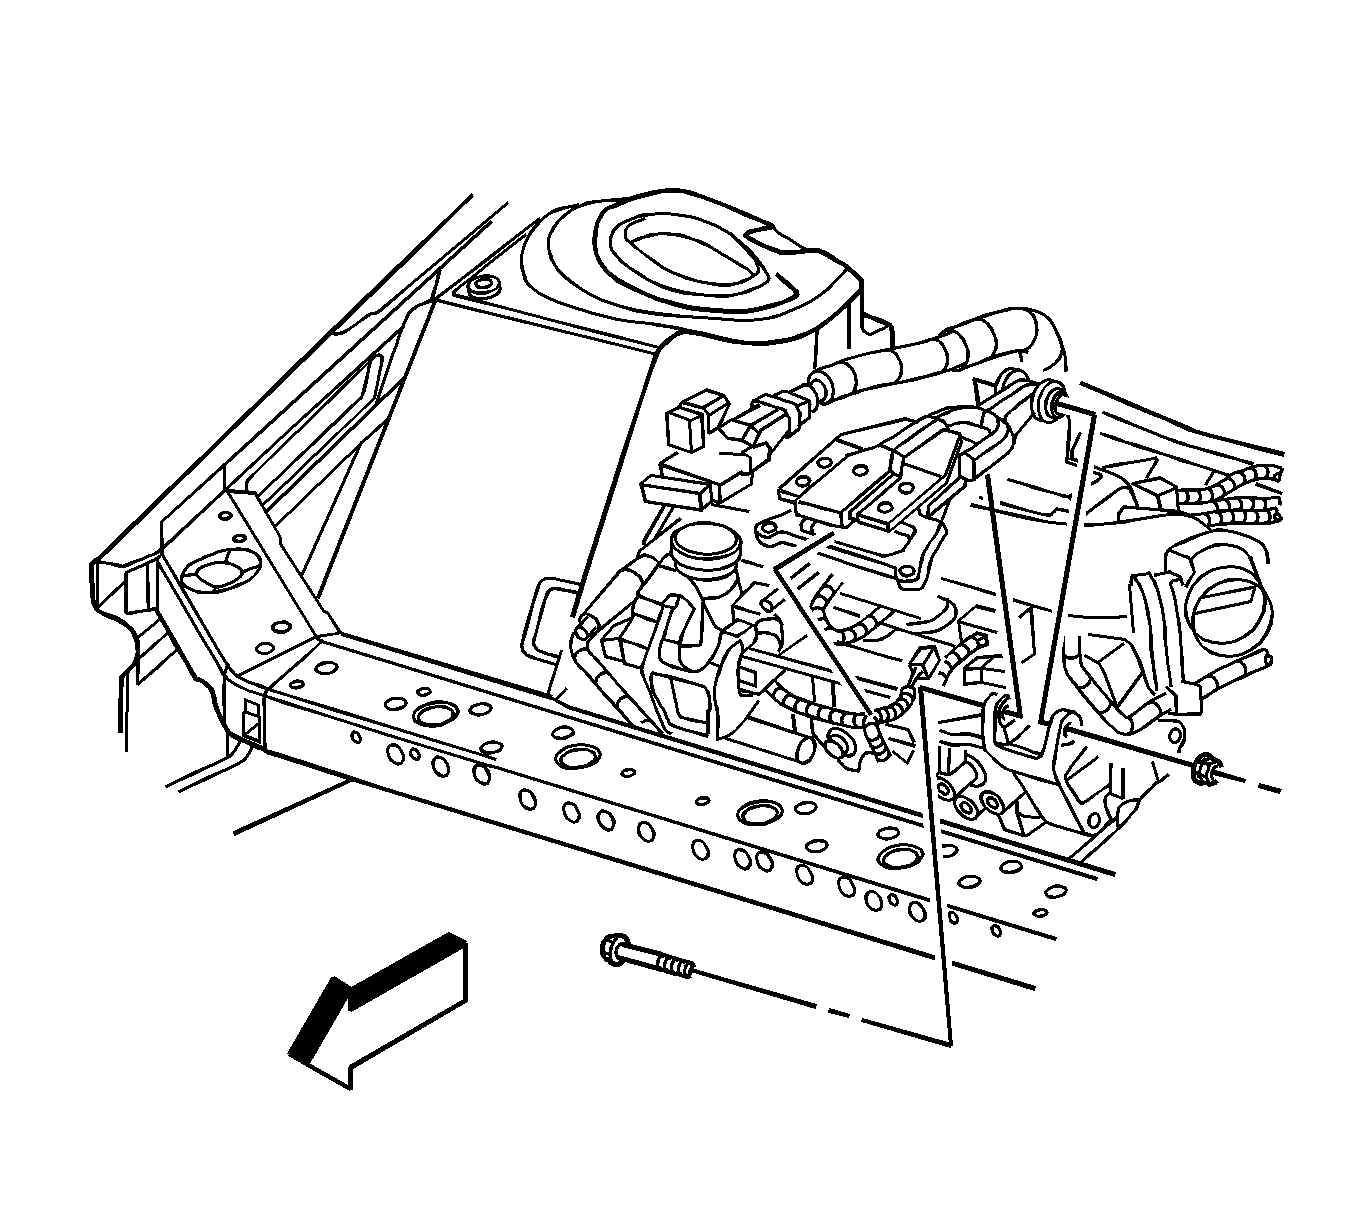
Exhaust Crossover Pipe Replacement LY7 3.6L
Removal Procedure
- Remove the left inner fender brace. Refer to Front Fender Upper Diagonal Brace Replacement.
- Remove the air cleaner assembly. Refer to Air Cleaner Assembly Replacement.
- Remove the left front engine mount strut. Refer to Engine Mount Strut Replacement - Left Side
- Remove the right front engine mount strut. Refer to Engine Mount Strut Replacement - Right Side
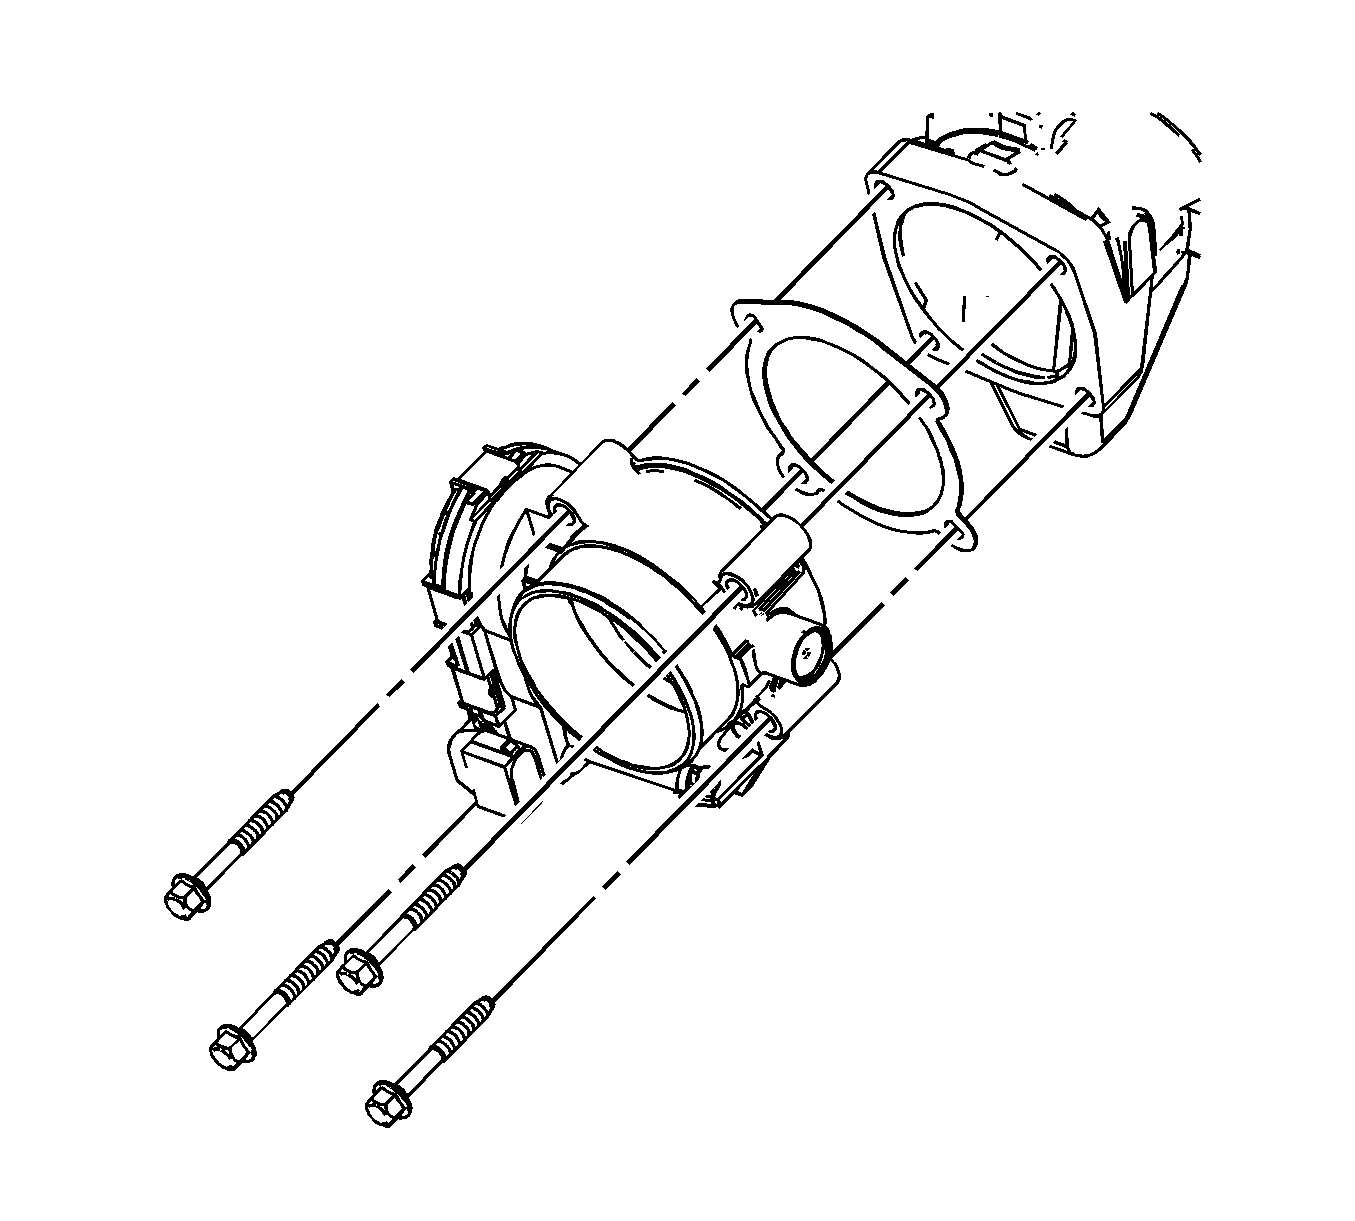
- Remove the throttle body. Refer to Throttle Body Assembly Replacement.
- Rotate the engine forward as far as possible.
- Secure the engine with tie down straps.
- Remove the downpipe attaching nuts.
- Remove the two left bank and front right bank crossover pipe nuts.
- Raise and support the vehicle. Refer to Lifting and Jacking the Vehicle.
- Remove the left front tire and wheel. Refer to Tire and Wheel Removal and Installation.
- Remove the left inner fender splash shield. Refer to Fender, Fender Insulator, Wheelhouse Liner Replacement - Front.
- Remove the intermediate shaft bolt and separate the shaft from the steering gear. Refer to Intermediate Steering Shaft Replacement
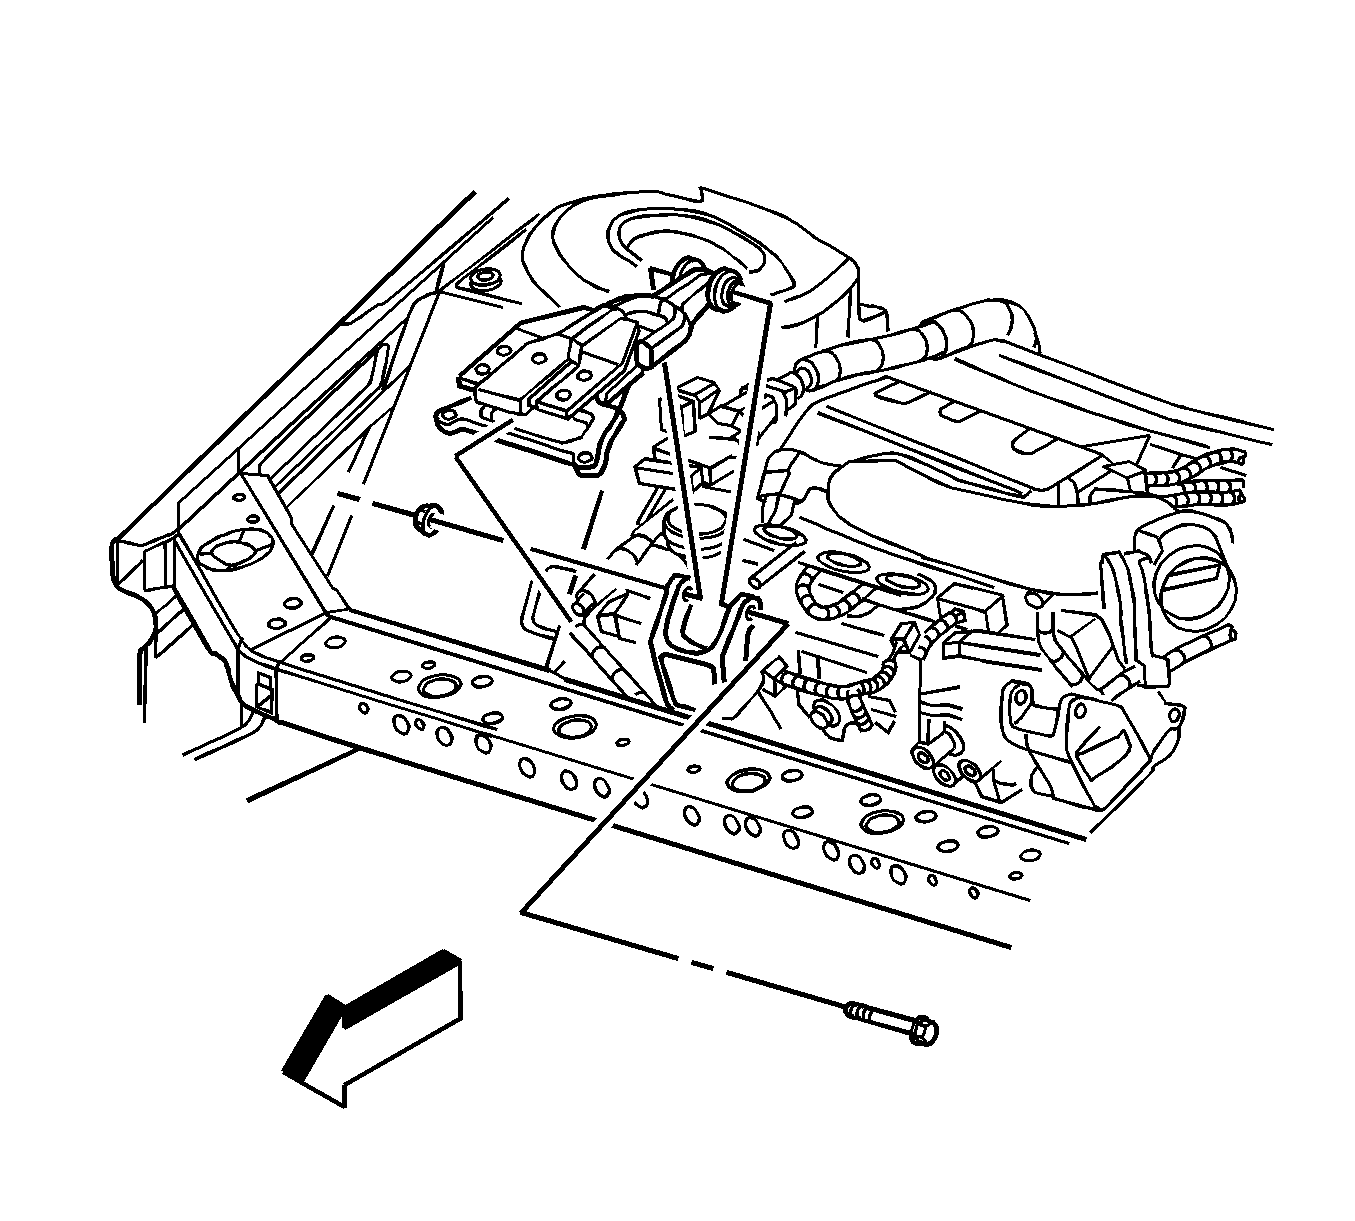
- Support the left fail rail with a jack stand.
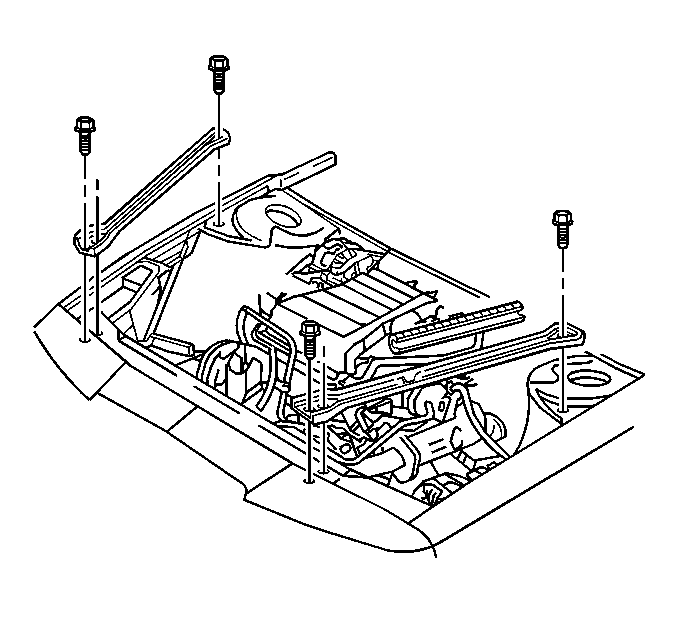
- Remove only the left two frame to body bolts. Refer to Frame Replacement.
- Lower the frame with the jack stand and remove the jack stand.
- Remove the fourth exhaust crossover pipe nut.
- Lower the vehicle.
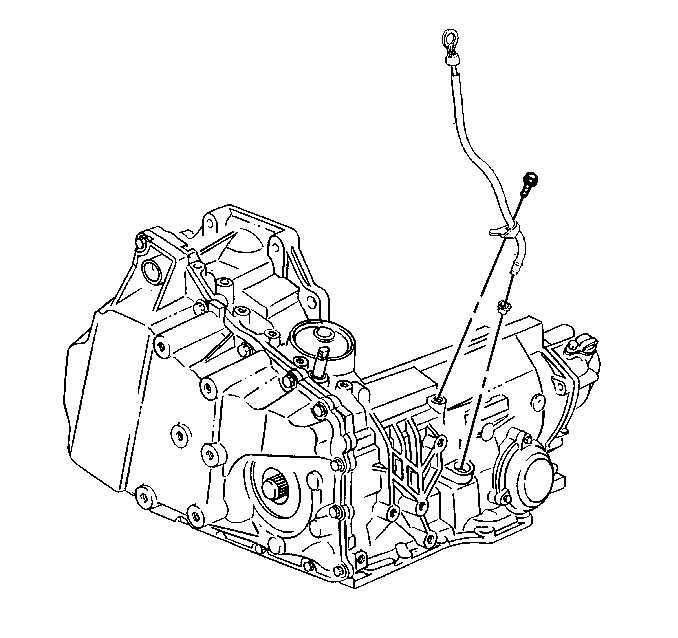
- Remove the transmission fluid filler tube. Refer to Transmission Fluid Filler Tube Replacement.
- Remove the crossover pipe.
Important: DO NOT loosen the right side frame to body bolts.

Installation Procedure
- Install the crossover pipe.
- Install the crossover nuts.
- Install the transmission fluid filler tube. Refer to Transmission Fluid Filler Tube Replacement
- Raise and support the vehicle.
- Using a jack stand, raise the frame.
- Install the left two frame bolts. Refer to Frame Replacement.
- Remove the jack stand.
- Install the intermediate shaft to the steering gear. Refer to Intermediate Steering Shaft Replacement
- Install the left inner fender splash shield. Refer to Fender, Fender Insulator, Wheelhouse Liner Replacement - Front
- Install the left front tire and wheel. Refer to Tire and Wheel Removal and Installation.
- Lower the veils.
- Install the two left bank and front right bank crossover pipe nuts.
- Install the downpipe attaching nuts.
- Remove the engine with tie down straps.
- Rotate the engine back into the proper position.
- Install the left front engine mount strut. Refer to Engine Mount Strut Replacement - Left Side
- Install the right front engine mount strut. Refer to Engine Mount Strut Replacement - Right Side
- Install the throttle body. Refer to Throttle Body Assembly Replacement.
- Install the air cleaner assembly. Refer to Air Cleaner Assembly Replacement.
- Install the left inner fender brace. Refer to Front Fender Upper Diagonal Brace Replacement.
Notice: Refer to Fastener Notice in the Preface section.
Tighten
Tighten the nuts to 34 N·m (25 lb ft).
